
Testing OTA updates for Google Home Matter integrations is done using the Google Home Developer Console.
Prerequisites
For testing OTA, in addition to the OTA prerequisites, you need to have:
- Access to a Linux system that has Docker Engine installed and access to the development board using USB
- A Matter integration that is ready for OTA testing.
Use your Connectivity Standards Alliance (Alliance)-assigned Vendor ID when testing OTA, not a test VID. When building your OTA image, change the Vendor ID and Product ID to match the integration to be tested.
Vendor-specific instructions
We've provided Matter OTA testing procedures for specific SoCs.
| Vendor | Platform | Guide |
|---|---|---|
| Espressif | ESP32 | Test OTA on Espressif ESP32 |
| Nordic Semiconductor | nRF52840 | Test OTA on Nordic |
Channels
A channel defines the set of devices that an OTA update image is released to. A device can only be assigned one channel at a time. There are three predefined channels: Test 1, Test 2, and Production. You can test on both of the test channels. A channel may be assigned only one OTA update image at a time.
Production channel
The Production channel is the channel which is used to push production releases to consumer devices in the field. When you release an OTA image on the Production channel, all devices that are not on a Test channel receive the image.
Test channels
To test an OTA image rollout, you must first configure one of the two test channels, then release the image to the devices on that channel.
Configure a test channel
Go to the Manage tab.
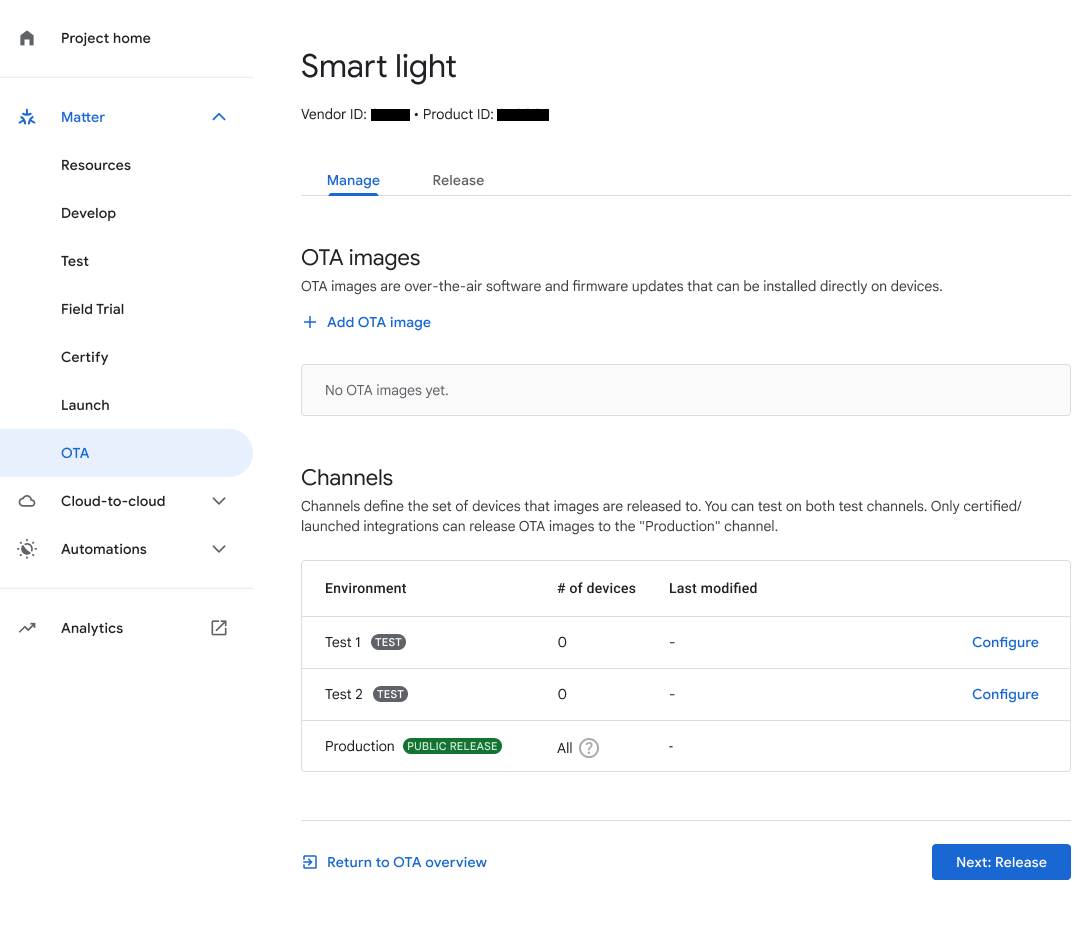
Figure 1: Navigating to test channels using the Manage tab Click Configure next to the test channel.
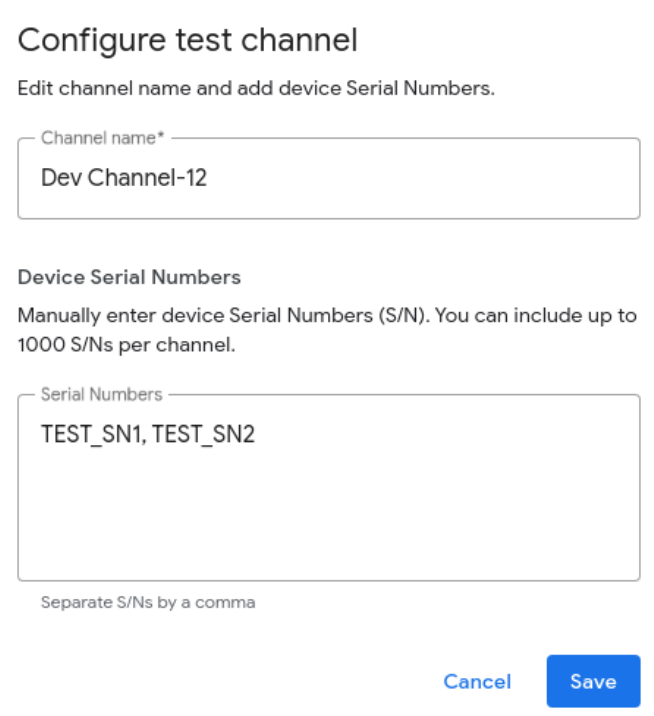
Under Channel name, enter a name.
Under Device Serial Number(s), enter one or more device serial numbers (maximum 1000).
Click Save to complete.
Release an OTA image to a test channel
Go to the Release tab.
On the Release tab, select the test channel you want to use.
Select the OTA image from the OTA Image drop-down menu or add an OTA image by clicking Add OTA Image.
Rollout percentage represents the percentage of devices that will receive the OTA image. For this field, specify an integer from 1 to 100. Enter a value less than 100 if you prefer to release the OTA image in batches. For more information about how the rollout percentage works, as well as information about other OTA image-related tasks, see Release an OTA image to Production.
Click Release to test.
A confirmation dialog appears. Click Release to release the selected image to the specified channel.
Once you click Release, the channel, image, rollout status, rollout percentage, and release date and time appear in the Released OTA Images area.
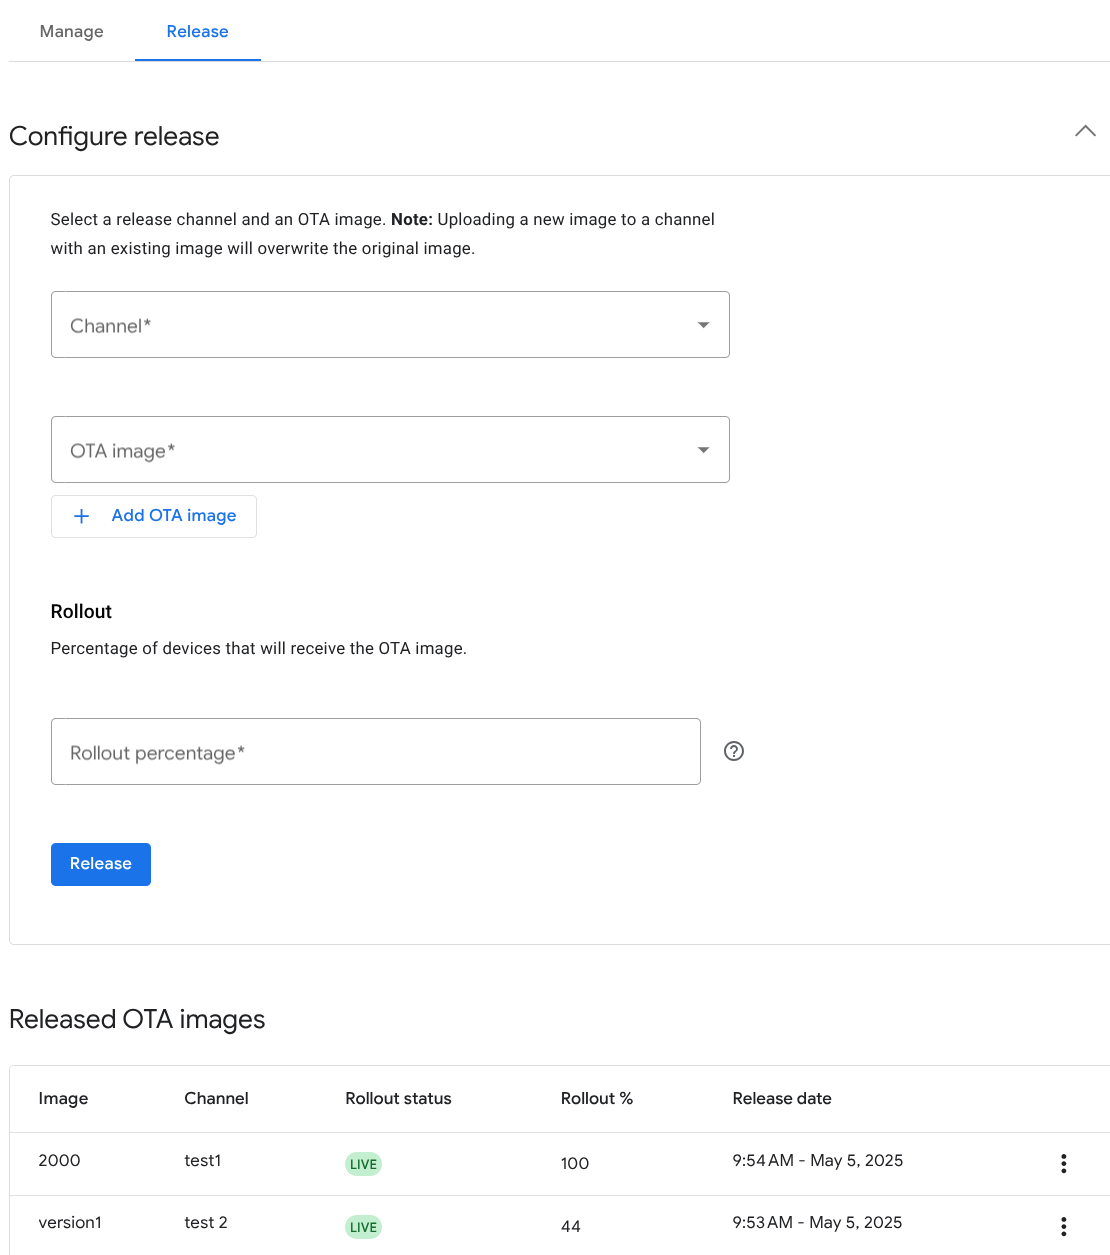
Figure 3: OTA images released to test channels