We recommend implementing an OAuth 2.0 server prior to creating a Cloud-to-cloud project.
Developer projects, which include Cloud-to-cloud integrations, are managed on the Google Home Developer Console. This page explains how to set up a new developer project on the Developer Console.
Name the project
When naming your project, it's good practice to compose a name that:
- Incorporates some basic information about the project.
- Won't be confused with that of another project.
- Can represent all the integrations within the project.
Meaningful names are important. A generic name such as project-gamma-798, is
effectively "camouflaged" and won't stand out in a list of other
generically-named projects.
Consider the following guidance when naming your project:
- Use your company name
- Use the type of project or action in the name
- Don't use "test" in the project name
For example, acme-smarthome and acme-lighting are clear and unique project
names.
Create the project
A developer project represents one or more integrations, only one of which may be a Cloud-to-cloud integration. By sharing a project with the members of their development team, the owner can allow other users to manage all integrations in the project.
Google Smart Home Ecosystem integrations are managed using the Developer Console.
Method 1: Create a new project
Go to the Developer Console:
- On the Manage projects page, click Create a project.
- On the Get started page, click Create project.
- Enter the name of your project, which should adhere to the project naming guidelines.
- Click Create new project.
You are redirected back to the Home page for the new project.
Method 2: Import an existing project from the Actions on Google console
An existing Actions on Google project may be imported into the new Developer Console, if you need to add Matter support to an existing Cloud-to-cloud or Local Home SDK integration.
The following restrictions apply to this method:
- This import is one-way only. It cannot be reversed.
- Only the project owner can import an existing Actions on Google project. The owner is whoever created the project, which is viewable using the Members link.
- The Company Profile for an imported project can only be edited in the Actions on Google Console. Changes there will be reflected in the Google Home Developer Console.
After import, the original Actions on Google project can still be used to manage existing integrations (such as Cloud-to-cloud, Local Home, App Discovery).
To import an existing project from the Actions on Google Console, go to the Developer Console:
- Click Create a Project.
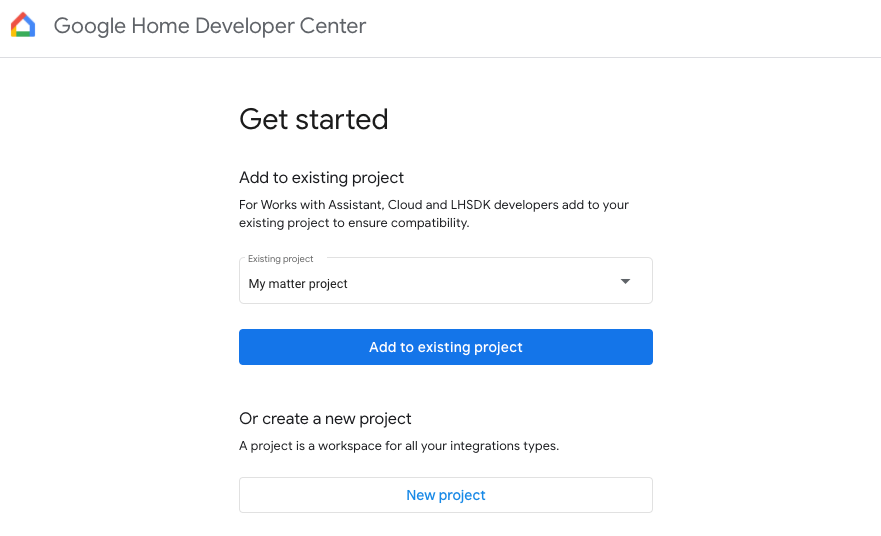
- Enter an existing Actions project name or select a project from the drop-down list (for example, in the following screenshot, the project name is "My matter project").
- Click Import project.
You are redirected back to the existing project details in Developer Console.

Set log levels
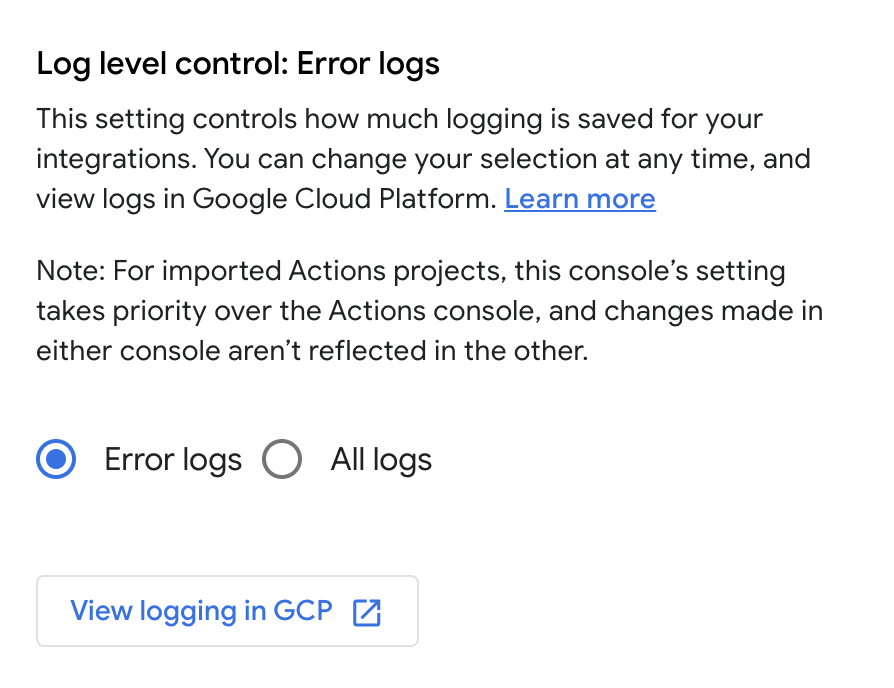
By default, only error logs are saved to Google Cloud for each integration in your project.
To save all logs to Google Cloud for each integration, select All logs in the Log level control: Error logs section.

This setting applies to all integrations in your project. It can only be overridden for Cloud-to-cloud integrations. Saving all logs to Google Cloud may incur additional cost if your log storage space is exceeded.
To learn more about logs, see Cloud logging for Cloud-to-cloud .
Share a developer project
You may add or remove access to a project among the users on your team using predefined roles.
On the Home page of the Developer Console click Members, which takes you to the IAM & Admin > IAM page on the Google Cloud Console.
Or, click Project details, then click Manage members in GCP in the Members section at the bottom.
Make changes as necessary using the Google Cloud Console dashboard.
For instructions for how to modify access to a project, refer to the Access control for projects with IAM.
Once added to the list of users, a user can view the project and any integrations in the Developer Console.
According to your organizational setting, you might experience permission errors when attempting to create developer projects. If so, reach out to your Google Cloud administrator and request Project Creator permissions for your account.
