Cloud-to-cloud Local Home SDK Home APIs
The Google Home Playground is a web application that simulates a smart home project with configurable device types and traits. You can create virtual devices, modify the device attributes and states, view these devices in Google Home Graph, and import or export device configurations.
Complete account linking
To use Google Home Playground, it is recommended that you first link the tool to your account. Open the Google Home app (GHA) on your phone, and go through the account linking process outlined at Connect third-party smart home devices in the Google Home app.
- Search for the integration titled Google Home Playground.
- Select the integration, and the GHA will direct you to the sign-in page. Click Sign in with Google and select your account to sign in.
- Click the Authorize button to authorize account linking.
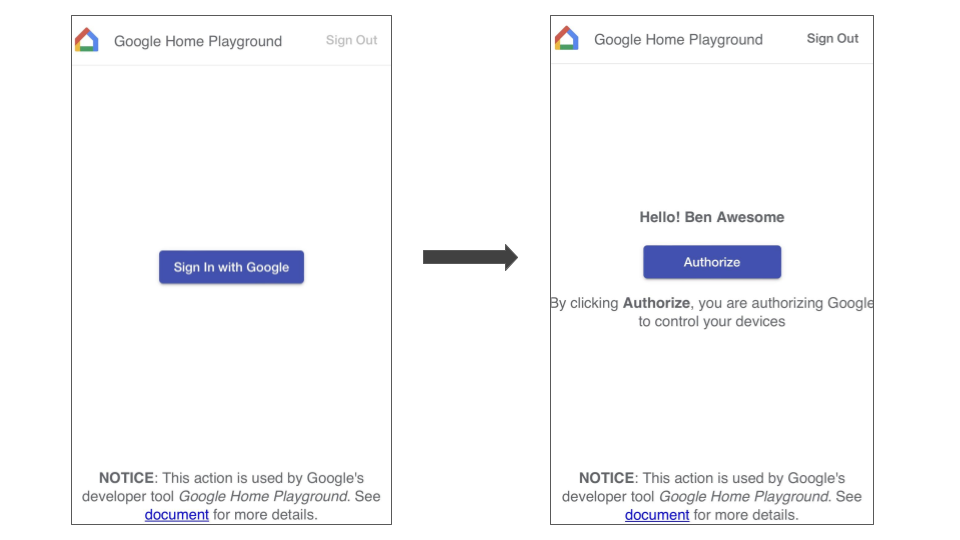
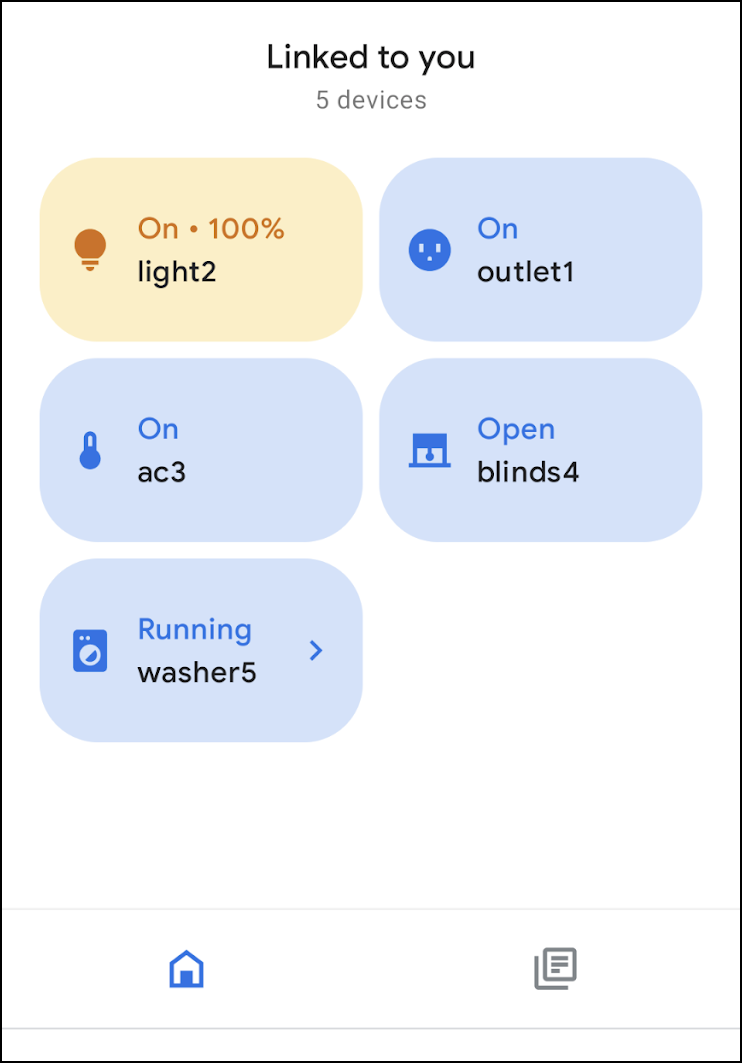
Once you complete account linking, a set of default virtual devices will show on the GHA for you to interact with.
Sign in
Launch Google Home Playground by clicking the button below:
Click Sign in with Google. Make sure to sign in with the same account you used in the GHA to complete account linking.
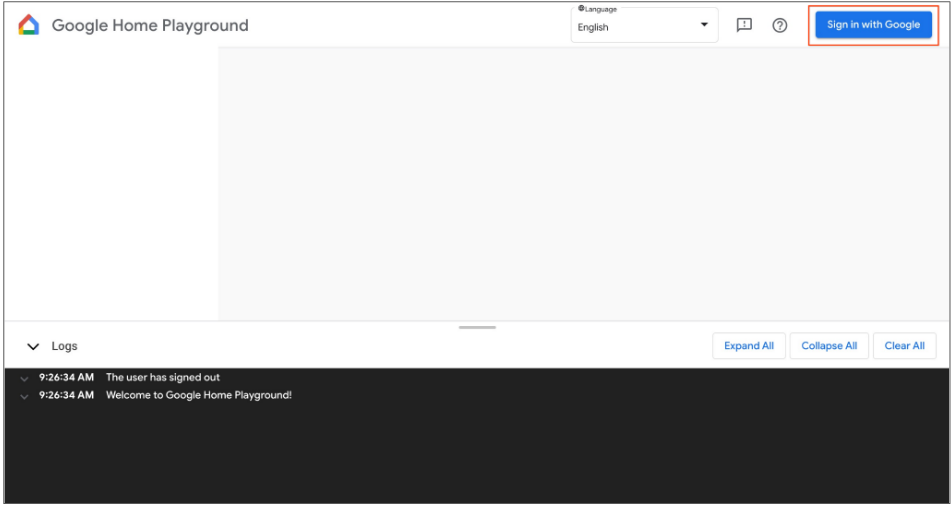
After you sign in, Google Home Playground will show the virtual devices stored in Home Graph.
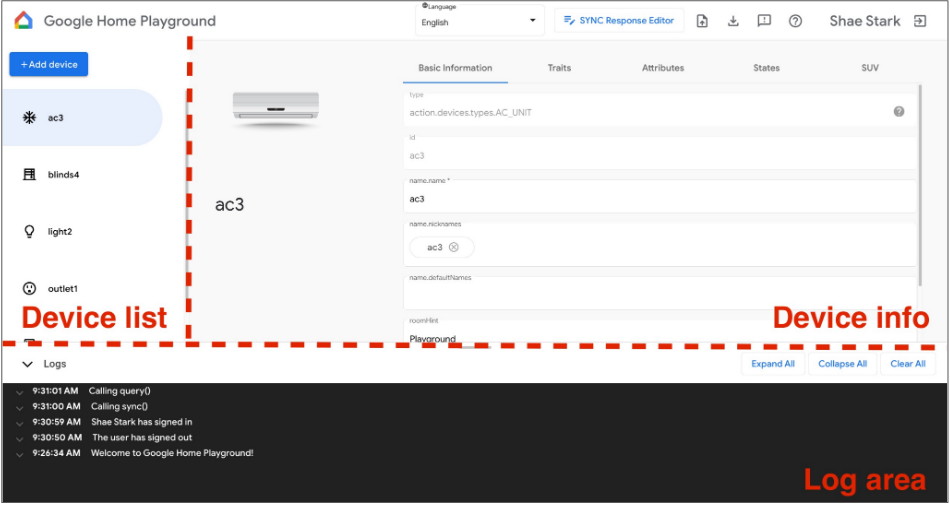
The web UI consists of three panels:
- Device list shows all your virtual devices. You can select a certain virtual device to view its information and create virtual devices via this panel.
- Device info presents the information of the selected virtual device. You can also edit this information and remove the selected virtual device via the panel.
- Log area displays the interaction logs between Google Home Playground and Home Graph. You can expand the logs to inspect the request and response payloads for troubleshooting.
Virtual device
View virtual device info
In the Device list panel, select the virtual device that you wish to view. In the Device list panel, select the virtual device that you wish to view. The Device info panel will show its information categorized into five tabs:
- Basic information: top-level properties of the device, including device type, id, and name.
- Traits: supported traits of the device.
- Attributes: trait-specific attributes of the device.
- States: all device states.
- SUV: Secondary User Verification configuration of the device.
Edit virtual device info
Besides viewing a virtual device's information, you can also directly edit its information stored in Home Graph via the Device info panel.
Modify supported traits
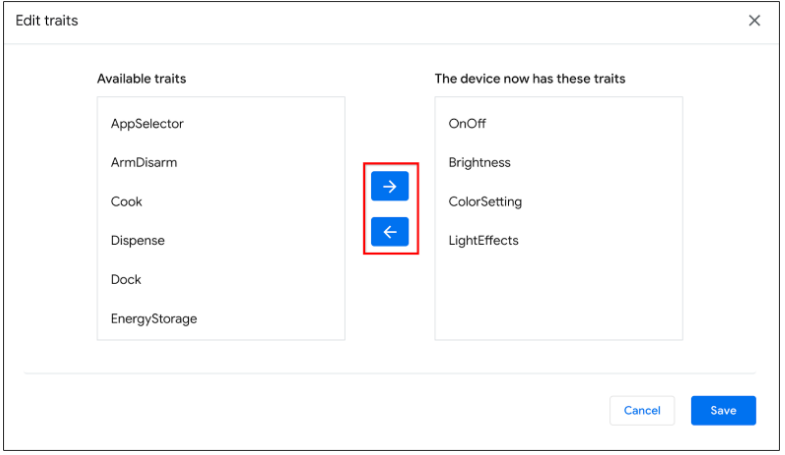
- Select the Traits tab; click the Edit button.
- In the pop-up panel, you can see the device's currently supported traits, and
available traits to add. Use the arrow
(arrow_forward/arrow_back) buttons to add or remove supported traits for the device. - When you've finished updating the supported traits, click Save, and the updated traits will be applied to Home Graph.
- You can view these trait updates in the Log area.
Modify device attributes
- Select the Attributes tab, and edit the attribute for the traits supported by the device.
- Once you've finished editing, press Enter and your attribute changes will be applied to Home Graph.
- You can view these updated attributes in the Log area.
Modify device states
- Select the States tab and edit the state directly. The state changes will be applied to Home Graph.
- You can view these state modifications in the Log area.
Add a secondary user verification to virtual device
You can add an SUV to virtual devices and configure its challenge type and corresponding behavior on each device. You can add an SUV to virtual devices and configure its challenge type and corresponding behavior on each device.
Configure SUV on device
- In the Device list panel, select the virtual device that you wish to configure.
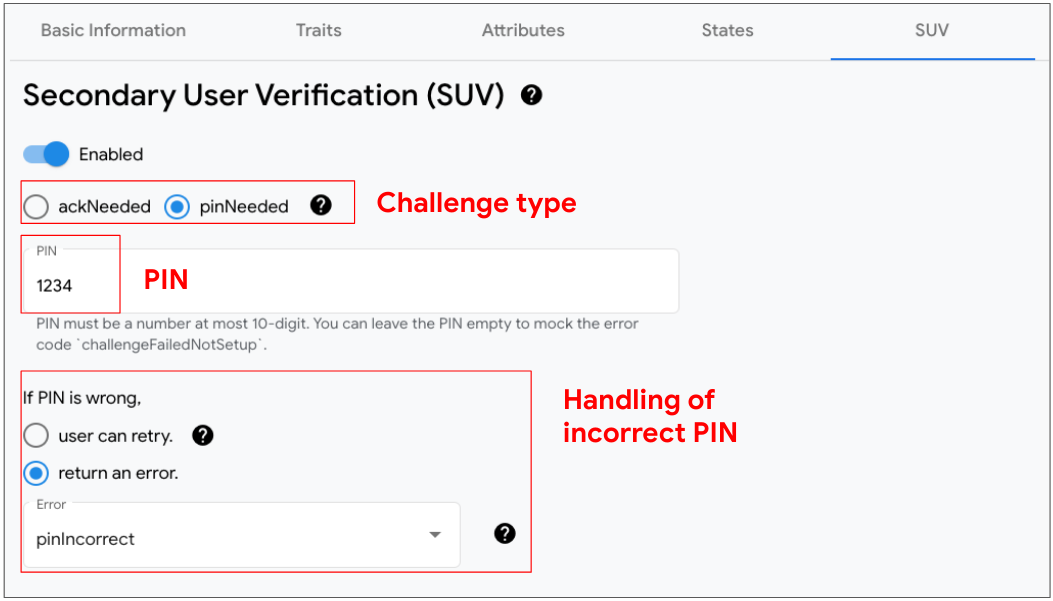
- In the Device info panel, select the SUV tab and configure the
following:
- Enabled: whether SUV is enabled or disabled (no challenge) on the device.
- Challenge type: whether SUV requires explicit acknowledgment (ackNeeded) or personal identification number (pinNeeded).
- PIN: The valid PIN.
- Handling of incorrect PIN: when the PIN is wrong, whether to ask the user again and, if not, the error to respond.
Identify devices that enable SUV
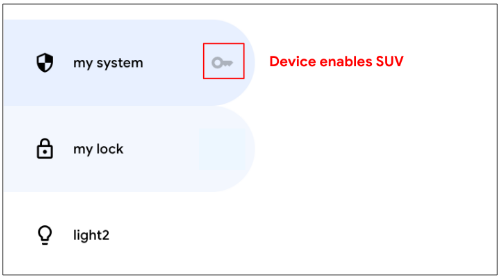
In the Device list panel, a key icon key displays next to each SUV-enabled device.
The following list of traits require SUV:
Create a new virtual device
- In the Device list panel, click Add a device.
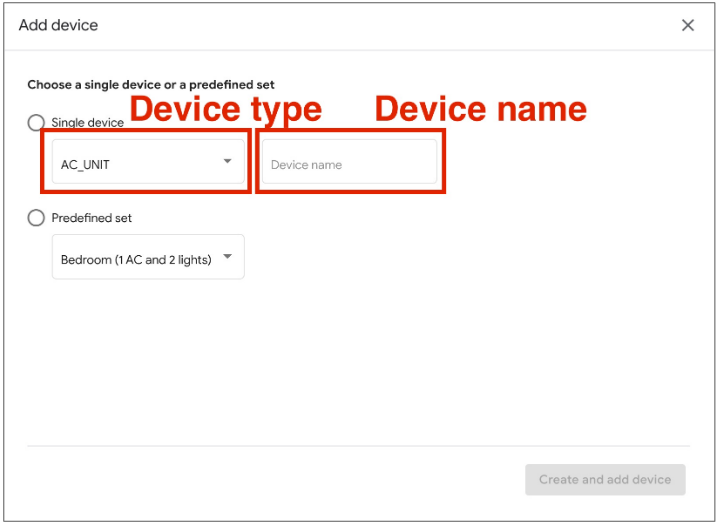
- In the pop-up panel, select the device type and input the device name for your new device. Alternatively, you can select a predefined set of devices to add.
- Once you complete all the steps, the new device will be added to Home Graph.
Remove a virtual device
- In the Device list panel, select the device that you wish to remove.
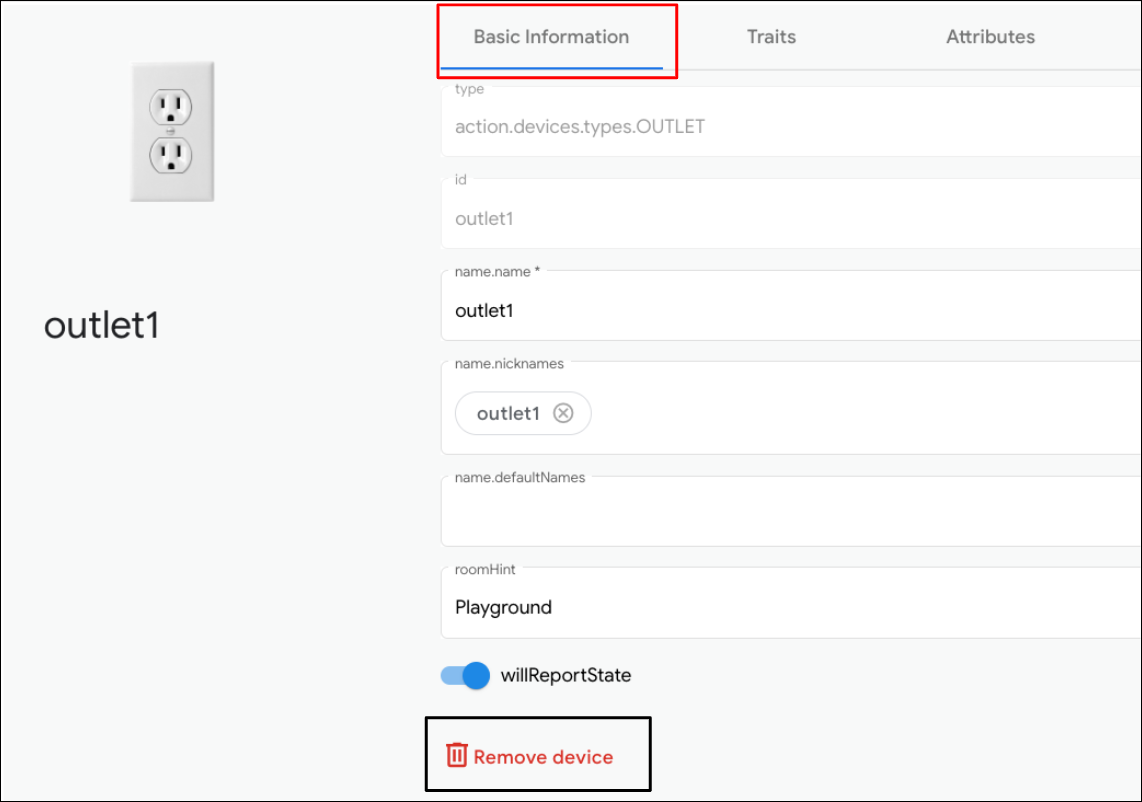
Then, in the Device info panel, select the Basic Information tab and
Then, in the Device info panel, select the Basic Information tab and
click
Remove device at the bottom.
- Confirm the device removal in the pop-up alert.
- Once you confirm the device's removal, the device will be removed from Home Graph.
Sync Response Editor
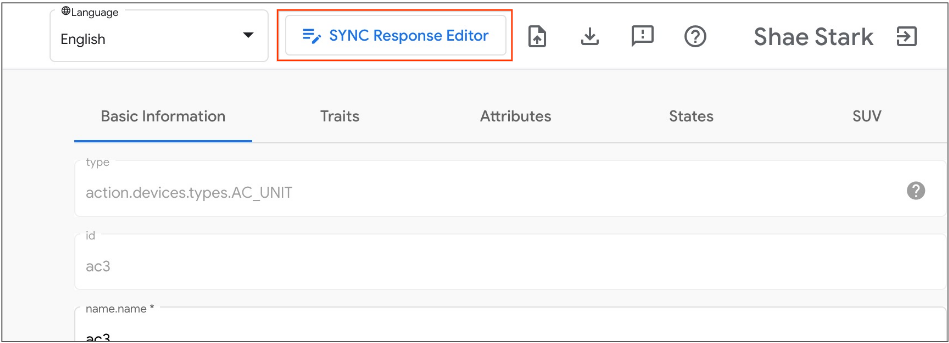
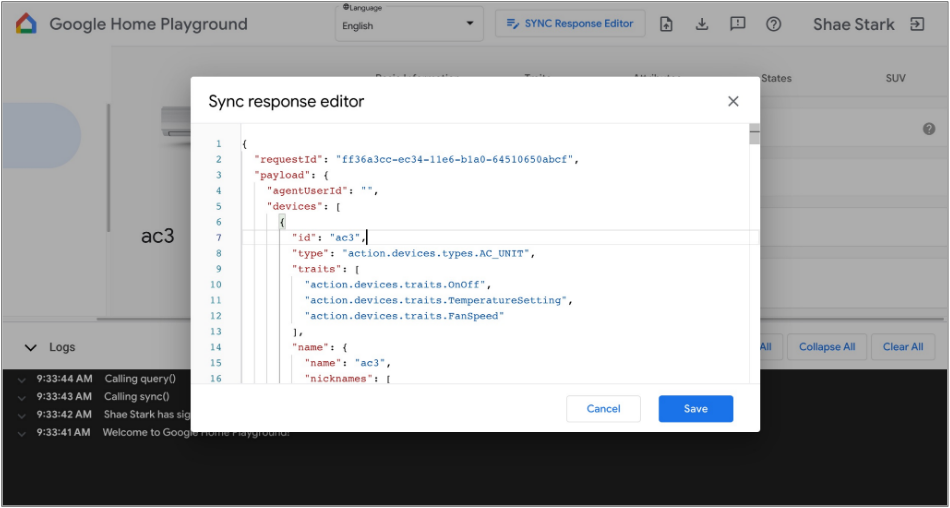
You can validate or update your sync response in Google Home Playground. Click Sync Response Editor to open an embedded IDE.
Edit, or copy and paste, your sync response and click Save to apply changes to see how it works in the Google Home ecosystem.
Import and Export virtual devices
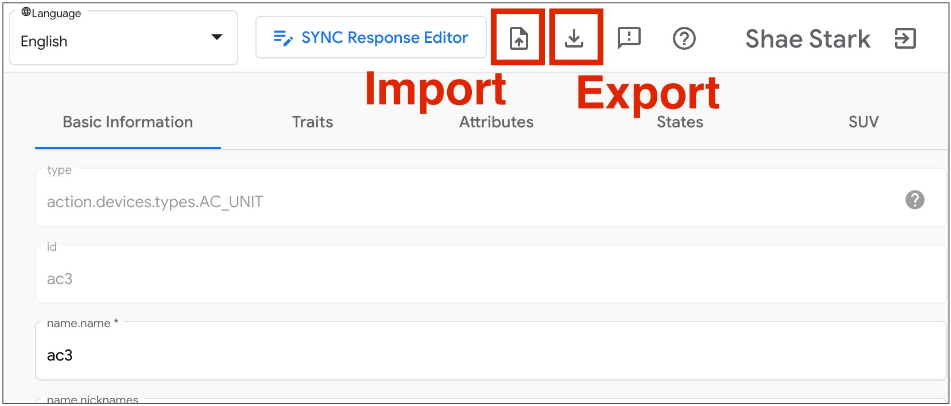
For troubleshooting or reproducing issues, you can export your virtual devices with their states to a file, and share with others the file to import and replicate your virtual devices.
Export virtual devices to a file
- Click to export virtual devices to a file.
- Enter the file name you want to export, and click OK.
- Once you've input the file name, the browser will download the file of exported virtual devices.
Import virtual devices from a file
- Click to import virtual devices from a file.
- Select the file you want to import, and click OK.
- Once you confirm the file to import, Google Home Playground will import virtual devices with states from the file, and update the imported devices’ information and states in Home Graph.
Inspect interaction logs
When you interact with the virtual devices, Google Home Playground automatically applies your change to Home Graph. The interactions with Home Graph are recorded to the Log area panel, where you can expand each entry to inspect the Home Graph API request and response payloads.
Each log entry is a JSON array, containing elements of the following structure:
{
  "uri": string,
  "request": object,
  "response": object
}
| Fields | Type | Description |
|---|---|---|
uri |
string |
URL of the Home Graph API call. |
request |
object |
Request body of the Home Graph API call. See the reference documentation reference documentation for the format of each method. |
response |
object |
Response body of the Home Graph API call. See the reference documentation reference documentation for the format of each method. |
View supported device types and traits
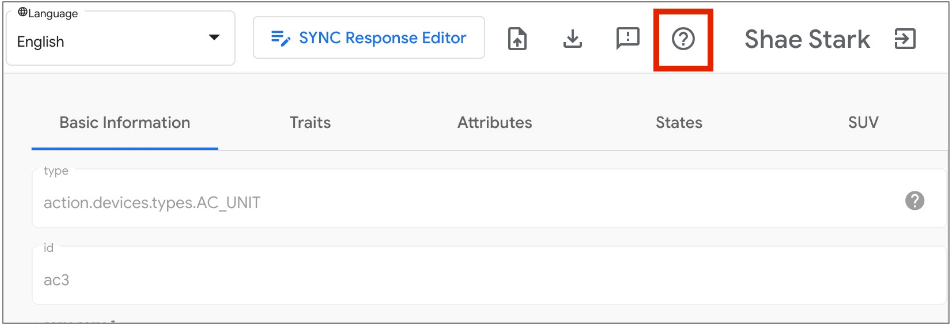
The question mark help icon in the top right will display the current device type and trait list supported by Google Home Playground.
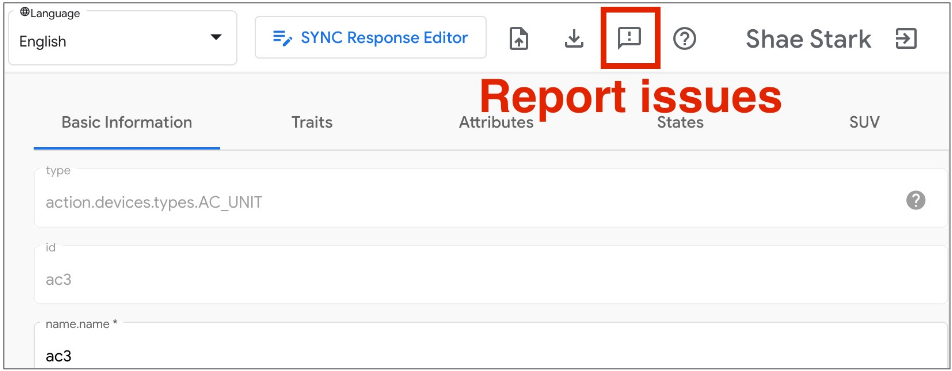
Report issues
We would like to hear from you! Report encountered issues using the exclamation mark icon feedback on the top right.
