
1. 事前準備
Android 開發人員可透過 Google Home API 存取 Google Home 生態系統。開發人員可使用這些新版 API 建構應用程式,順暢地委派及控制智慧住宅裝置。
這部影片會簡要介紹您要建構的行動應用程式,因此請在完成程式碼研究室時觀看影片。
如果開發人員想使用 Google Home API 存取實際範例,可以下載 Google 提供的 Android 範例應用程式。本程式碼研究室以範例應用程式的分支版本為基礎,逐步說明如何使用 Permissions、Commissioning、Device 和 Structure API。
必要條件
- 瞭解 Google Home 生態系統 (雲端對雲端和 Matter)。
- 已安裝 Android Studio (2024.3.1 Ladybug 以上版本) 的工作站。
- 符合 Home API 規定 (請參閱「必要條件」) 的 Android 手機,並已安裝 Google Play 服務和 Google Home 應用程式。模擬器無法運作,範例應用程式僅支援實體 Android 手機。
- 支援 Google Home API 的相容 Google Home Hub。
- 選用 - 與 Google Home API 相容的智慧住宅裝置。
課程內容
- 瞭解如何使用 Google Home API 建構 Android 應用程式,並採用最佳做法。
- 如何使用裝置和結構體 API 代表及控制智慧住宅。
- 如何使用 Commissioning API 將裝置新增至 Google Home 生態系統。
選用:設定住家
使用 Google Home API 前,請先透過 Google Home 應用程式,在 Google 帳戶中設定住家,並新增幾部裝置。本節將說明如何使用 Google Home Playground 執行這項操作,這個工具提供虛擬智慧型住宅裝置。
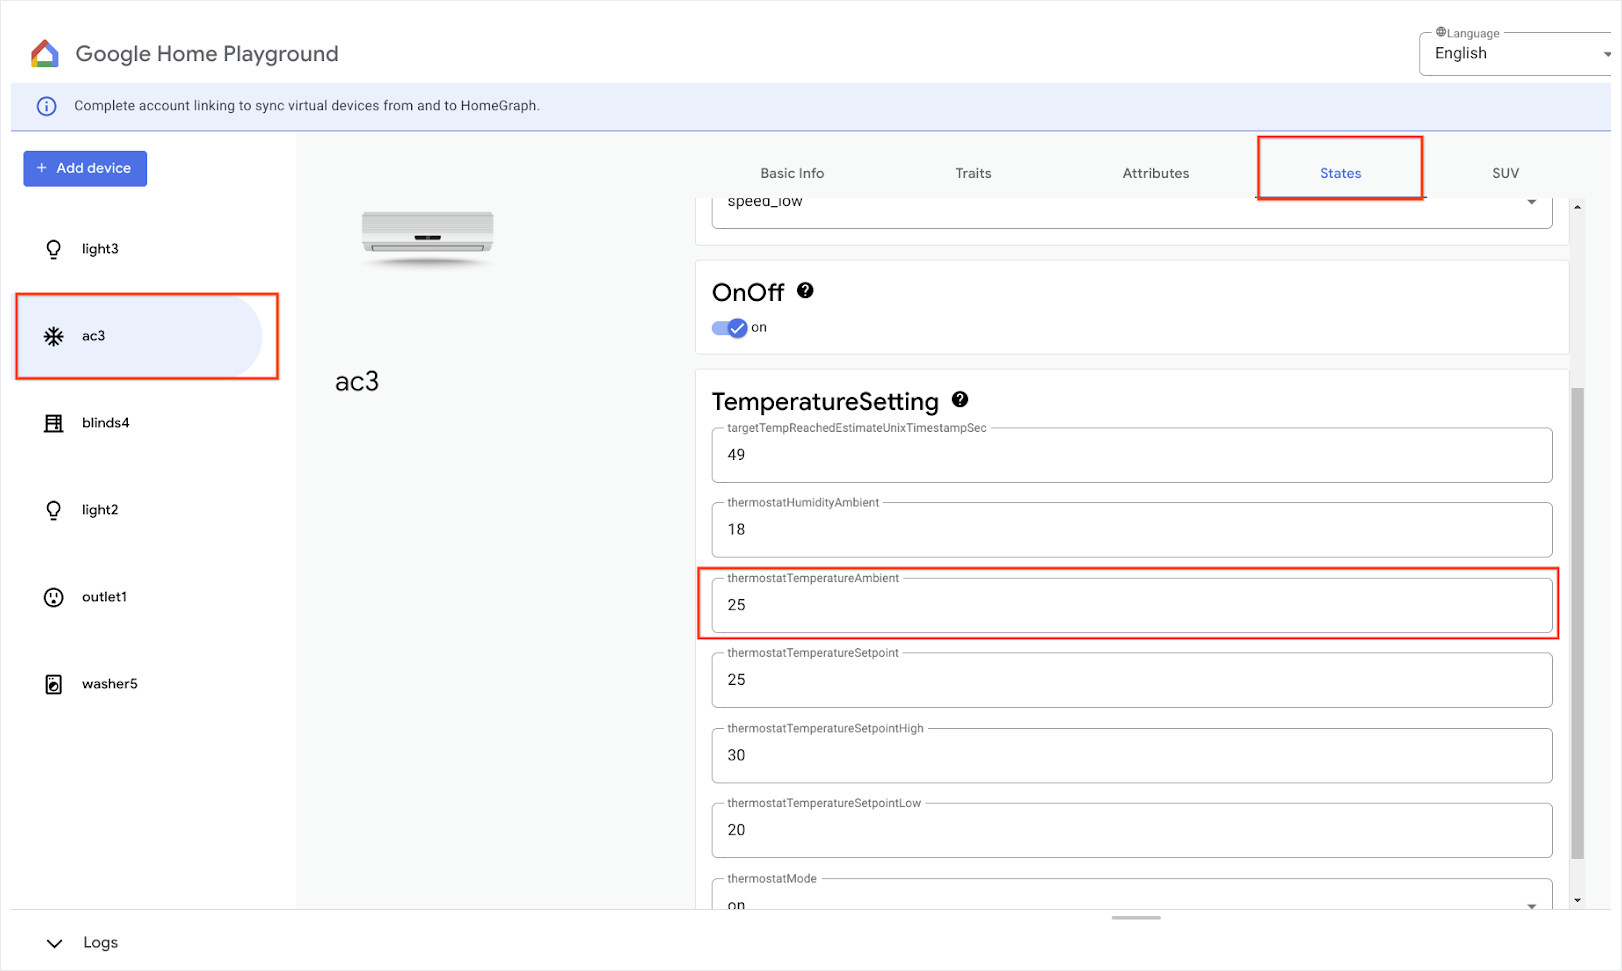
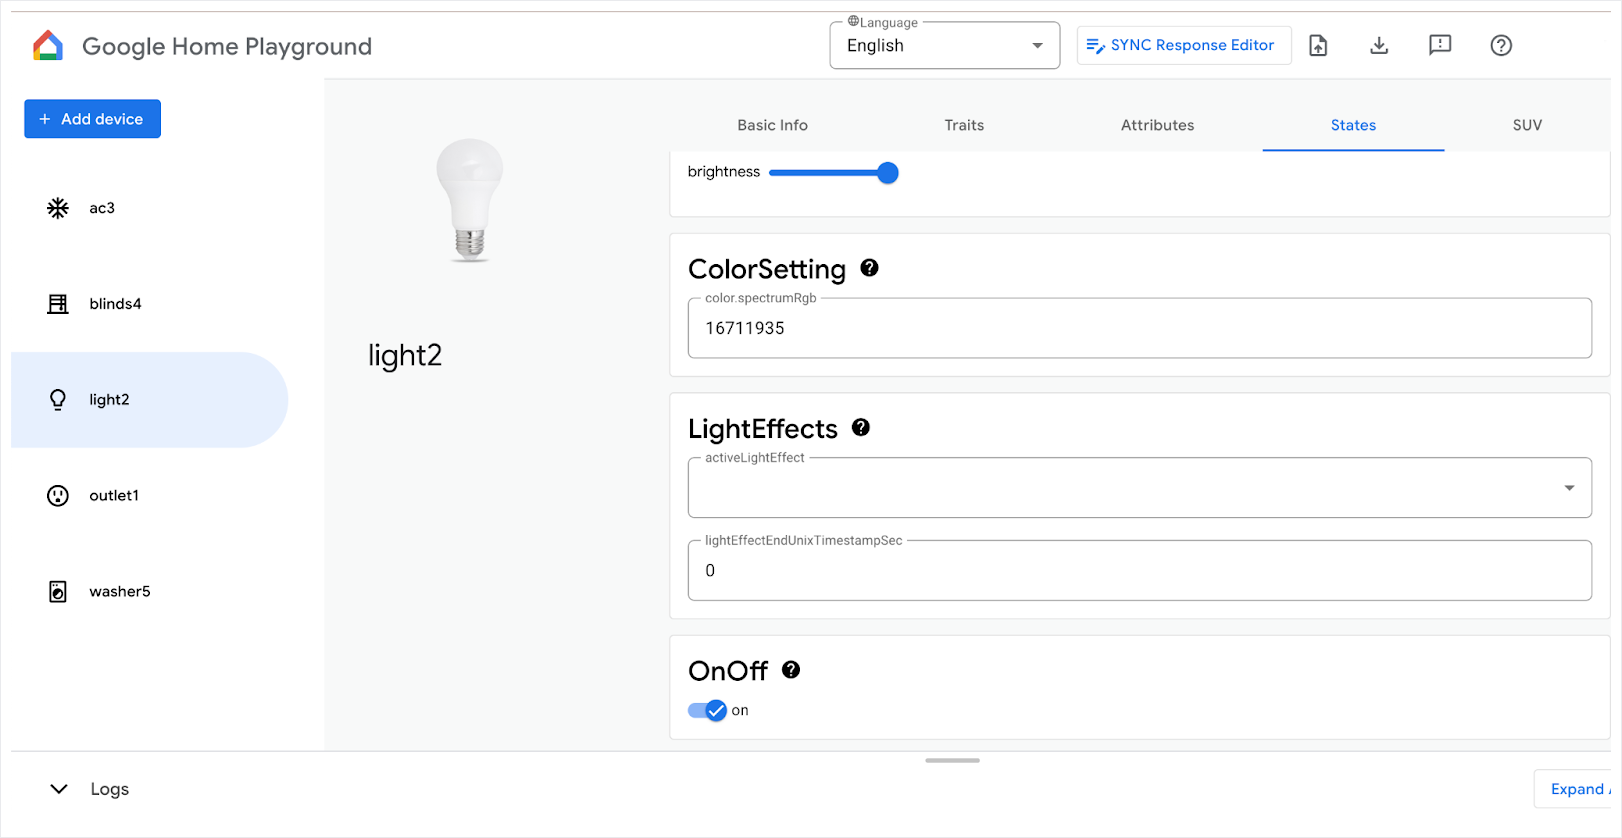
在網路瀏覽器中開啟 home-playground.withgoogle.com,登入 Google 帳戶,然後查看是否顯示下列模擬裝置:
- outlet1:開/關插頭
- light2:可調光燈
- light3:開啟/關閉燈
- ac3:空調
- blinds4:Window Covering
- washer5:智慧洗衣機
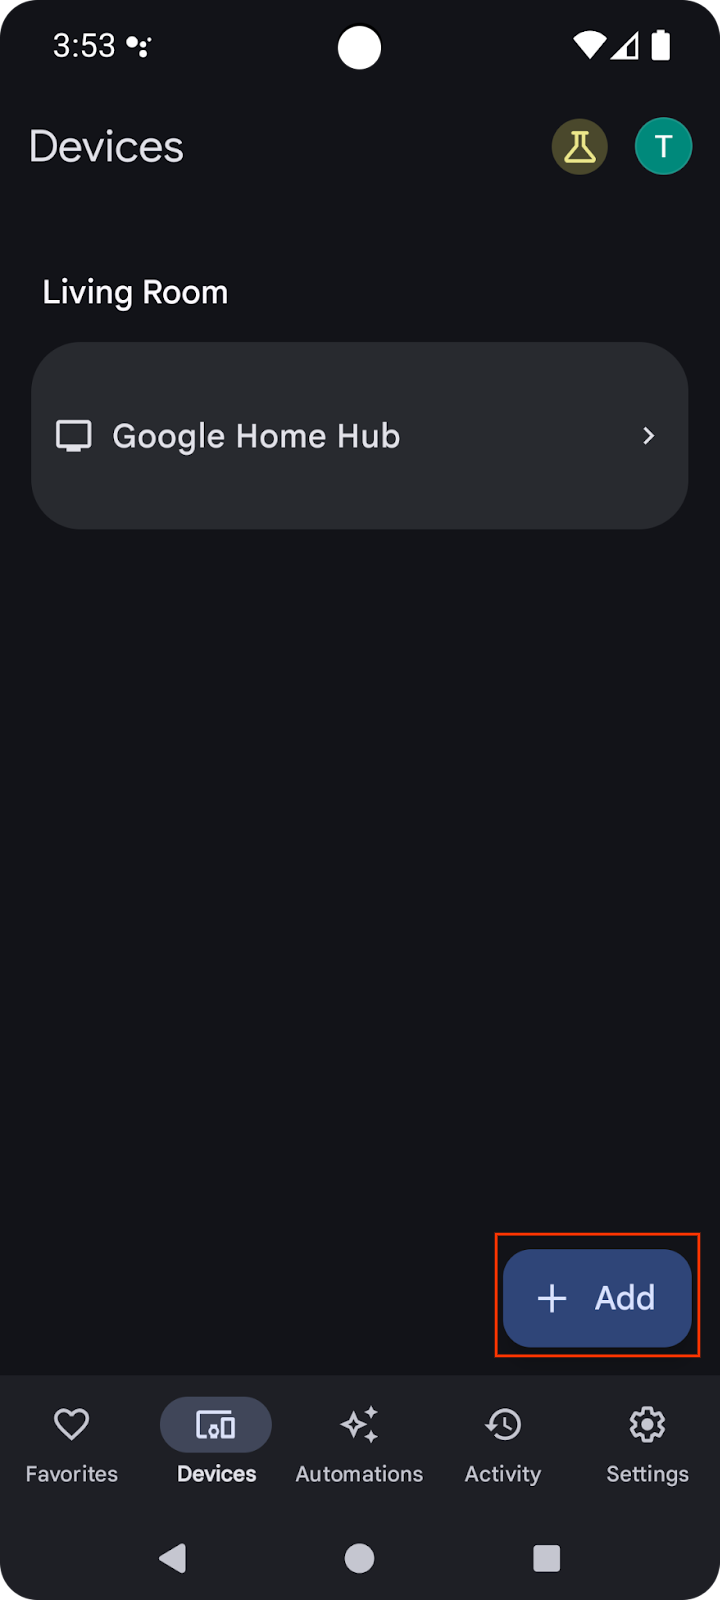
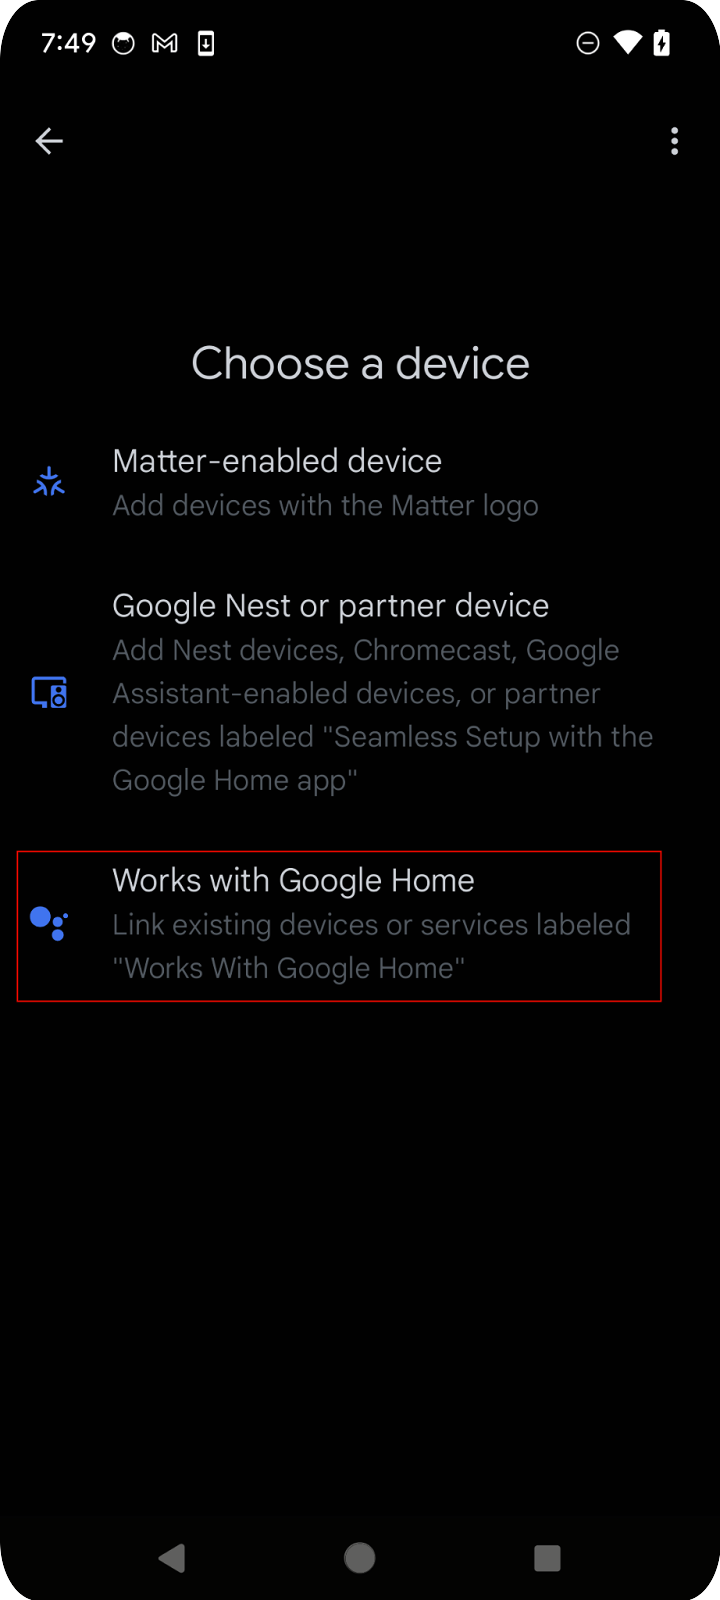
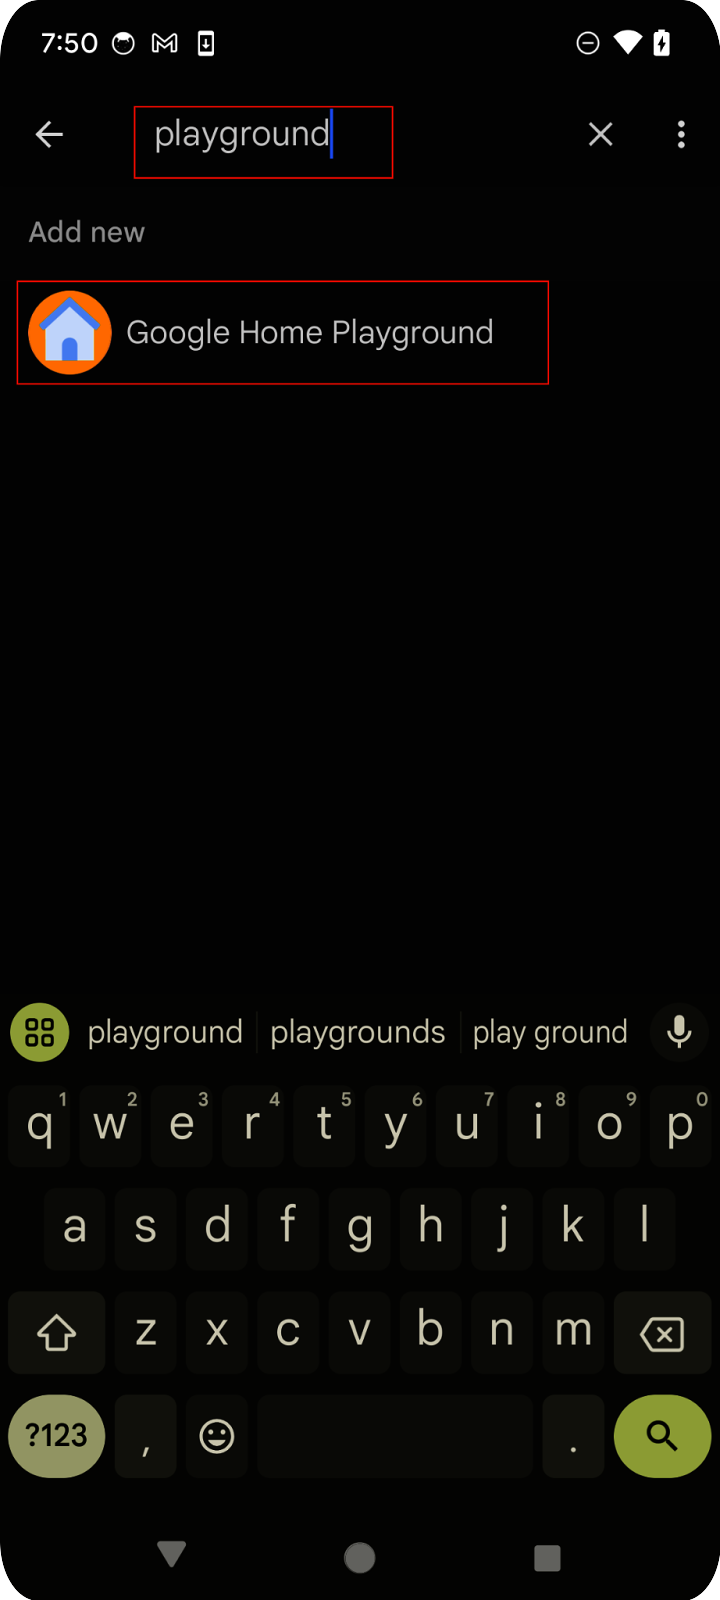
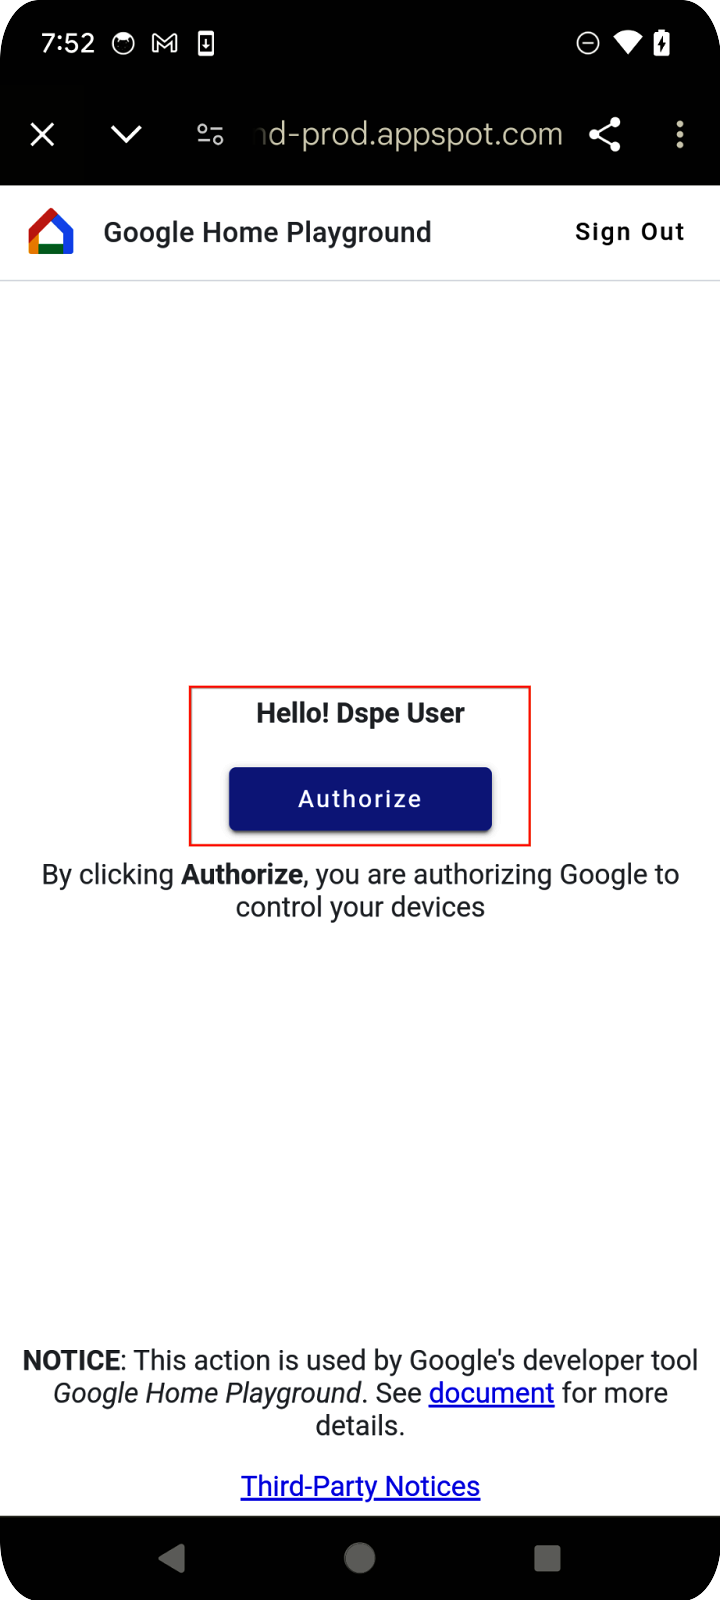
在行動裝置上開啟 Google Home 應用程式,輕觸「新增」按鈕,然後選取「與 Google Home 連結」。在清單中搜尋「playground」,然後選取「Google Home Playground」專案,並輕觸「繼續」。
Google Home Playground 會顯示帳戶授權頁面。輕觸「授權」或「使用 Google 帳戶登入」,您在網頁應用程式中設定的所有裝置,都會顯示在行動應用程式中。
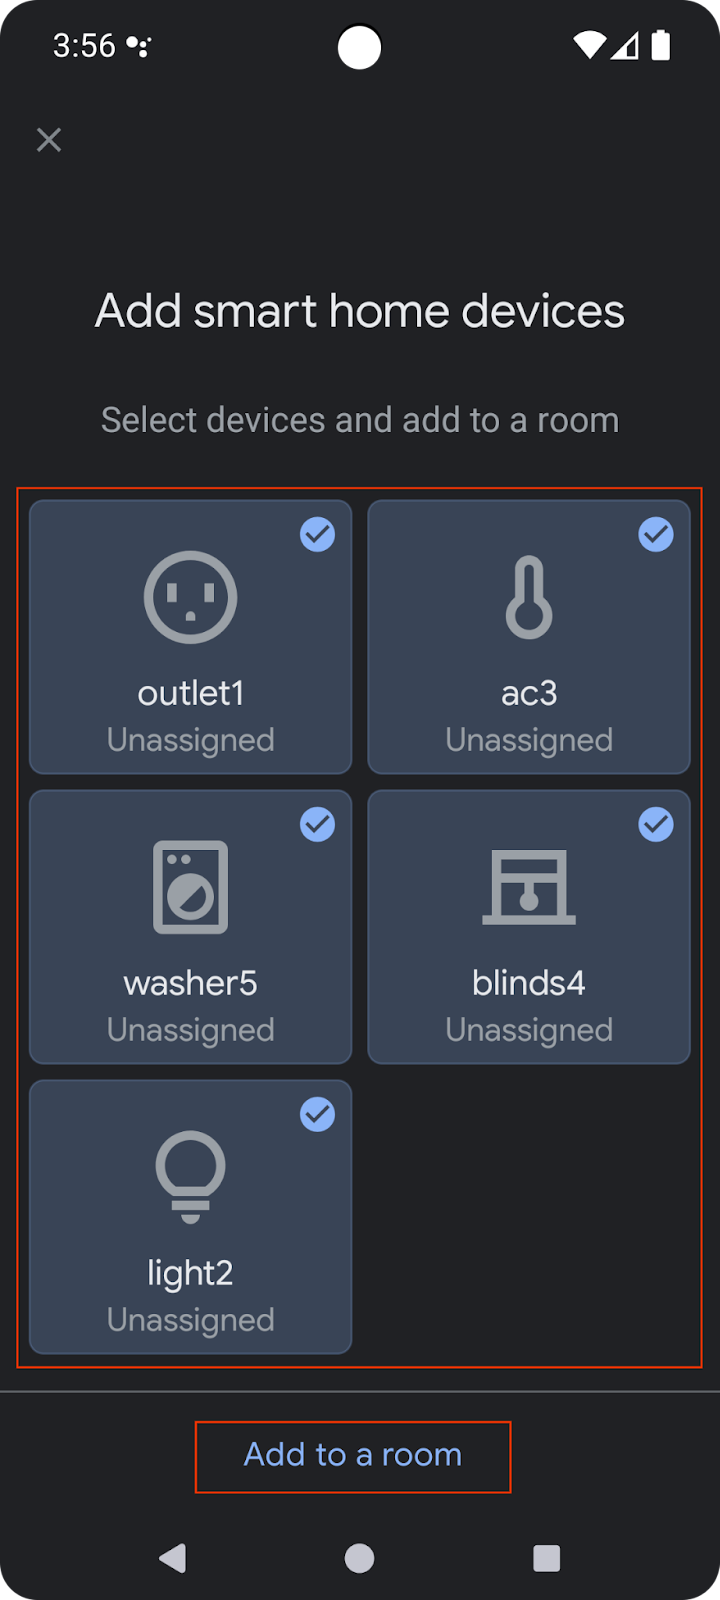
選取所有裝置,然後完成設定程序。返回首頁後,您會看到所有可用的裝置。

清單中的支援裝置現在可搭配 Google Home API 使用。
2. 設定專案
下圖說明 Home API 應用程式的架構:
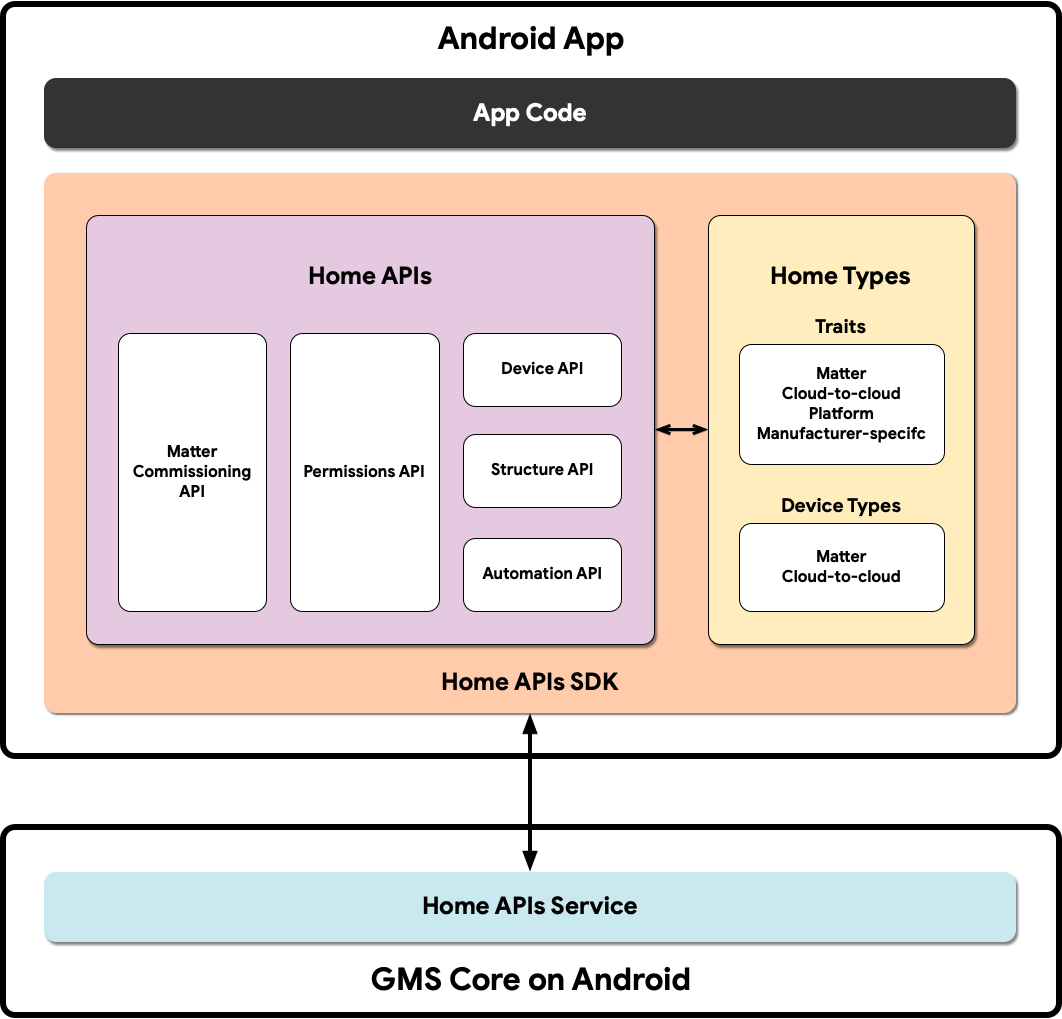
- 應用程式程式碼:開發人員建構應用程式使用者介面,以及與 Home APIs SDK 互動的邏輯時所使用的核心程式碼。
- Home APIs SDK:Google 提供的 Home APIs SDK 可與 GMSCore 中的 Home APIs 服務搭配運作,用來控制智慧住宅裝置。開發人員會將 Home API 與 Home API SDK 組合在一起,建構可與 Home API 搭配使用的應用程式。
- Android 上的 GMSCore:GMSCore 又稱 Google Play 服務,是 Google 平台,可提供核心系統服務,讓所有通過認證的 Android 裝置執行重要功能。Google Play 服務的住家模組包含與 Home API 互動的服務。
設定 Home SDK
請按照「設定 SDK」一文中的步驟操作,取得最新版 SDK。
取得範例應用程式
您可以在 GitHub 找到範例應用程式的原始碼。本程式碼研究室會使用範例應用程式 codelab-branch-1 分支的範例。
前往要儲存專案的位置,然後複製 codelab-branch-1 分支:
$ git clone -b codelab-branch-1 https://github.com/google-home/google-home-api-sample-app-android.git
建構範例應用程式
執行「建構應用程式」中的步驟 1 至 5。
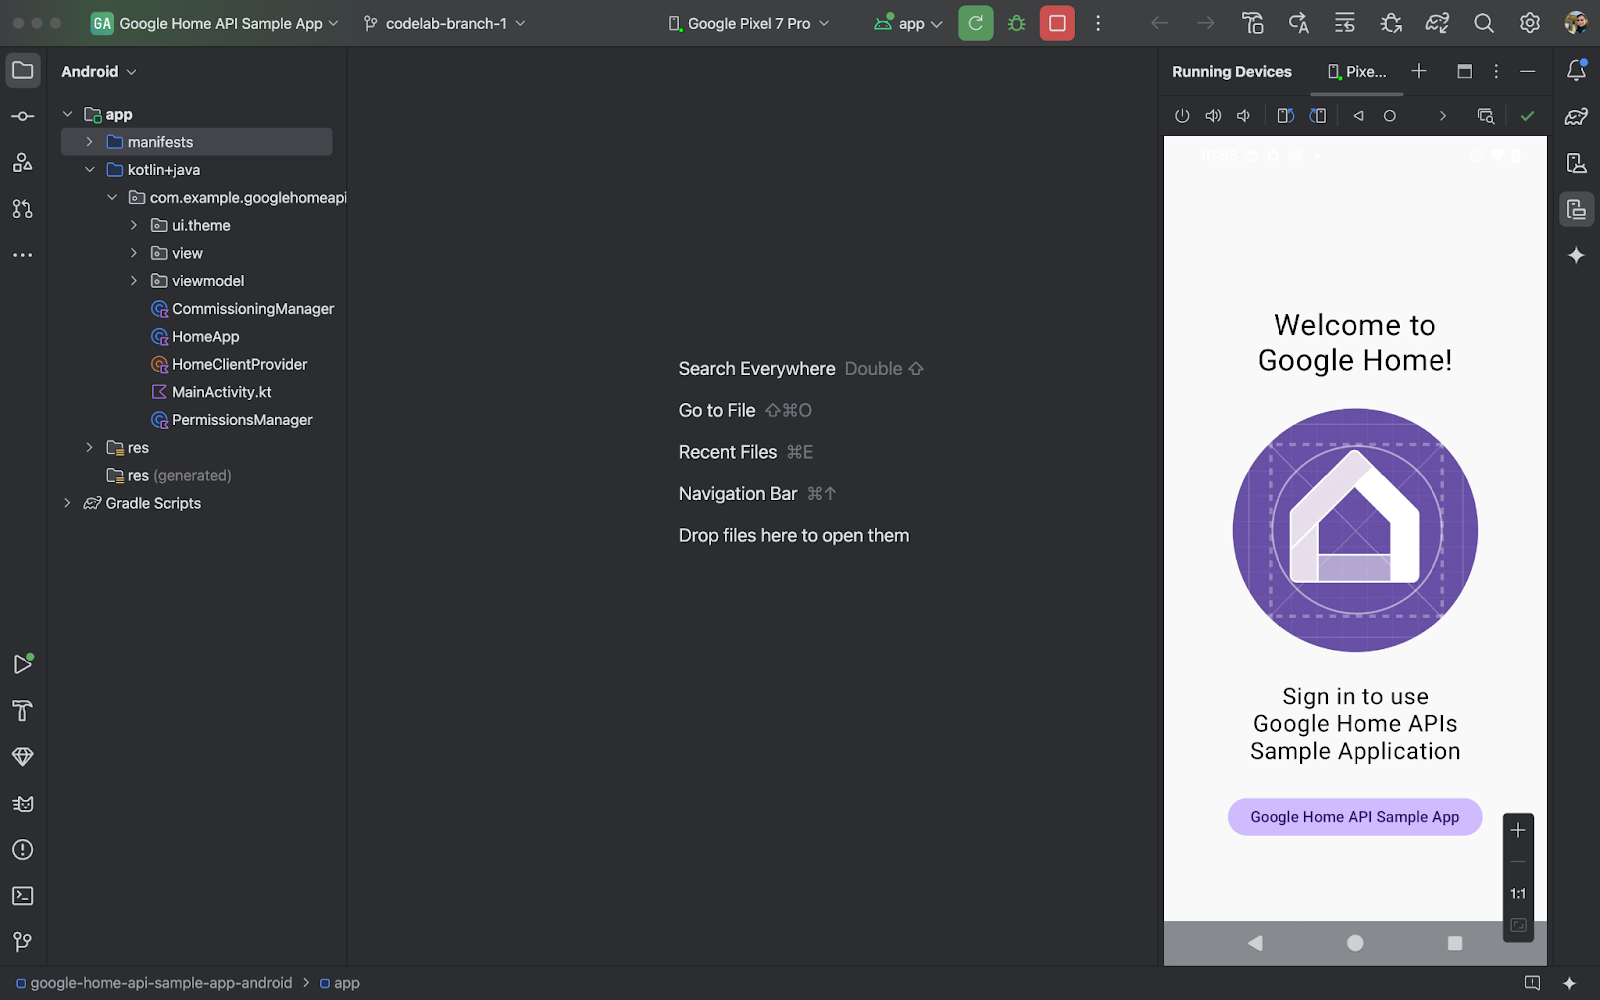
應用程式在手機上順利執行後,您會看到「Sample App」主要頁面。不過,您必須先設定 OAuth 驗證,並使用 Permission API 實作缺少的項目,才能登入。
3. 設定驗證
Home API 會使用 OAuth 2.0 授予結構中裝置的存取權。使用者不必提供登入憑證,就能透過 OAuth 授權應用程式或服務。
按照「設定 OAuth 同意聲明」一文中的操作說明設定同意畫面。請務必建立至少一個測試帳戶。
然後按照「設定 OAuth 憑證」中的指示,為應用程式建立憑證。
4. 初始化和處理權限
在本節中,您將使用 Permissions API 完成缺少的片段,瞭解如何初始化 SDK 及處理使用者權限。
定義支援的型別和特徵
開發應用程式時,您必須明確註記應用程式支援的裝置類型和特徵。在範例應用程式中,我們會在 HomeApp.kt 的伴隨物件中定義靜態清單,然後視需要在整個應用程式中參照這些清單:
companion object {

  // List of supported device types by this app:
  val supportedTypes: List<DeviceTypeFactory<out DeviceType>> = listOf(
    OnOffLightDevice,
    DimmableLightDevice,

  // ...
  )
  // List of supported device traits by this app:
  val supportedTraits: List<TraitFactory<out Trait>> = listOf(
  OnOff,
  LevelControl,
  // ...
  )
}
如要查看所有支援的裝置類型和特徵,請參閱「支援的裝置類型」和「Android 上的特徵索引」。
在 HomeApp.kt 來源檔案中取消註解步驟 4.1.1 和 4.1.2,啟用要求權限的原始碼。
companion object {
// List of supported device types by this app:
val supportedTypes: List<DeviceTypeFactory<out DeviceType>> = listOf(
// TODO: 4.1.1 - Non-registered device types will be unsupported
//             ContactSensorDevice,
//             ColorTemperatureLightDevice,
//             DimmableLightDevice,
//             ExtendedColorLightDevice,
//             GenericSwitchDevice,
//             GoogleDisplayDevice,
//             GoogleTVDevice,
//             OccupancySensorDevice,
//             OnOffLightDevice,
//             OnOffLightSwitchDevice,
//             OnOffPluginUnitDevice,
//             OnOffSensorDevice,
//             RootNodeDevice,
//             SpeakerDevice,
//             ThermostatDevice,
)
// List of supported device traits by this app:
val supportedTraits: List<TraitFactory<out Trait>> = listOf(
// TODO: 4.1.2 - Non-registered traits will be unsupported
//             AreaAttendanceState,
//             AreaPresenceState,
//             Assistant,
//             AssistantBroadcast,
//             AssistantFulfillment,
//             BasicInformation,
//             BooleanState,
//             OccupancySensing,
//             OnOff,
//             Notification,
//             LevelControl,
//             TemperatureControl,
//             TemperatureMeasurement,
//             Thermostat,
//             Time,
//             Volume,
        )
}
初始化 HomeClient 物件
所有使用 Home API 的應用程式都會初始化 HomeClient 物件,這是與 API 互動的主要介面。我們會在 HomeApp (HomeApp.kt) 類別的初始值設定器中準備這個物件。
// Registry to record device types and traits used in this app:
val registry = FactoryRegistry(
  types = supportedTypes,
  traits = supportedTraits
)
// Configuration options for the HomeClient:
val config = HomeConfig(
  coroutineContext = Dispatchers.IO,
  factoryRegistry = registry
)
// Initialize the HomeClient, which is the primary object to use all Home APIs:
homeClient = Home.getClient(context = context, homeConfig = config)
首先,我們會使用先前定義的支援型別和特徵,建立 FactoryRegistry。接著,我們使用這個登錄檔初始化 HomeConfig,其中包含執行 API 所需的設定。接著,我們使用 Home.getClient(...) 呼叫來取得 HomeClient 執行個體。
我們與 Home API 的所有互動都會透過這個 HomeClient 物件進行。
使用 Permissions API
系統會透過 Permissions API 驗證使用者,以存取 Home API。範例應用程式的 PermissionsManager.kt 來源檔案包含使用者驗證的程式碼。取消註解 checkPermissions(...) 和 requestPermissions(...) 函式的內容,啟用範例應用程式的權限。
註冊:
homeClient.registerActivityResultCallerForPermissions(activity)
推出時間:
try {
    val result: PermissionsResult
    result = homeClient.requestPermissions(forceLaunch = true)
    when (result.status) {
        PermissionsResultStatus.SUCCESS -> // Success Case
        PermissionsResultStatus.CANCELLED -> // User Cancelled
        PermissionsResultStatus.ERROR -> // Some Error
else -> // Unsupported Case
    }
}
catch (e: HomeException) { ... }
檢查:
try {
    val state: PermissionsState
    state = homeClient.hasPermissions().first { state ->
        state != PermissionsState.PERMISSIONS_STATE_UNINITIALIZED
    }
    when (state) {
        PermissionsState.GRANTED -> // Signed In
        PermissionsState.NOT_GRANTED -> // Not Signed In
        PermissionsState.PERMISSIONS_STATE_UNAVAILABLE -> // ...
        PermissionsState.PERMISSIONS_STATE_UNINITIALIZED -> // ...
else -> // Unsupported case
    }
}
catch (e: HomeException) { ... }
訂閱:
       homeClient.hasPermissions().collect( { state ->
// Track the changes on state
        } )
取消註解 PermissionsManager.kt 中的步驟 4.3.1,啟用要求權限的程式碼:
fun requestPermissions() {
    scope.launch {
    try {
// TODO: 4.3.1 - Request the permissions from the Permissions API
//                 // Request permissions from the Permissions API and record the result:
//                 val result: PermissionsResult = client.requestPermissions(forceLaunch = true)
//                 // Adjust the sign-in status according to permission result:
//                 if (result.status == PermissionsResultStatus.SUCCESS)
//                     isSignedIn.emit(true)
//                 // Report the permission result:
//                 reportPermissionResult(result)
    }
    catch (e: HomeException) { MainActivity.showError(this, e.message.toString()) }
    }
}
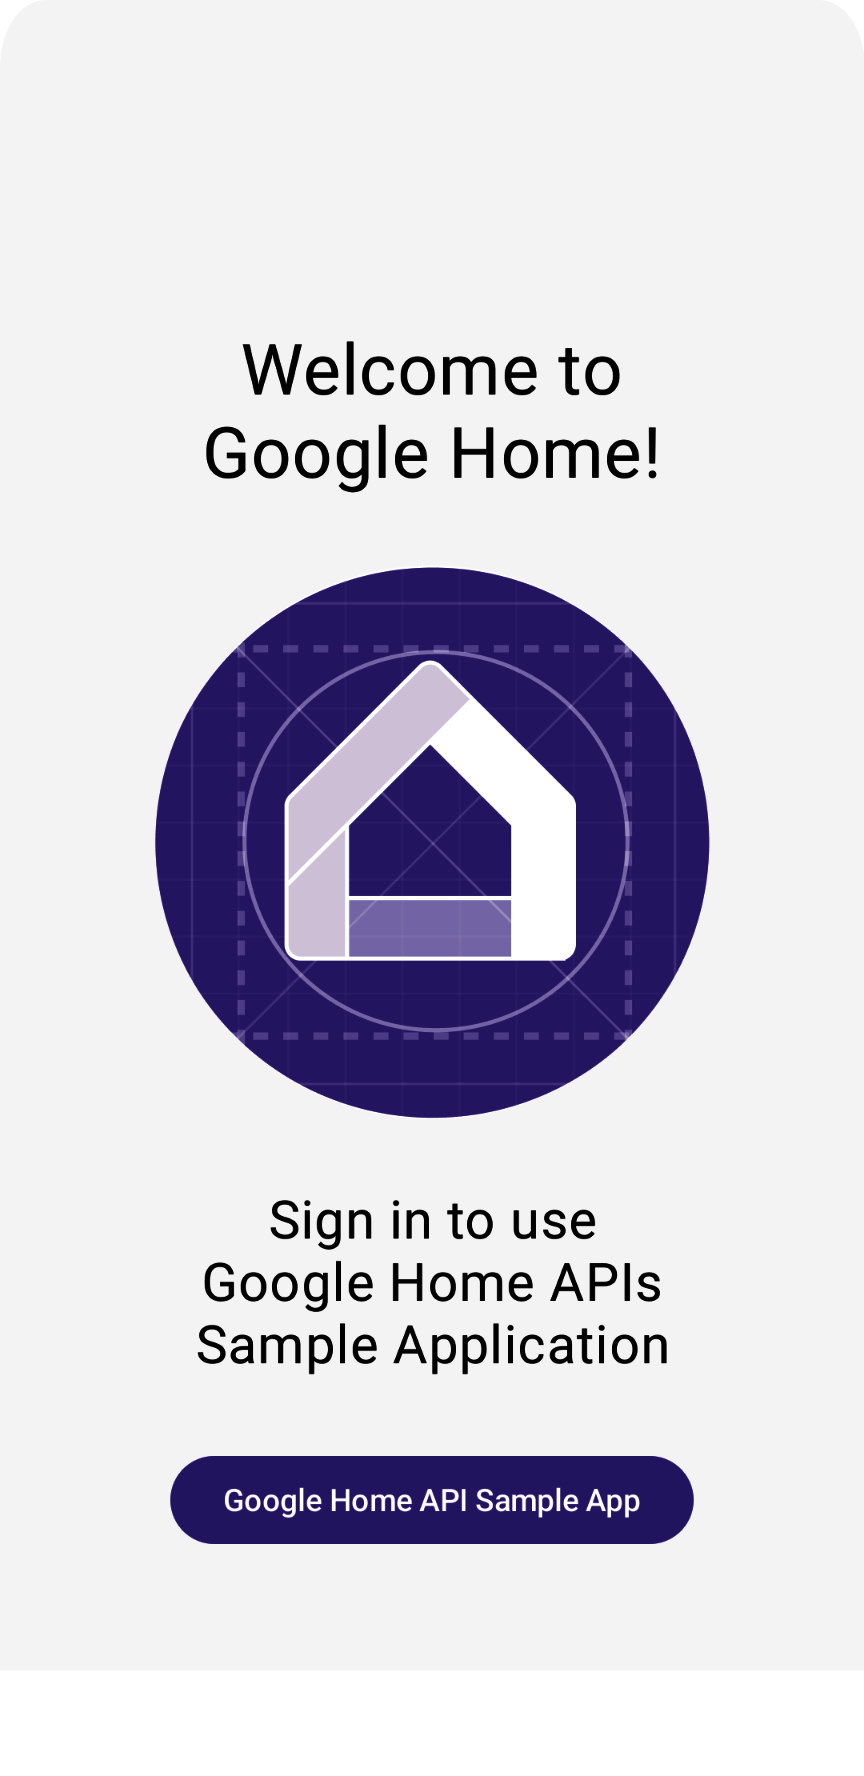
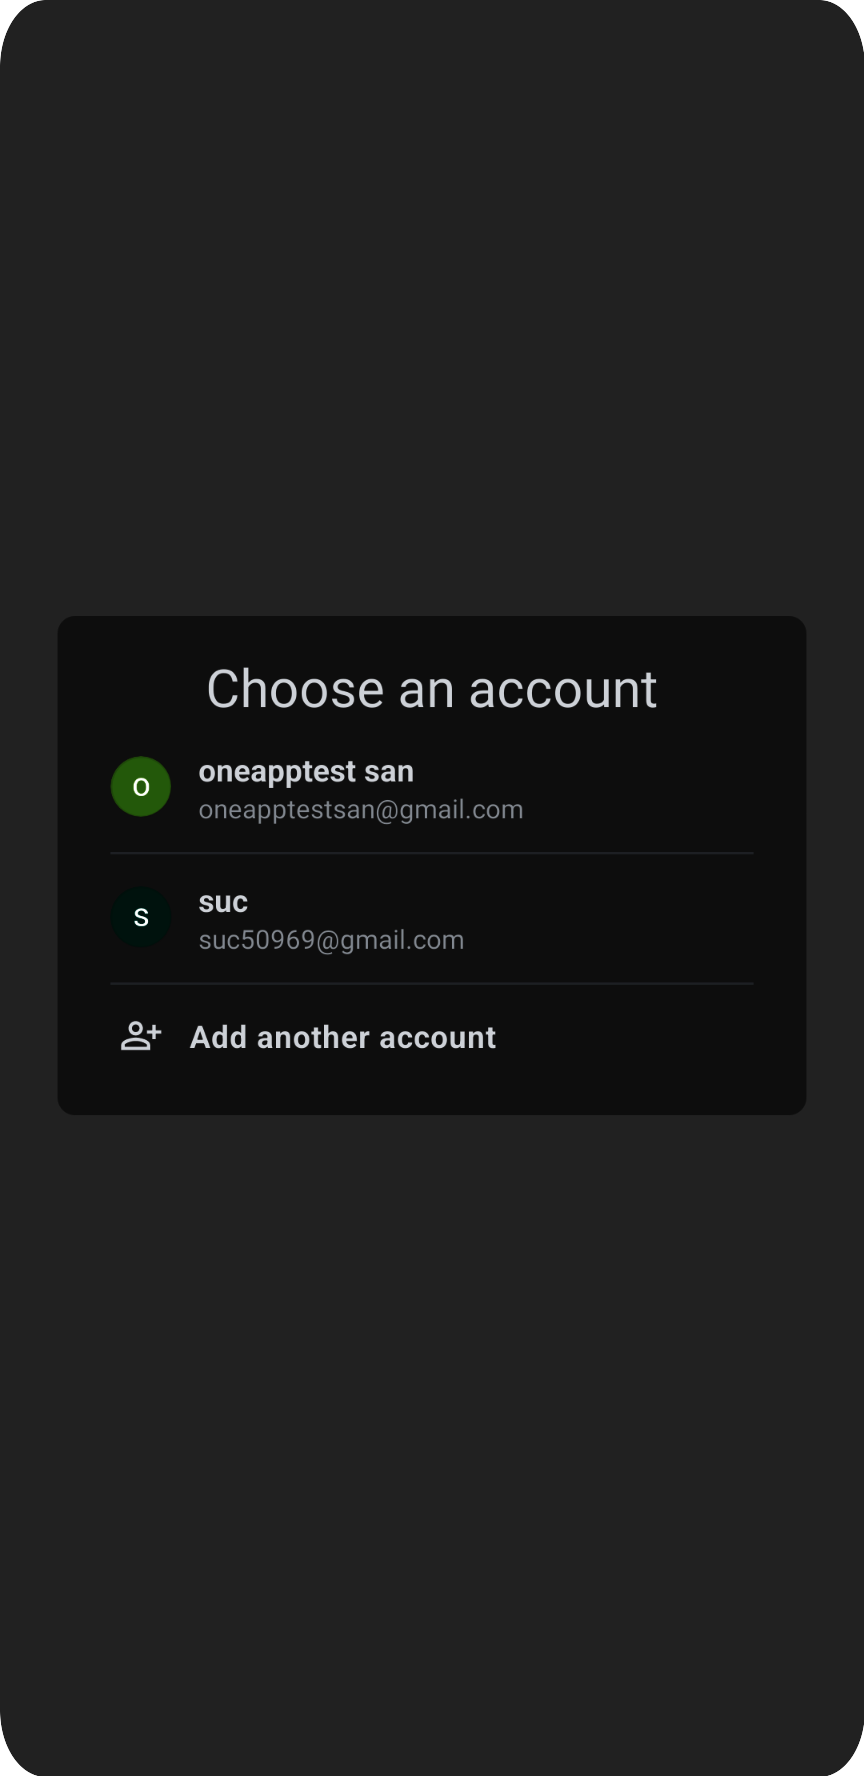
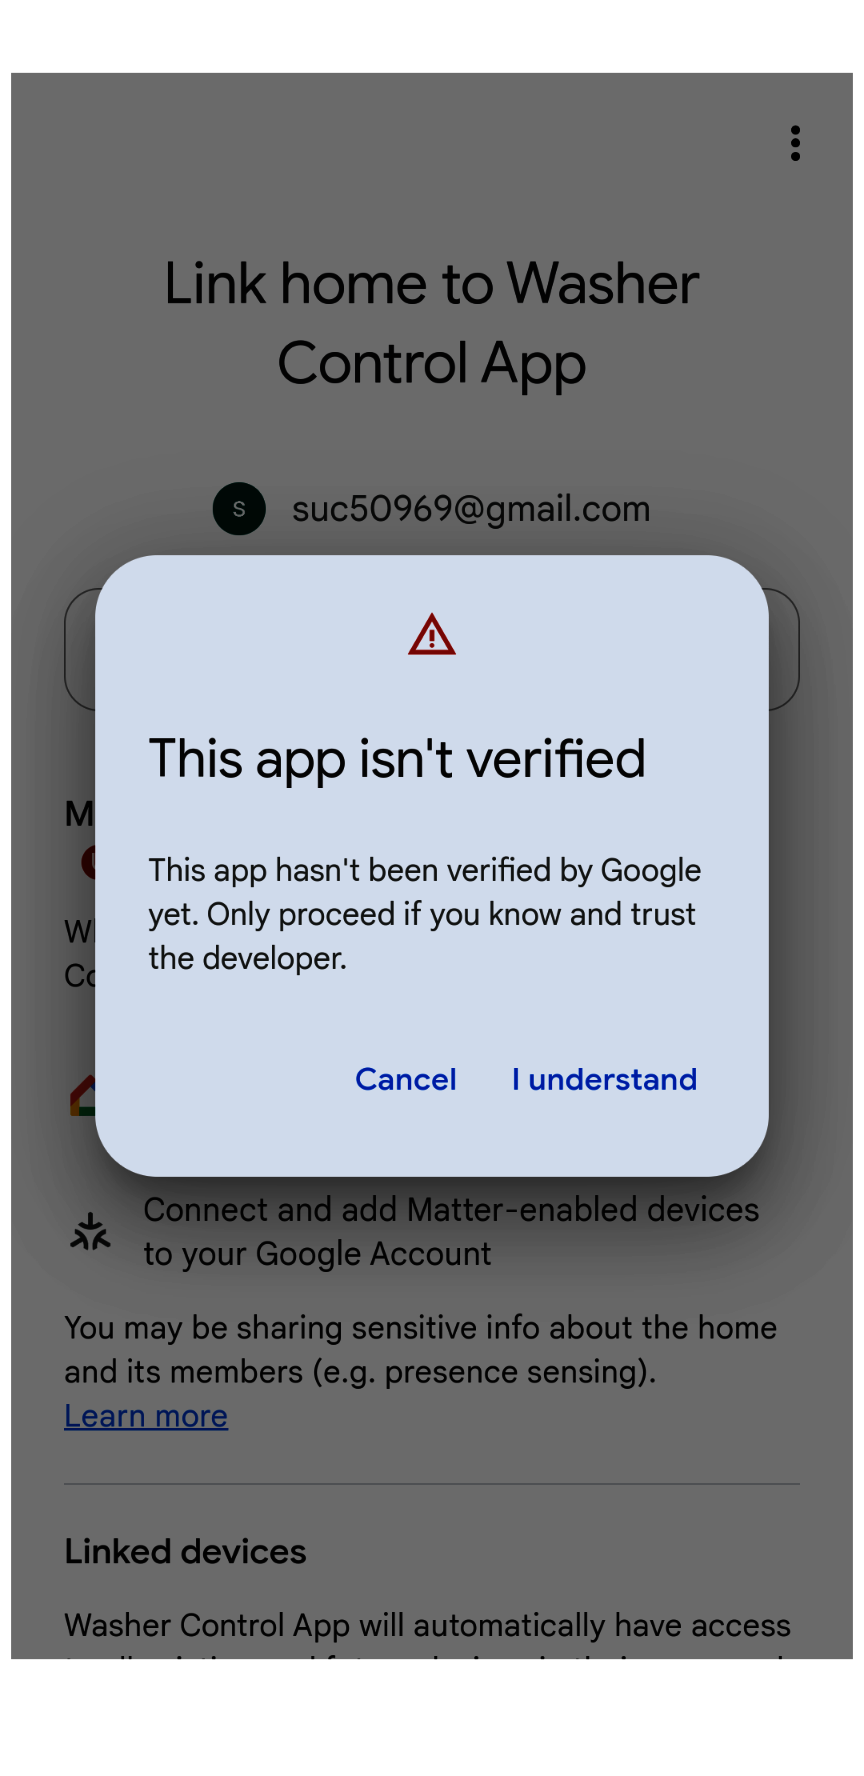
接著在手機上執行應用程式,按照步驟操作並允許權限。您應該會看到以下流程:
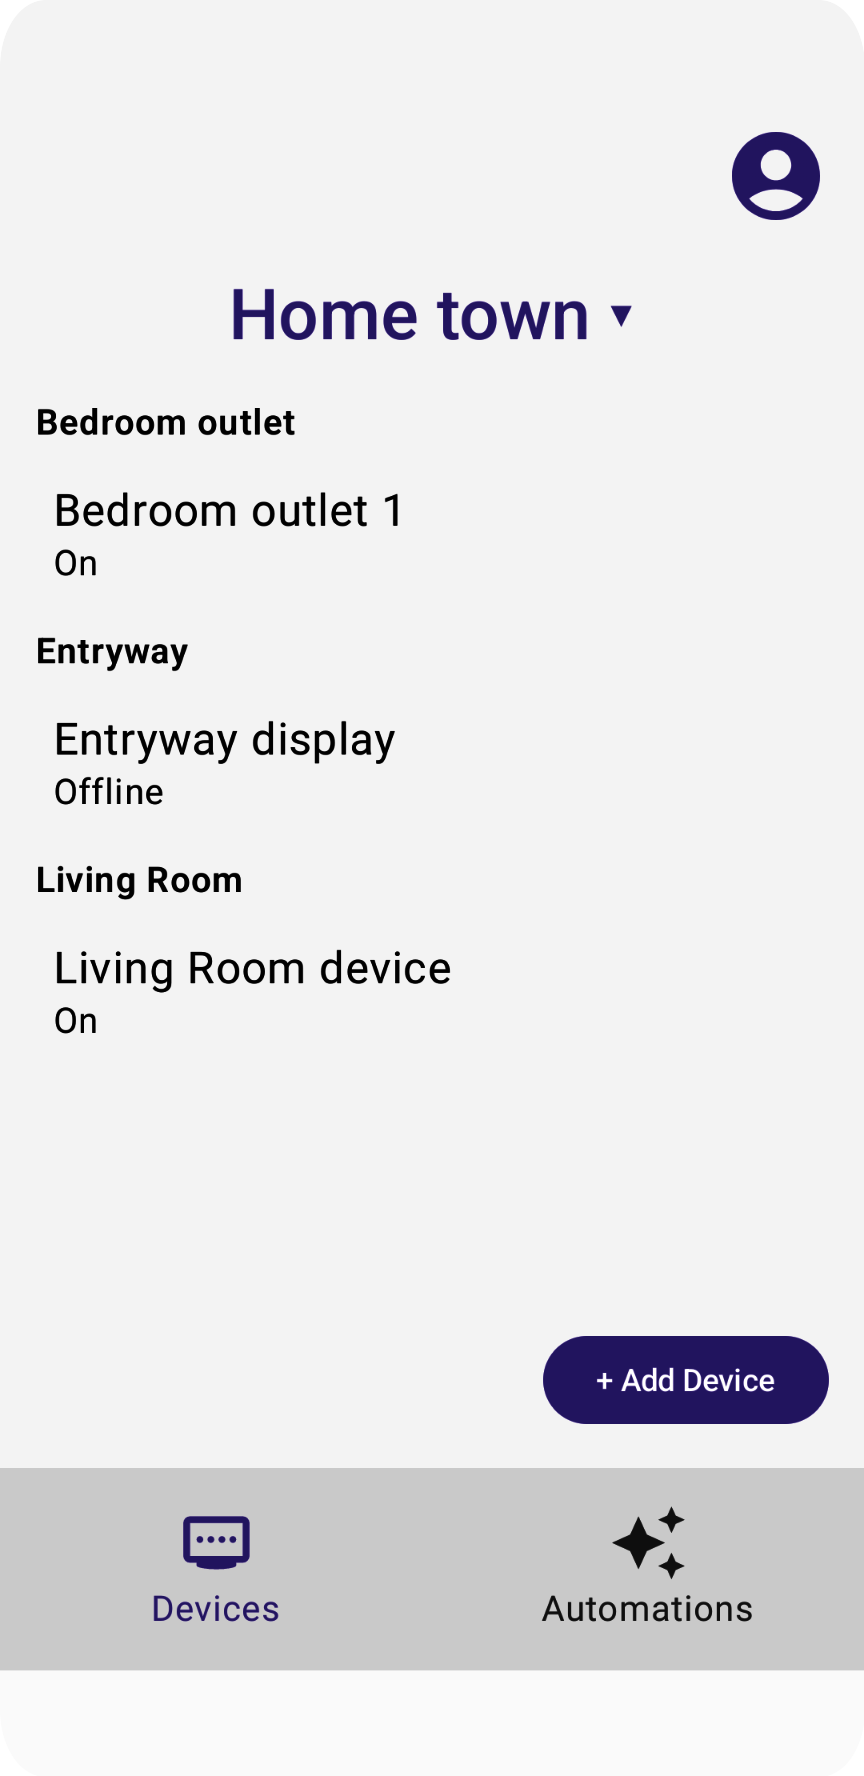
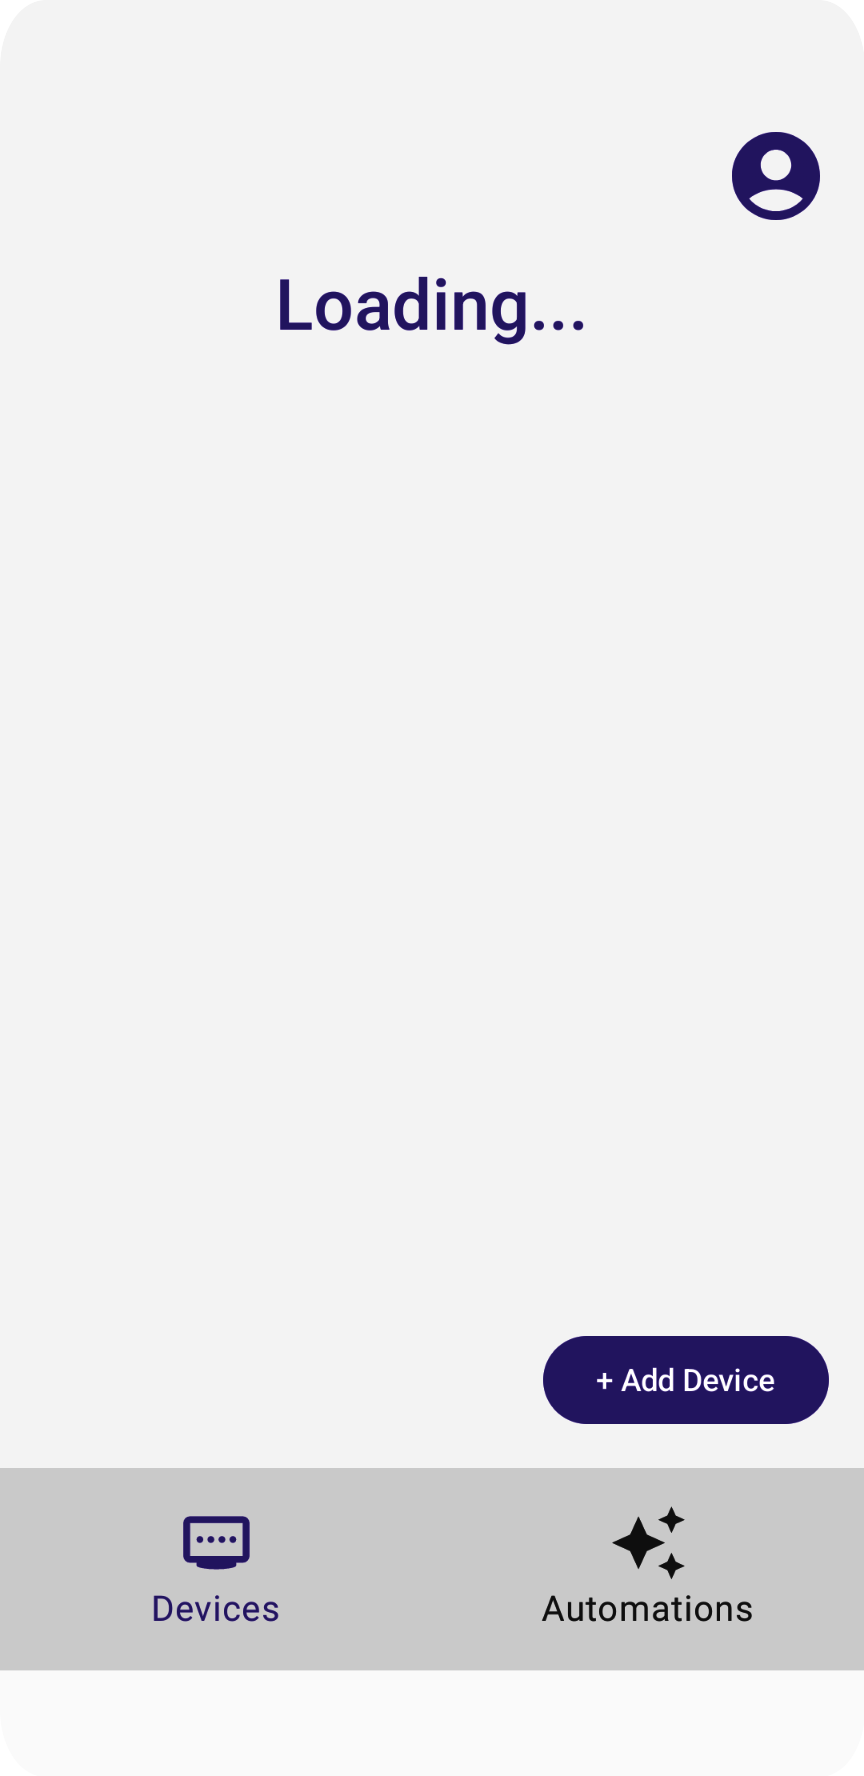
「正在載入」訊息不會消失,但這是因為我們尚未實作讀取結構和裝置的程式碼。我們會在下一節中執行這項操作。
5. 瞭解資料模型
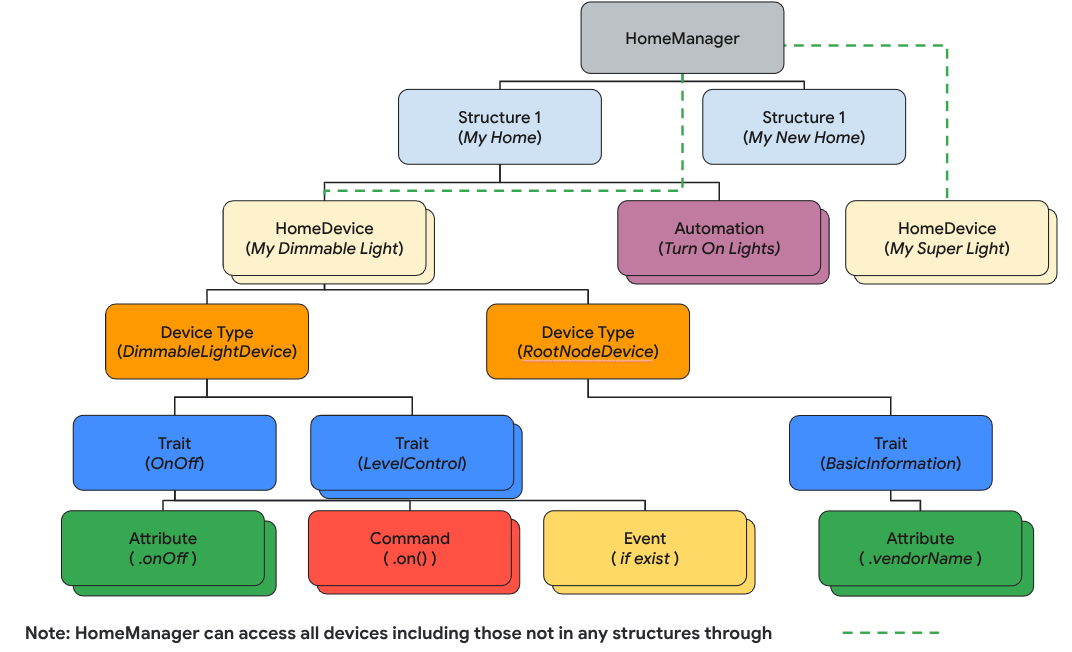
在 Home API 中,資料模型由下列項目組成:
Structure代表包含房間和裝置的住家。Room是結構的一部分,內含裝置。- 裝置 (定義為
HomeDevice) 可以指派給結構 (或住家),也可以指派給結構中的房間。 - 裝置由一或多個
DeviceType例項組成。 DeviceType由Trait執行個體組成。Trait由Attribute個執行個體 (用於讀取/寫入)、Command個執行個體 (用於控制屬性) 和Event個執行個體 (用於讀取或訂閱過去變更的記錄) 組成。Automation執行個體屬於結構體,並使用住家裝置和中繼資料自動執行住家事務。
在本節中,您將瞭解如何開發原始碼,以說明如何使用結構化 API 剖析及算繪住家結構、房間、裝置等。
讀取結構
Home API 的設計是以 Kotlin Flow 為基礎,可串流輸出資料模型物件 (例如 Structure、HomeDevice 等)。開發人員訂閱 Flow,即可取得物件中包含的所有物件 (例如 Structure、Room 等)。
如要擷取所有結構,請呼叫 structures() 函式,該函式會傳回結構的 Flow。接著,在流程中呼叫清單函式,取得使用者擁有的所有結構。
// Get the a snapshot of all structures from the current homeClient
val allStructures : Set<Structure> =
    homeClient.structures()   // HomeObjectsFlow<Structure>
    .list()                   // Set<Structure>
「應用程式架構指南」強烈建議採用現代化的反應式程式設計方法,改善應用程式資料流和狀態管理。
以下說明範例應用程式如何遵循反應式程式設計風格:
- 檢視模型 (例如
StructureViewModel和DeviceViewModel,做為狀態容器) 會訂閱 Home API SDK 中的流程,接收值變更,並維持最新狀態。 - 檢視區塊 (例如
StructureView和DeviceView) 會訂閱檢視區塊模型,接收狀態並轉譯 UI,以反映這些變更。 - 當使用者點選檢視畫面上的按鈕 (例如燈具裝置的「開啟」按鈕) 時,事件會觸發檢視模型函式,進而呼叫相應的 Home API 函式 (例如
OnOff特徵的On指令)。
在 HomeAppViewModel.kt 的步驟 5.1.1 中,我們呼叫 collect() 函式,訂閱結構變更事件。取消註解會遍歷 Structures API 回應傳回的 structureSet,並在 StructureViewModel's StateFlow 中傳送的區段。應用程式可藉此監控結構狀態變化:
   private suspend fun subscribeToStructures() {
// TODO: 5.1.1 - Subscribe the structure data changes
// // Subscribe to structures returned by the Structures API:
// homeApp.homeClient.structures().collect { structureSet ->
//     val structureVMList: MutableList<StructureViewModel> = mutableListOf()
//     // Store structures in container ViewModels:
//     for (structure in structureSet) {
//         structureVMList.add(StructureViewModel(structure))
//     }
//     // Store the ViewModels:
//     structureVMs.emit(structureVMList)
//
//     // If a structure isn't selected yet, select the first structure from the list:
//     if (selectedStructureVM.value == null && structureVMList.isNotEmpty())
//         selectedStructureVM.emit(structureVMList.first())
//
// }
}
在 DevicesView.kt 中,應用程式會訂閱 StructureViewModel'sStateFlow,,在結構資料變更時觸發 UI 重組。取消註解步驟 5.1.2 中的原始碼,將結構清單算繪為下拉式選單:
   val structureVMs: List<StructureViewModel> = homeAppVM.structureVMs.collectAsState().value
...
DropdownMenu(expanded = expanded, onDismissRequest = { expanded = false }) {
// TODO: 5.1.2 - Show list of structures in DropdownMenu
//  for (structure in structureVMs) {
//      DropdownMenuItem(
//          text = { Text(structure.name) },
//          onClick = {
//              scope.launch { homeAppVM.selectedStructureVM.emit(structure) }
//              expanded = false
//          }
//      )
//  }
}
...
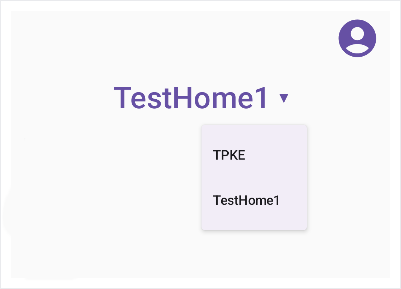
再次執行應用程式。輕觸箭頭時,應該會看到選單:
剖析結構
下一步是在結構體中遍歷住家物件。從結構體擷取房間:
val rooms: Set<Room>
rooms = structure.rooms().list()
然後,您可以遍歷房間來擷取裝置:
val devices: Set<HomeDevice>
devices = room.devices().list()
重要事項:在 Home API 資料模型中,結構體可以包含未指派給房間的裝置,因此請務必在應用程式中擷取沒有房間的裝置:
val devicesWithoutRooms: MutableSet<HomeDevice> = mutableSetOf()

for (device in structure.devices().list())
if (device.roomId == null)
  devicesWithoutRooms.add(device)
同樣地,在現有的程式碼範例中,我們會訂閱流程,以取得最新的 Room 和裝置清單。檢查 StructureViewModel.kt 來源檔案中的步驟 5.2.1 和 5.2.2 的程式碼,並取消註解以啟用房源資料訂閱:
val roomVMs : MutableStateFlow<List<RoomViewModel>>
val deviceVMs : MutableStateFlow<List<DeviceViewModel>>
val deviceVMsWithoutRooms : MutableStateFlow<List<DeviceViewModel>>
private suspend fun subscribeToRooms() {
// TODO: 5.2.1 - Subscribe the room data changes
//   // Subscribe to changes on rooms:
//   structure.rooms().collect { roomSet ->
//       val roomVMs = mutableListOf<RoomViewModel>()
//       // Store rooms in container ViewModels:
//       for (room in roomSet) {
//           roomVMs.add(RoomViewModel(room))
//       }
//       // Store the ViewModels:
//       this.roomVMs.emit(roomVMs)
//   }
}
private suspend fun subscribeToDevices() {
// TODO: 5.2.2 - Subscribe the device data changes in a structure
//   // Subscribe to changes on devices:
//   structure.devices().collect { deviceSet ->
//       val deviceVMs = mutableListOf<DeviceViewModel>()
//       val deviceWithoutRoomVMs = mutableListOf<DeviceViewModel>()
//       // Store devices in container ViewModels:
//       for (device in deviceSet) {
//           val deviceVM = DeviceViewModel(device)
//           deviceVMs.add(deviceVM)
//           // For any device that's not in a room, additionally keep track of a separate list:
//           if (device.roomId == null)
//               deviceWithoutRoomVMs.add(deviceVM)
//       }
//       // Store the ViewModels:
//       this.deviceVMs.emit(deviceVMs)
//       deviceVMsWithoutRooms.emit(deviceWithoutRoomVMs)
//   }
    }
在 DevicesView.kt 來源檔案中取消註解步驟 5.2.3 和 5.2.4,將會議室清單算繪為選單:
val selectedRoomVMs: List<RoomViewModel> =
selectedStructureVM.roomVMs.collectAsState().value
...
for (roomVM in selectedRoomVMs) {
// TODO: 5.2.3 - Render the list of rooms
//   RoomListItem(roomVM)
// TODO: 5.2.4 - Render the list of devices in a room
//   val deviceVMsInRoom: List<DeviceViewModel> = roomVM.deviceVMs.collectAsState().value
//
//   for (deviceVM in deviceVMsInRoom) {
//       DeviceListItem(deviceVM, homeAppVM)
//   }
}
現在你已擁有裝置,接下來將瞭解如何使用。
6. 使用裝置
Home API 會使用 HomeDevice 物件擷取裝置及其功能。開發人員可以訂閱裝置屬性,並在應用程式中用來代表智慧住宅裝置。
讀取裝置狀態
HomeDevice 物件會顯示一組靜態值,例如裝置名稱或連線狀態。開發人員可透過 API 取得裝置,並在取得裝置後立即擷取下列資訊:
val id: String = device.id.id
val name: String = device.name
val connectivity: ConnectivityState =
    device.sourceConnectivity.connectivityState
如要取得裝置功能,您必須從 HomeDevice 擷取型別和特徵。如要這麼做,您可以按照下列步驟訂閱裝置類型流程,並從裝置類型擷取特徵:
device.types().collect { typeSet ->
var primaryType : DeviceType = UnknownDeviceType()
for (typeInSet in typeSet)
if (typeInSet.metadata.isPrimaryType)
                    primaryType = typeInSet
            val traits: List<Trait> = mutableListOf()
for (trait in primaryType.traits())
if (trait.factory in myTraits)
                    traits.add(trait)
for (trait in traits)
                parseTrait(trait, primaryType)
        }
每部裝置都包含一組支援的DeviceType (隨附功能),您可以使用 device.types() 擷取這些功能。這些裝置類型包含可使用 type.traits() 擷取的特徵。每個裝置都會將其中一種型別標示為主要型別 (可使用 type.metadata.isPrimaryType 檢查),您應在應用程式中呈現該型別。為提供完整的使用者體驗,建議您遍歷所有傳回的型別,並整合所有可用的特徵。
擷取特徵後,您可以使用下列函式剖析特徵,解讀值:
fun <T : Trait?> parseTrait(trait : T, type: DeviceType) {
    val status : String = when (trait) {
        is OnOff -> { if (trait.onOff) "On" else "Off" }
        is LevelControl -> { trait.currentLevel.toString() }
        is BooleanState -> {
            when (type.factory) {
                ContactSensorDevice -> {
if (trait.stateValue) "Closed"
else "Open"
                }
else -> ...
            }
        }
else -> ...
    }
}
請注意,特徵代表的內容可能會因裝置類型而異 (請參閱上例中的 BooleanState),因此您必須瞭解各裝置類型的背景資訊,才能掌握特徵的實際代表意義。
在 DeviceViewModel.kt 來源檔案中取消註解步驟 6.1.1 和 6.1.2,以擷取狀態:
private suspend fun subscribeToType() {
// Subscribe to changes on device type, and the traits/attributes within:
device.types().collect { typeSet ->
// Container for the primary type for this device:
var primaryType : DeviceType = UnknownDeviceType()
...
// TODO: 6.1.1 - Determine the primary type for this device
//       // Among all the types returned for this device, find the primary one:
//       for (typeInSet in typeSet)
//           if (typeInSet.metadata.isPrimaryType)
//               primaryType = typeInSet
//
//       // Optional: For devices with a single type that did not define a primary:
//       if (primaryType is UnknownDeviceType && typeSet.size == 1)
//           primaryType = typeSet.first()
// Container for list of supported traits present on the primary device type:
val supportedTraits: List<Trait> = getSupportedTraits(primaryType.traits())
...
}
fun getSupportedTraits(traits: Set<Trait>) : List<Trait> {
           val supportedTraits: MutableList<Trait> = mutableListOf()
// TODO: 6.1.2 - Get only the supported traits for this device
//   for (trait in traits)
//       if (trait.factory in HomeApp.supportedTraits)
//           supportedTraits.add(trait)
return supportedTraits
}
取消註解 DeviceView.kt 中的步驟 6.1.3,將 OnOff 特徵 (包括名稱和狀態) 算繪為 String:
Box (Modifier.padding(horizontal = 24.dp, vertical = 8.dp)) {
when (trait) {
is OnOff -> {
// TODO: 6.1.3 - Render controls based on the trait type
// Column (Modifier.fillMaxWidth()) {
//     Text(trait.factory.toString(), fontSize = 20.sp)
//     Text(DeviceViewModel.getTraitStatus(trait, type), fontSize = 16.sp)
// }
...
}
is LevelControl -> {
      ...
  }
   is BooleanState -> {
      ...
  }
   is OccupancySensing -> {
      ...
  }
  ...
}
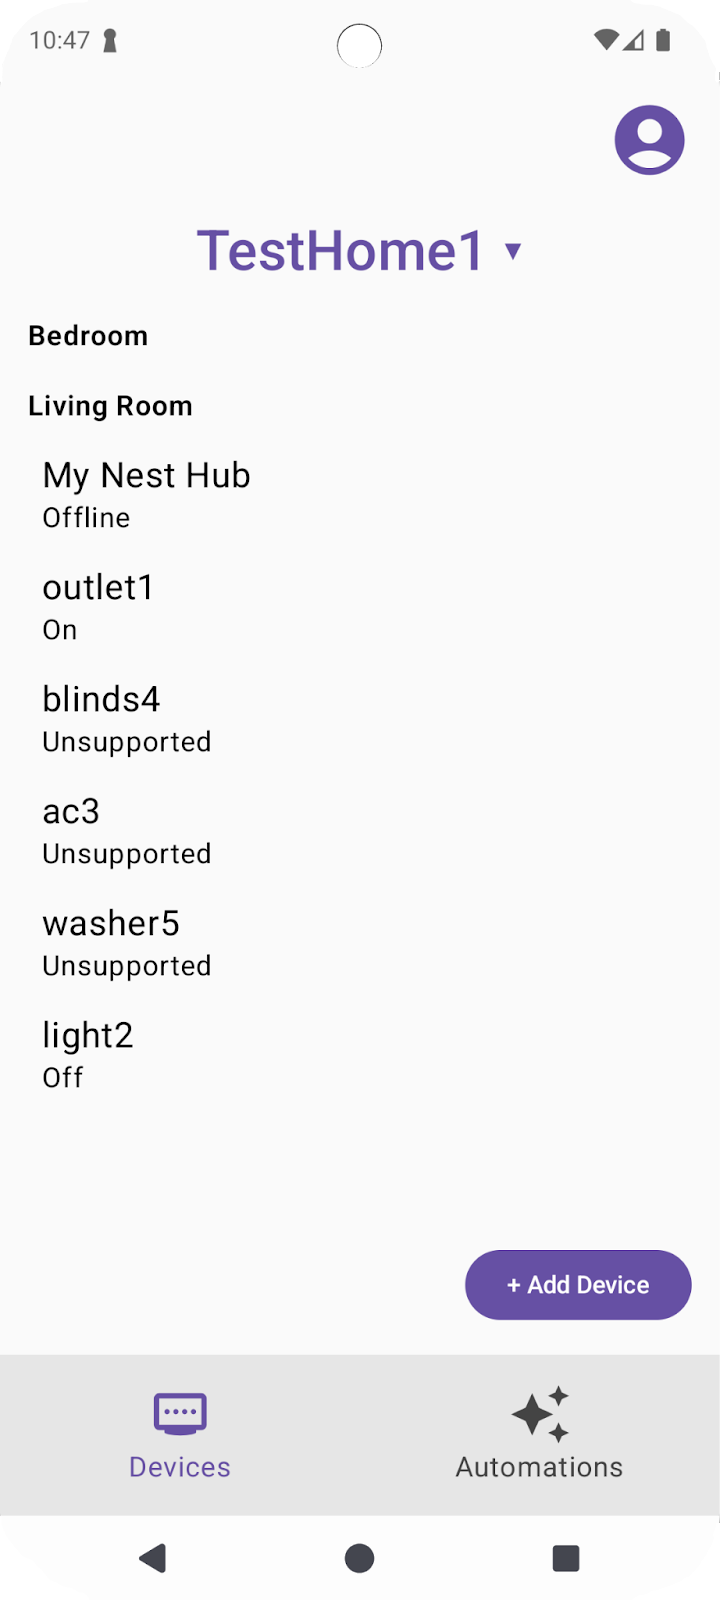
如果您現在使用支援的裝置類型 (例如 Light 裝置) 執行應用程式,應該會看到所有裝置的最新狀態。

發送裝置指令
如要對裝置發出指令,Home API 會在 Trait 物件上提供便利功能,例如 trait.on() 或 trait.moveToLevel(...):
fun <T : Trait?> issueCommand(trait : T) {
     when (trait) {
         is OnOff -> {
// trait.on()
// trait.off()
   }
   is LevelControl -> {
// trait.moveToLevel(...)
// trait.moveToLevelWithOnOff(...)
        }
    }
}
提示:判斷特徵類型後,請使用 Android Studio 的自動完成功能,查看可與特徵互動的動作類型。
取消註解 DeviceView.kt 中的步驟 6.2.1,在應用程式中新增功能控制項:
Box (Modifier.padding(horizontal = 24.dp, vertical = 8.dp)) {
when (trait) {
is OnOff -> {
                ....
// TODO: 6.2.1 - Render controls based on the trait type
//   Switch (checked = (trait.onOff == true), modifier = Modifier.align(Alignment.CenterEnd),
//       onCheckedChange = { state ->
//           scope.launch { if (state) trait.on() else trait.off() }
//       },
//       enabled = isConnected
//   )
}
如果您現在執行應用程式,應該就能控制實體裝置。
輕觸燈泡的「開啟/關閉」控制項,裝置現在應該會開啟。
如要進一步瞭解如何控制裝置,請參閱「在 Android 裝置上控制裝置」。
7. 委任裝置
開發人員可透過 Commissioning API 將裝置新增至 Google Home 生態系統,並使用 Home API 控制裝置。僅支援 Matter 裝置。本節將探討如何在應用程式中啟用裝置委派功能。
開始本節內容前,請確認符合下列必要條件:
- 支援 Matter 的 Google Hub 與 Android 手機連上相同網路,且已新增至 Google Home 應用程式。
- 您已在 Google Home 開發人員控制台上建立開發人員專案,並使用 VID
0xFFF1和 PID0x8000。
如果您有實體 Matter 裝置,且裝置隨附用於委派的 QR code,請直接跳到「啟用委派 API」一節。否則,請繼續閱讀下一節,瞭解如何使用 Matter 虛擬裝置 (MVD) 應用程式建立可委派的虛擬裝置。
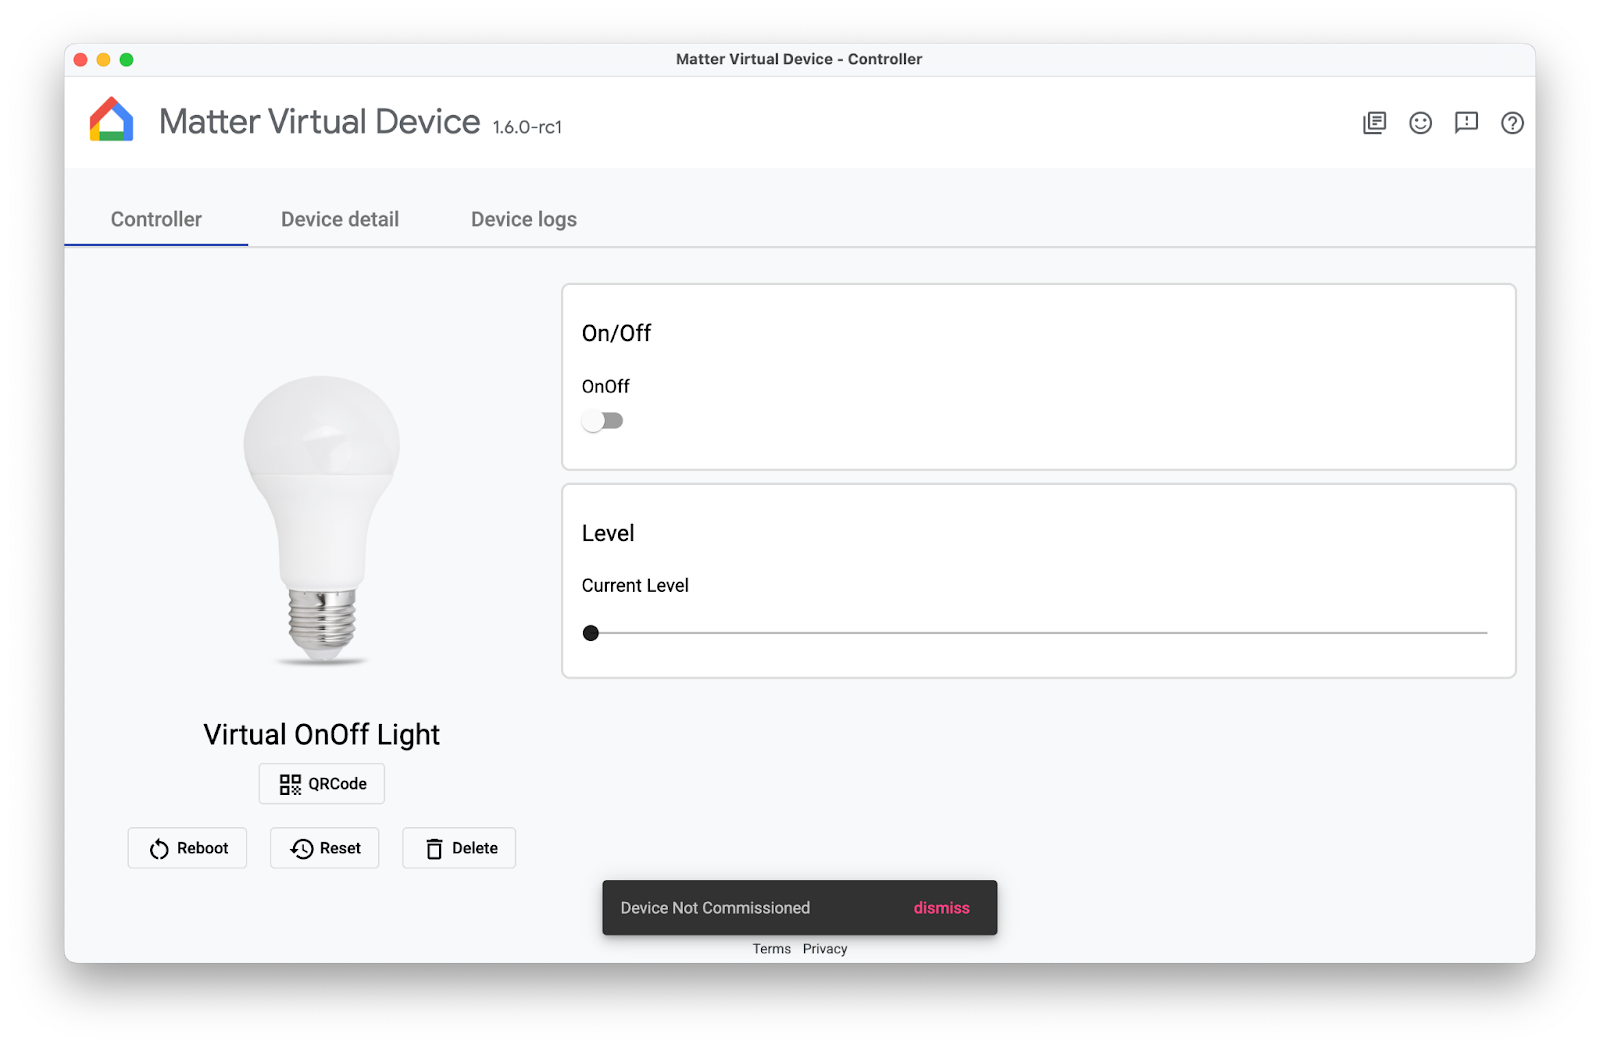
選用:準備支援 Matter 的可調試裝置
準備 Matter 可委派裝置最簡單的方法,就是使用 Matter 虛擬裝置應用程式 (MVD) 提供的模擬裝置。
安裝 MVD 並設定防火牆後,請執行 MVD:
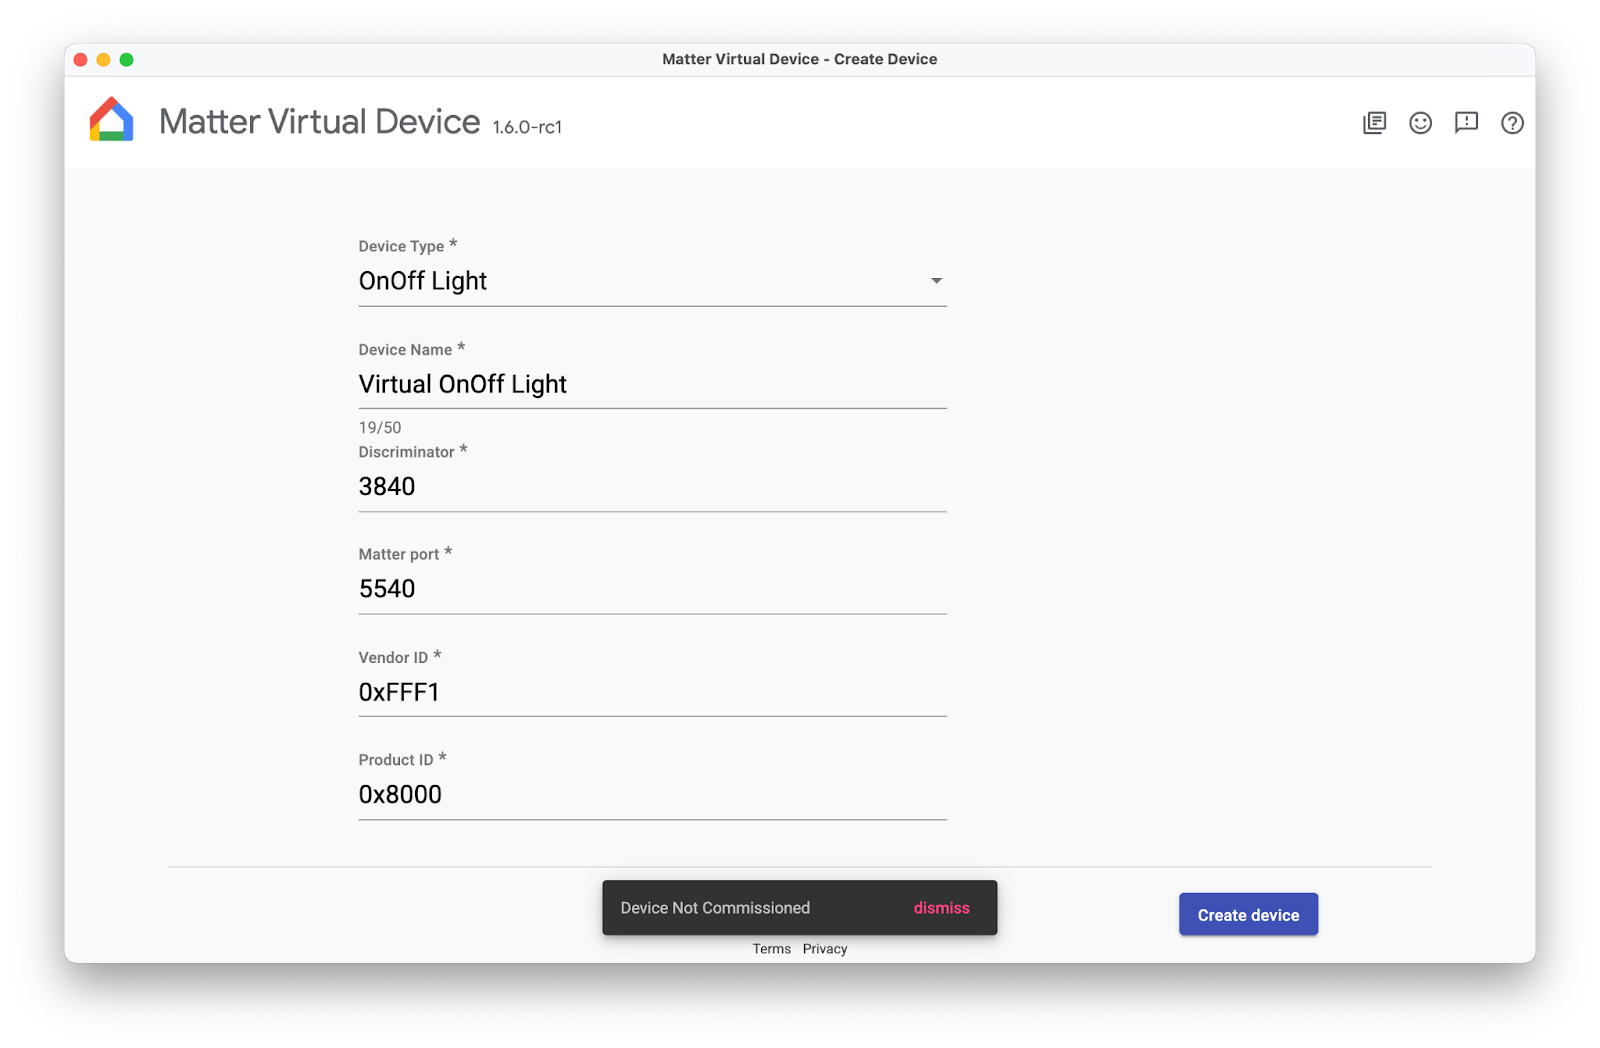
建立 OnOff 裝置。請注意,該裝置尚未委派,您會在稍後的程式碼研究室中委派該裝置。
啟用 Commissioning API
Commissioning API 會在應用程式的 Activity 之外運作,因此委派作業的處理方式與其他 Home API 不同。如要讓應用程式準備好委派作業,您需要兩個變數。
其中一個變數是 ActivityResultLauncher,用於傳送委派意圖及管理結果回呼。另一個變數是 CommissioningResult,這個物件用於儲存委派結果。請參閱以下範例,瞭解如何設定委任:
var launcher: ActivityResultLauncher<IntentSenderRequest>
lateinit var commissioningResult: CommissioningResult?
launcher = activity.registerForActivityResult(StartIntentSenderForResult()) { result ->
try {
  commissioningResult = CommissioningResult.fromIntentSenderResult(
      result.resultCode, result.data)
  } catch (exception: ApiException) {
// Catch any issues
 }
}
設定委派流程後,您將建構委派意圖,並使用上一個範例中建立的啟動器啟動意圖。建議您將意圖和啟動器放在專用函式中,如下所示。專屬函式可以繫結至 UI 元素 (例如「+新增裝置」按鈕),並根據使用者要求叫用:
fun requestCommissioning() {
// Retrieve the onboarding payload used when commissioning devices:
val payload = activity.intent?.getStringExtra(Matter.EXTRA_ONBOARDING_PAYLOAD)
  scope.launch {
    // Create a commissioning request to store the device in Google's Fabric:
    val request = CommissioningRequest.builder()
      .setStoreToGoogleFabric(true)
      .setOnboardingPayload(payload)
      .build()
    // Initialize client and sender for commissioning intent:
    val client: CommissioningClient = Matter.getCommissioningClient(context)
    val sender: IntentSender = client.commissionDevice(request).await()
    // Launch the commissioning intent on the launcher:
    launcher.launch(IntentSenderRequest.Builder(sender).build())
  }
}
取消註解 CommissioningManager.kt 中的步驟 7.1.1,啟用委派功能,並讓「+Add Device」按鈕在範例應用程式中運作。
// Called by +Add Device button in DeviceView.kt
fun requestCommissioning() {
// Retrieve the onboarding payload used when commissioning devices:
val payload = activity.intent?.getStringExtra(Matter.EXTRA_ONBOARDING_PAYLOAD)
// TODO: 7.1.1 - Launch the commissioning intent
// scope.launch {
//     // Create a commissioning request to store the device in Google's Fabric:
//     val request = CommissioningRequest.builder()
//         .setStoreToGoogleFabric(true)
//         .setOnboardingPayload(payload)
//         .build()
//     // Initialize client and sender for commissioning intent:
//     val client: CommissioningClient = Matter.getCommissioningClient(context)
//     val sender: IntentSender = client.commissionDevice(request).await()
//     // Launch the commissioning intent on the launcher:
//     launcher.launch(IntentSenderRequest.Builder(sender).build())
// }
}
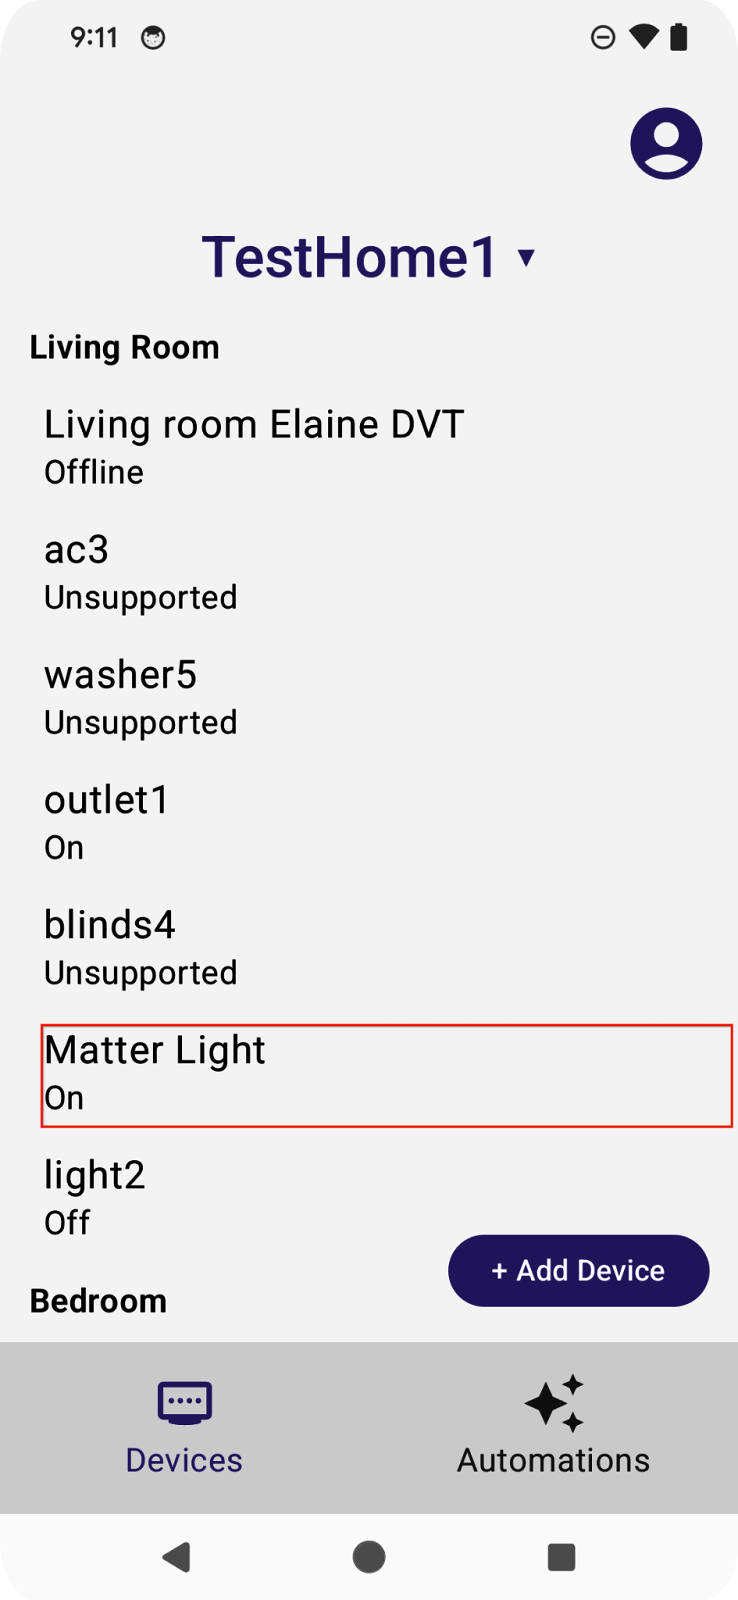
執行此函式應會啟動委派流程,並顯示類似以下螢幕截圖的畫面:
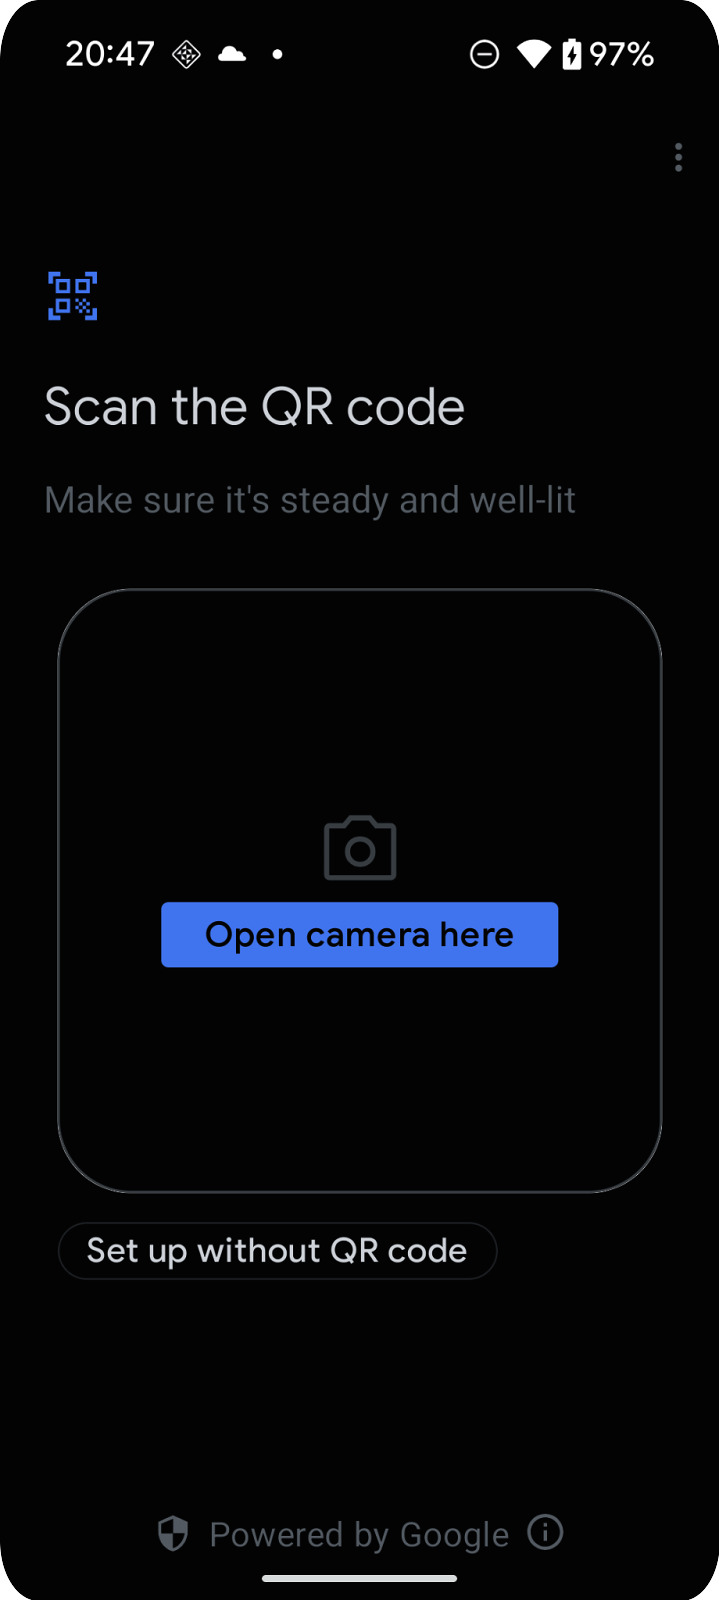
瞭解委任流程
委派流程包含一系列畫面,引導使用者將裝置新增至 Google 帳戶:
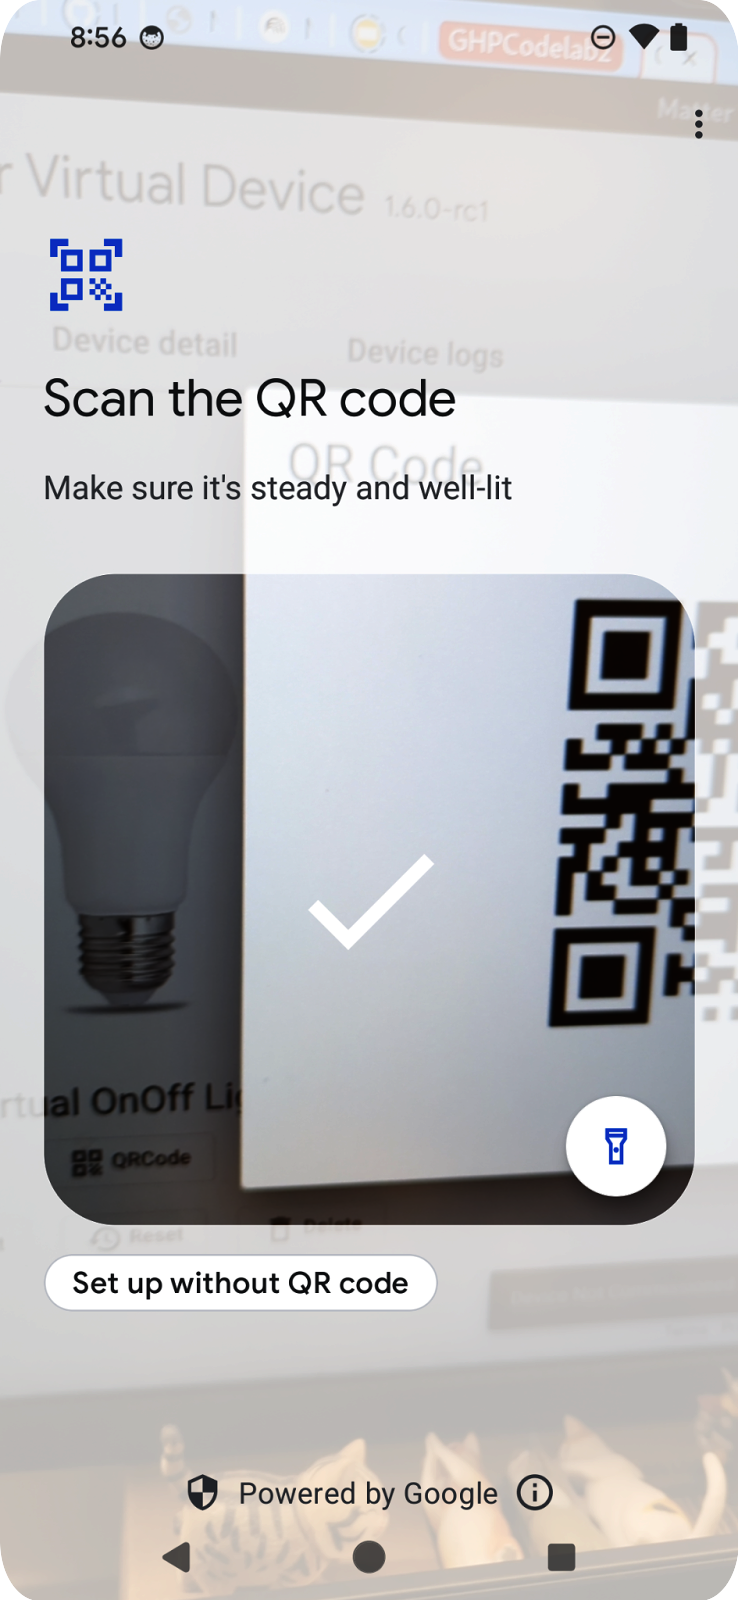
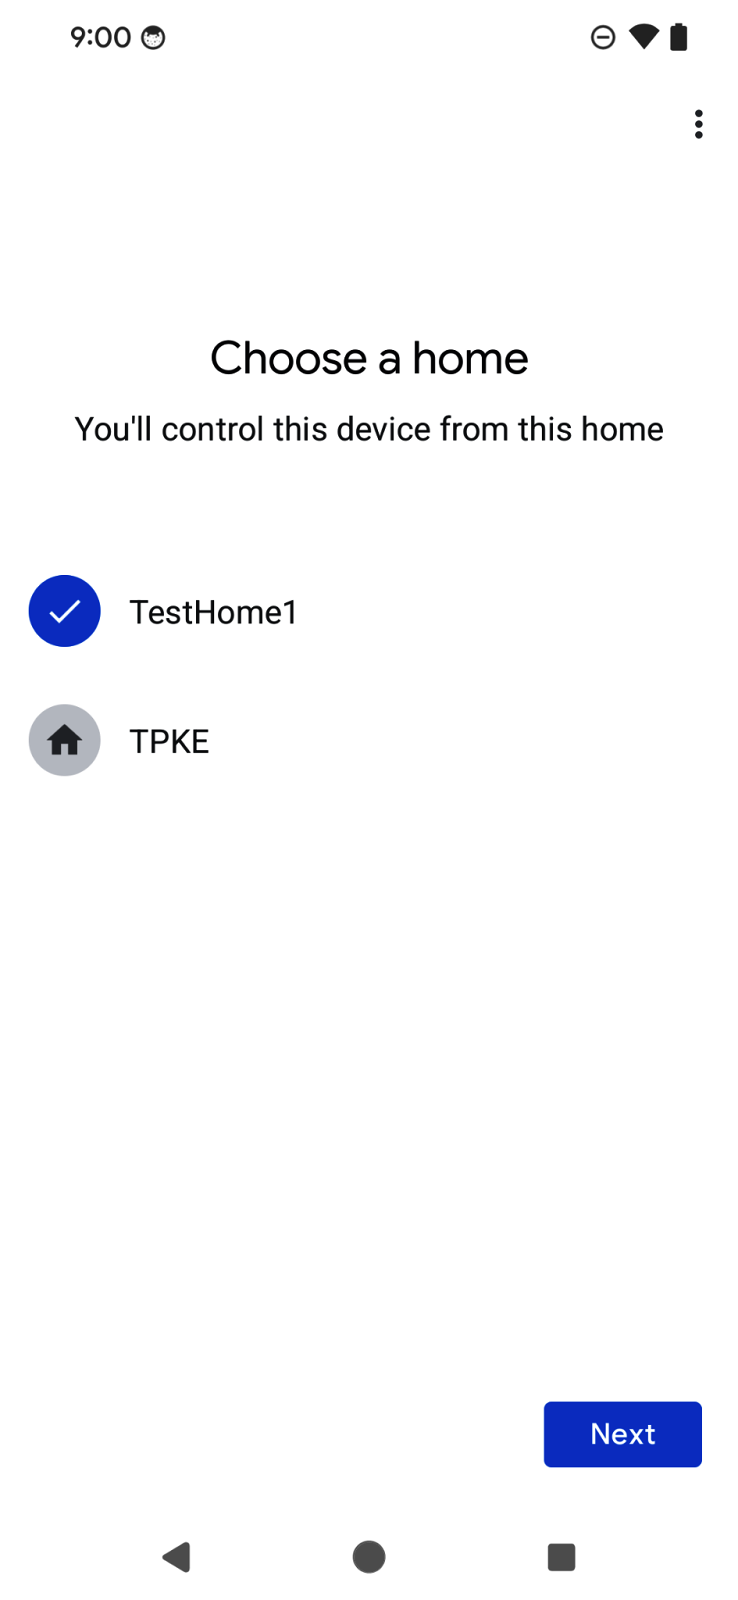
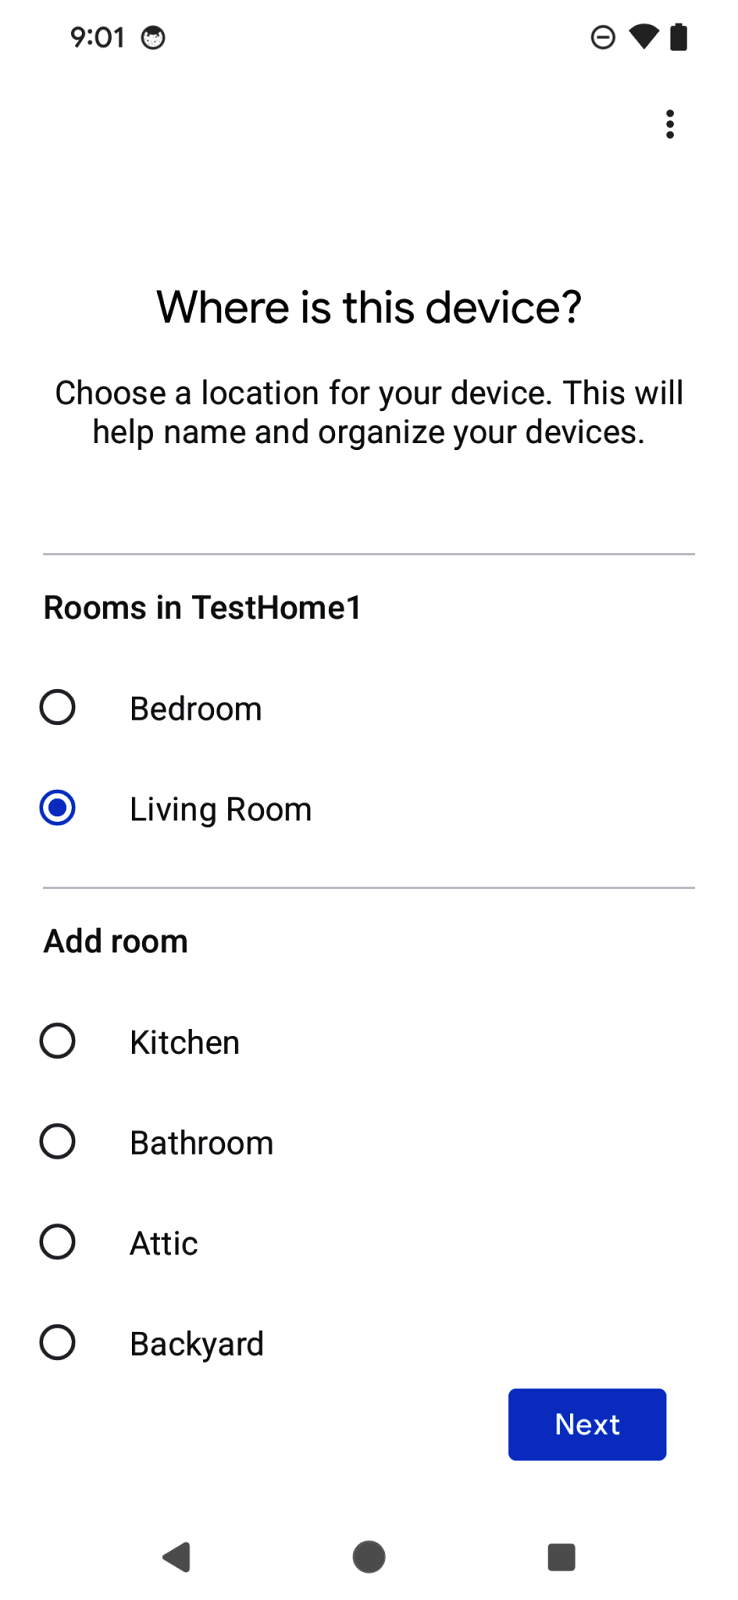
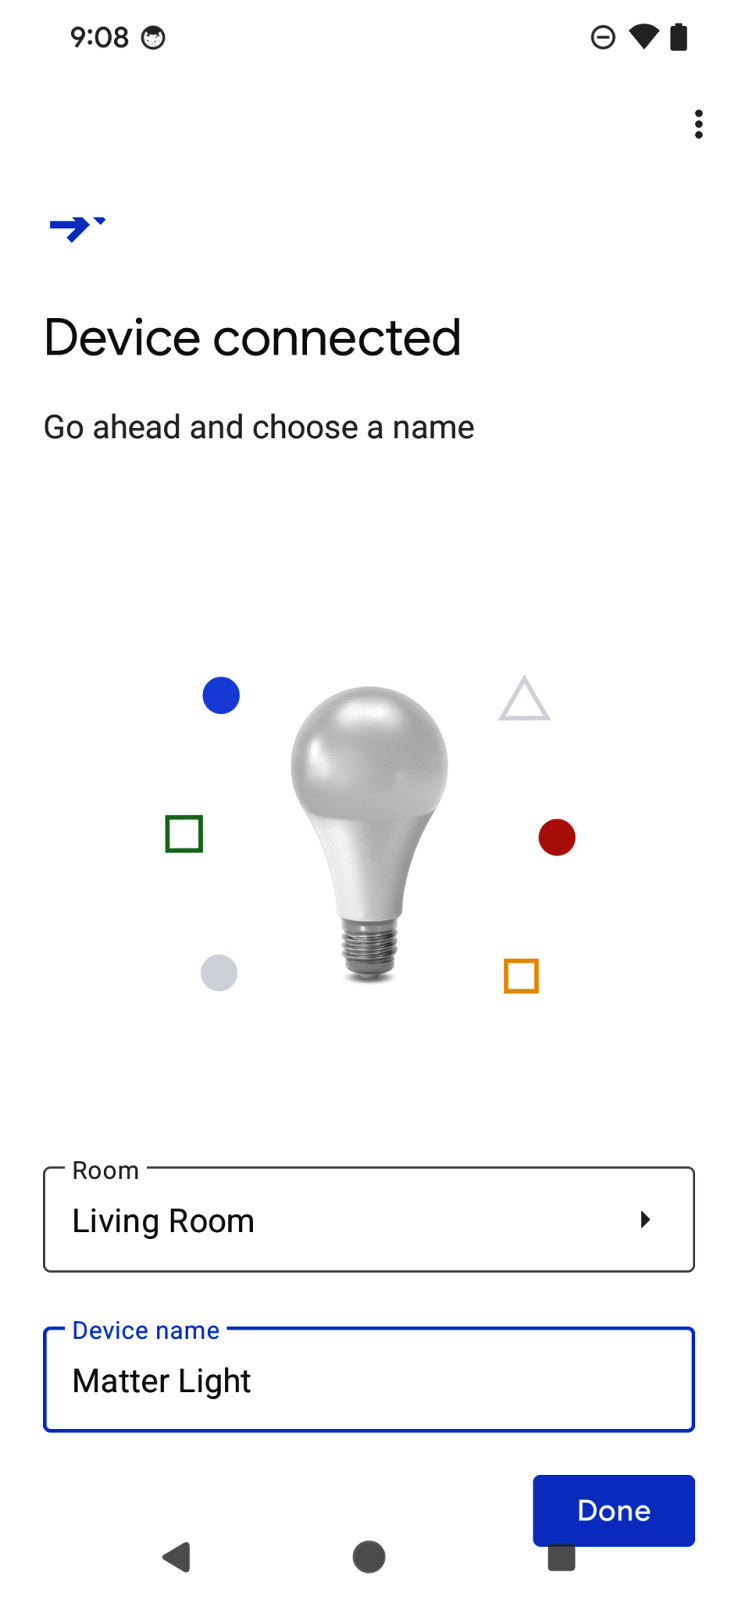
使用者會看到 QR code 掃描器,可用於掃描 Matter 裝置上的 QR code。接著,流程會顯示使用者協議、裝置探索和委派,以及裝置命名。流程完成後,焦點會返回應用程式,並在上一節草擬的回呼函式中傳遞委派結果。
使用 Commissioning API 的好處之一,就是 UX 流程由 SDK 處理,因此開發人員可以非常快速地開始運作。此外,使用者在不同應用程式中新增裝置時,也能享有一致的體驗。
如要進一步瞭解 Commissioning API,請參閱「Android 上的 Commissioning API」。
8. 恭喜!
恭喜!您已使用 Google Home API 成功建立 Android 應用程式。在本程式碼研究室中,您已探索 Permissions、Devices、Structures 和 Commissioning API。在下一個程式碼研究室「使用 Android 上的 Home API 建立進階自動化動作」中,我們將探討 Automation 和 Discovery API,並完成應用程式。
希望您能盡情發揮創意,建構可控制 Google Home 生態系統裝置的應用程式。
後續步驟
- 如要繼續學習如何在 Android 上使用 Home API,請完成本系列第二個程式碼研究室:使用 Android 上的 Home API 建立進階自動化動作。
- 如有任何建議或要回報問題,請透過 Issue Tracker 的智慧住宅支援主題與我們聯絡。