The Android sample app showcases the basic capabilities of device access and control using the Home APIs for the device types it supports.
Once account authorization is complete and a structure has been selected, the sample app loads all local devices found in that structure. If the device is in a room, it will be listed under that room. The sample app supports these device types:
- Color Temperature Light (on and off, brightness)
- Contact Sensor (boolean state)
- Dimmable Light (on and off, brightness)
- Extended Color Light (on and off, brightness)
- Generic Switch
- Occupancy Sensor (occupancy sensing)
- On/Off Light (on and off, brightness)
- On/Off Light Switch
- On/Off Plug-in Unit (on and off)
- On/Off Sensor
Actions on existing devices and automations
The sample app consists of two tabs - Devices and Automations. Each tab provides information about the structure and lets you perform tasks.
Devices tab
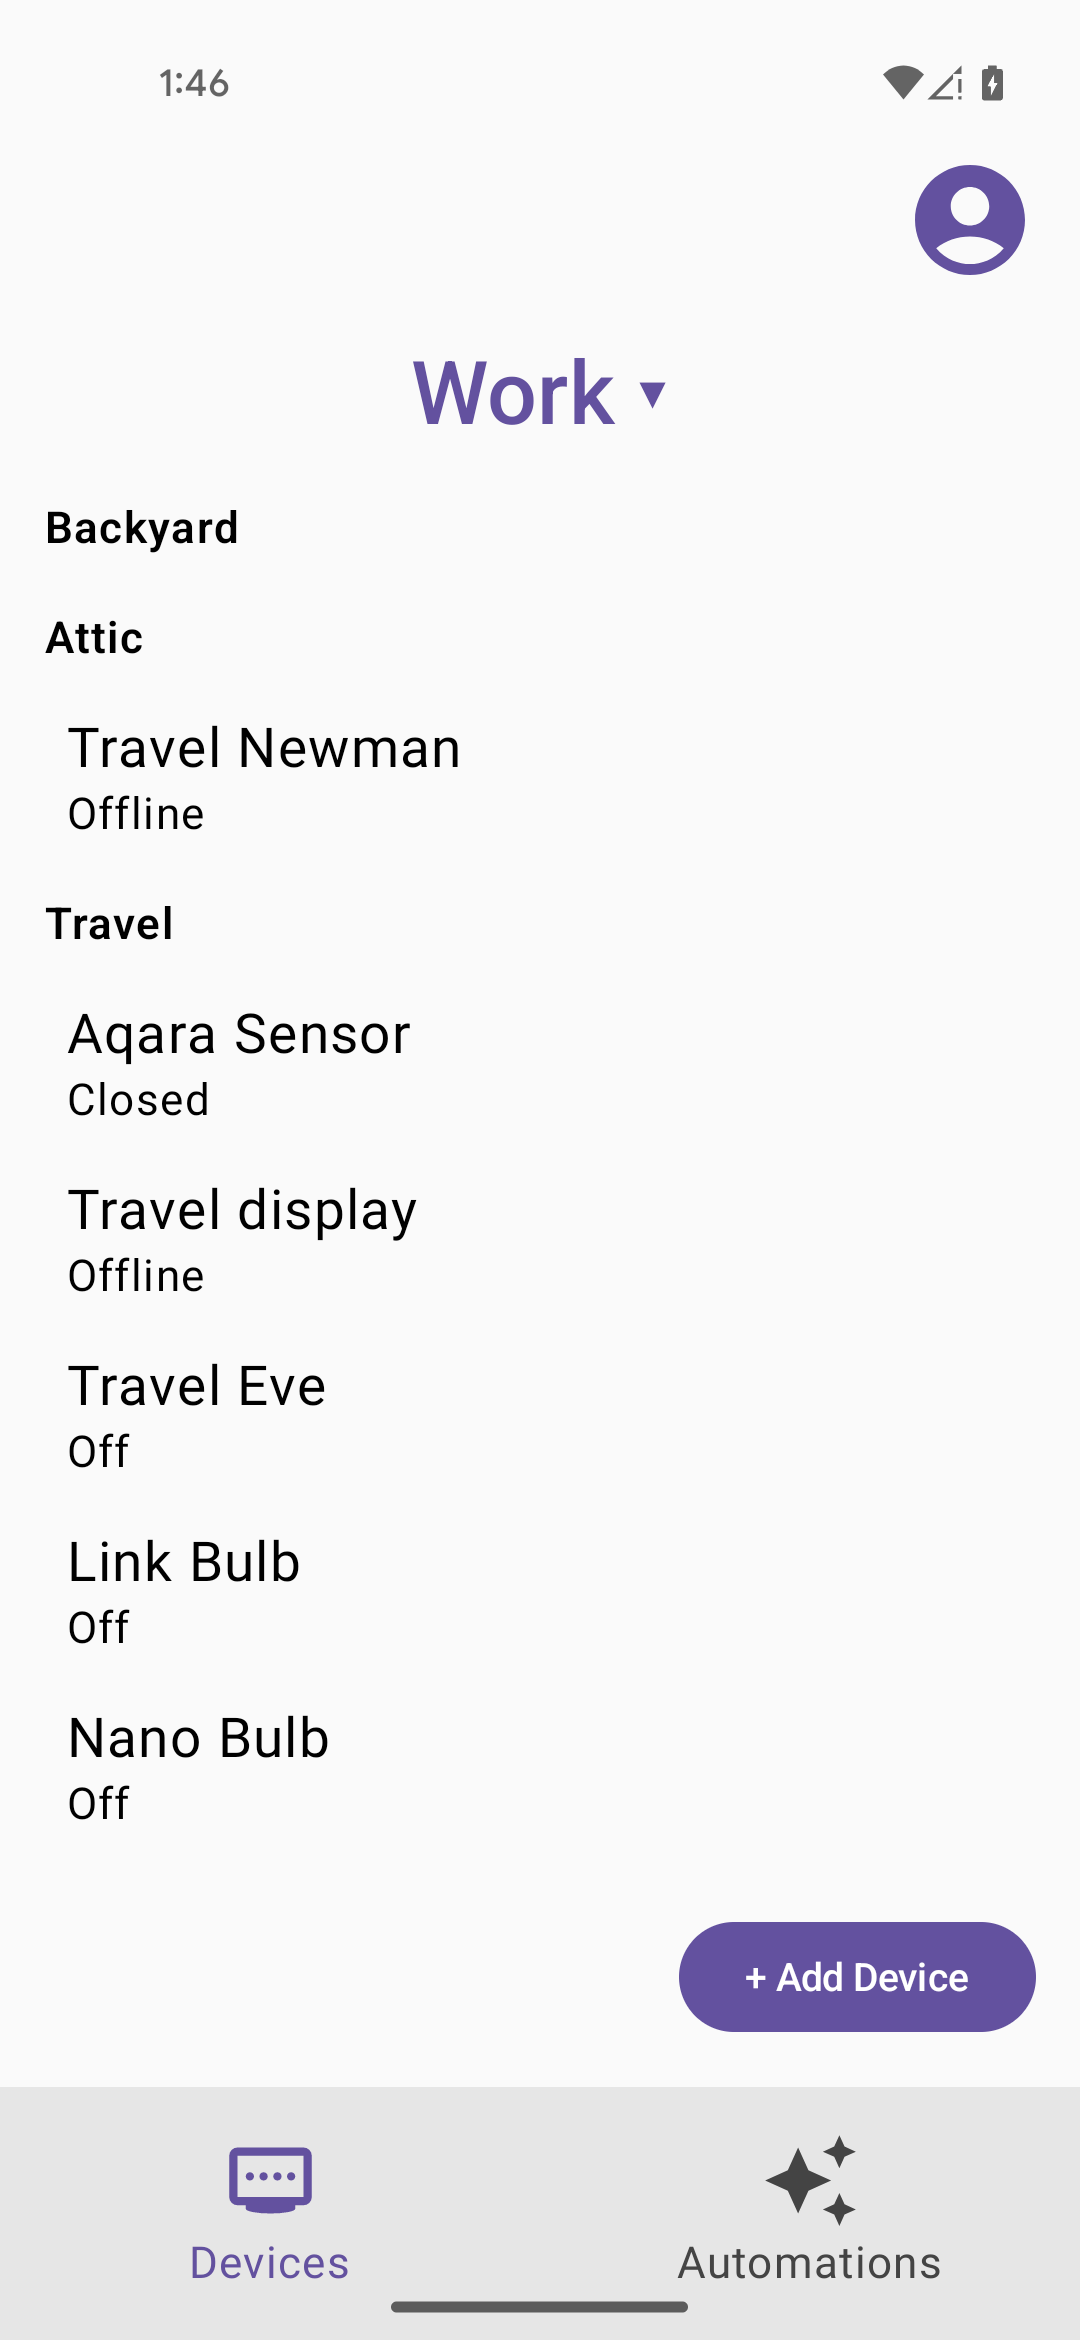
The Devices tab (Figure 1) shows the rooms in the structure (Backyard, Attic, Travel) and the devices for each room, along with the status of each device. To view or edit the traits on a device, tap the device name. This takes you to the control screen for that device (Figure 2).
To add a device to the structure, tap Add Device from the Devices tab (Figure 1), then follow the instructions to add a device with or without using a QR code.

Automations tab
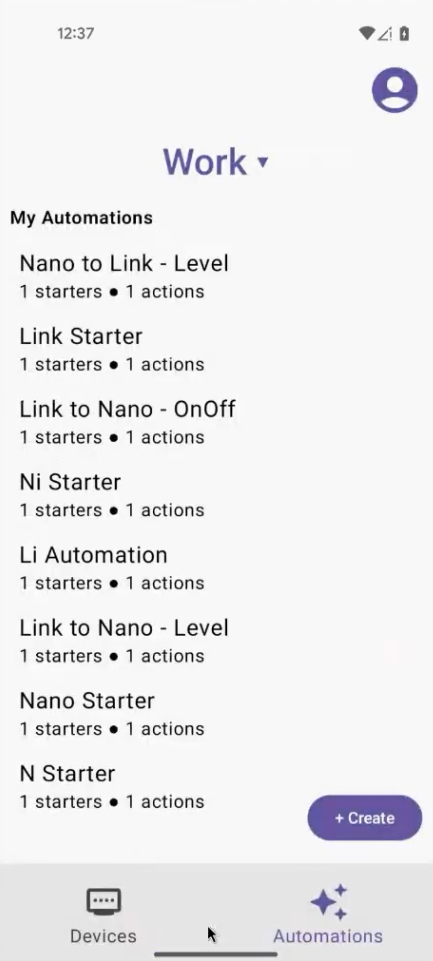
The Automations tab (Figure 3) shows a list of all automations for the structure. Each automation shows its starters and actions. Multiple starters and actions are supported.
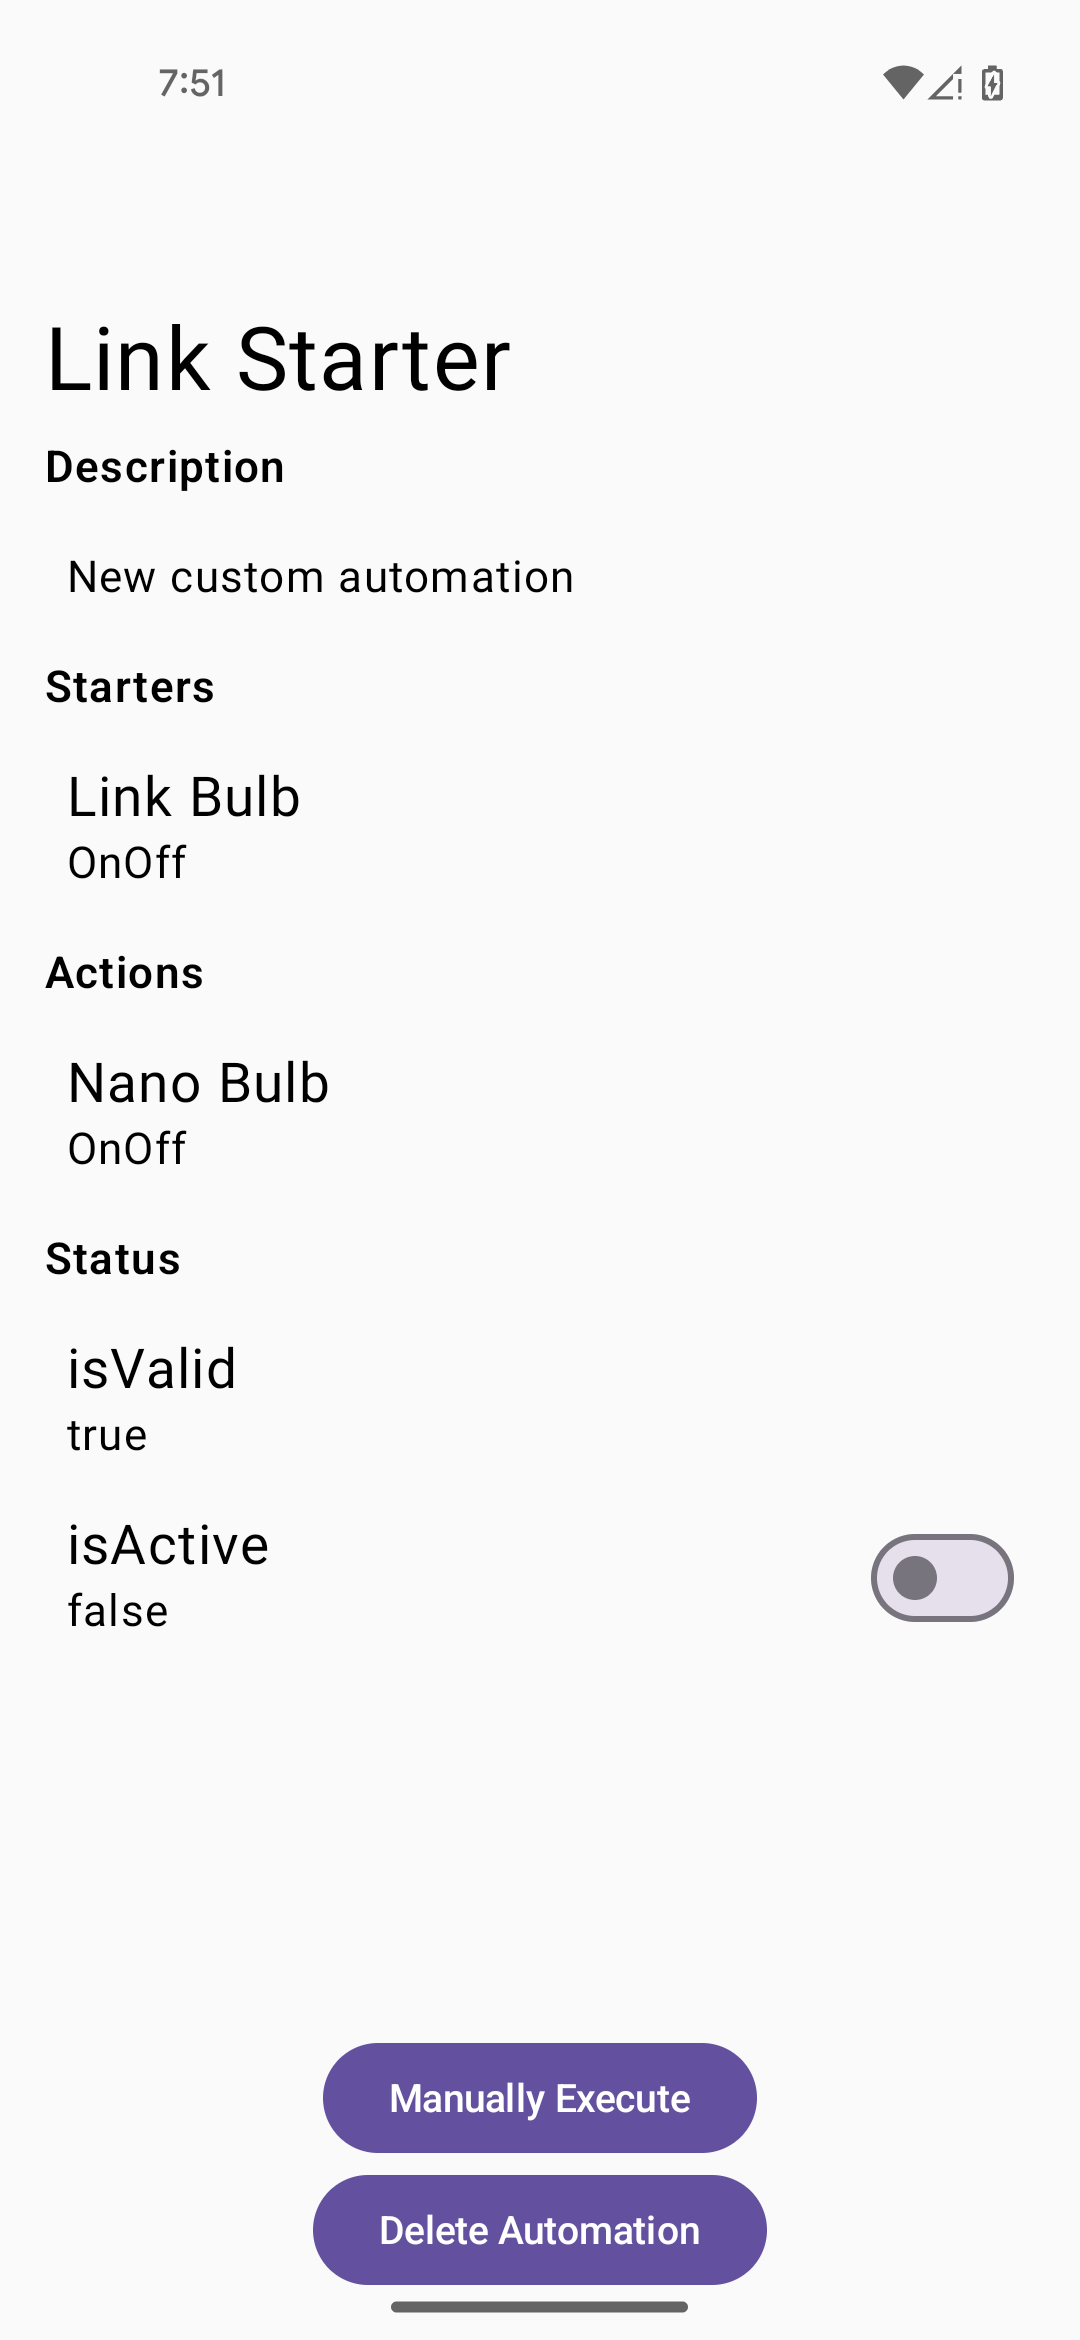
Tap an automation to view its details, as shown in the example in Figure 4. In this detailed view, you can delete the automation or manually execute the automation without the need for a starter, provided that the Manually Execute button is supported for this automation.
Also in the detailed view of an automation (Figure 4), you can toggle
isActive to turn the automation on or off.
The isValid field is set by the SDK and is false if there is an
issue with device or trait support or some other problem.
Create an automation
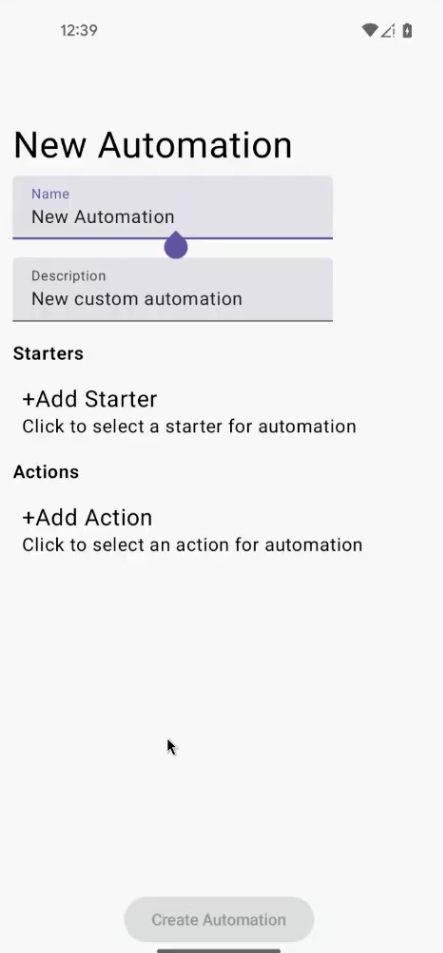
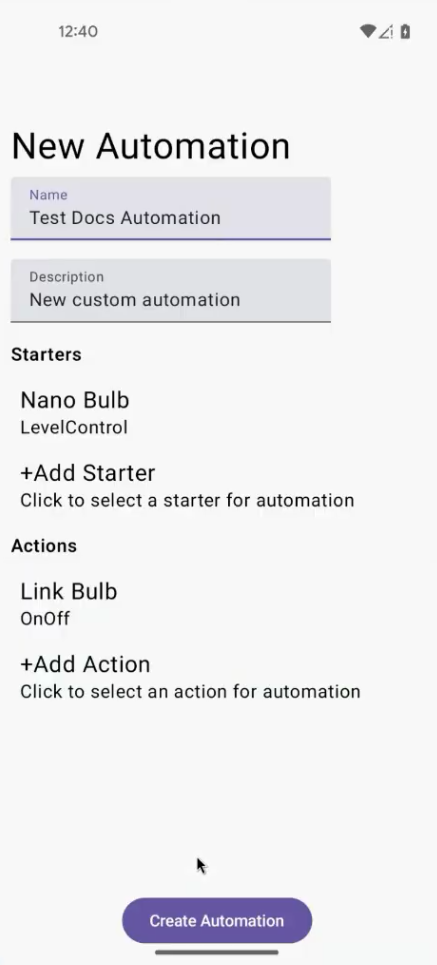
To create a new automation, tap the Create button from the automations list view (Figure 3). The New Automation screen appears (Figure 5).
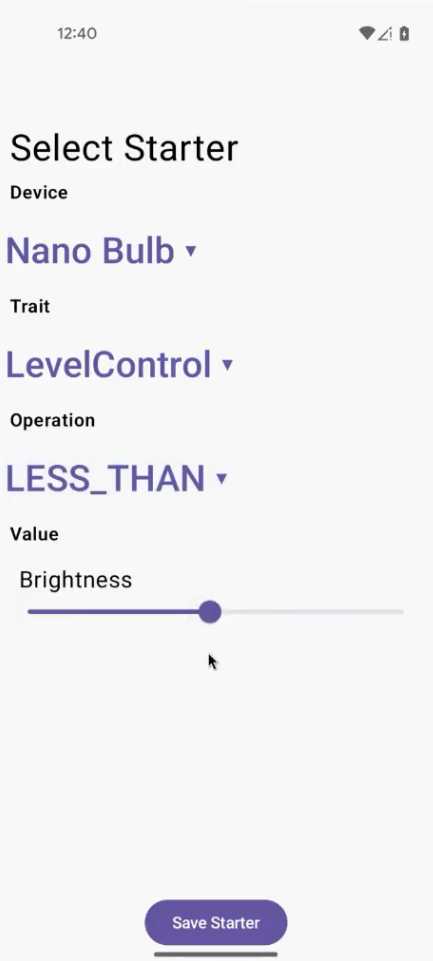
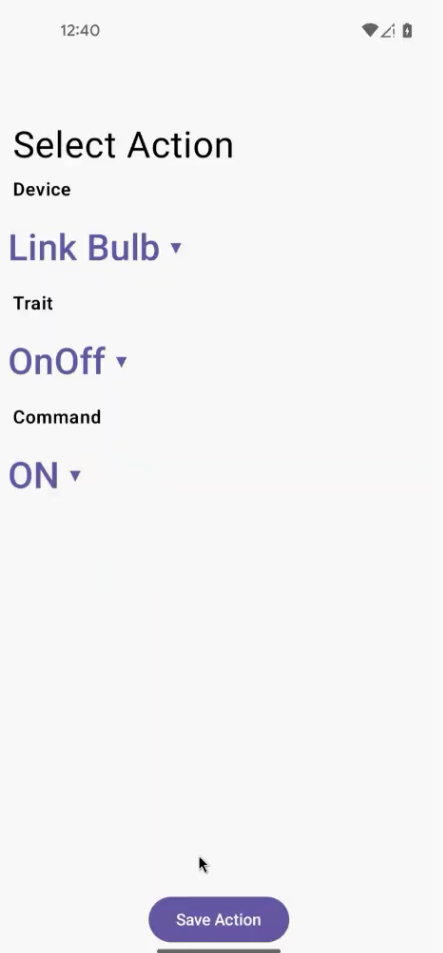
Use the +Add Starter and +Add Action buttons (Figure 5) to add one or more starter and action to your automation. Figures 6 and 7 show examples of selecting a starter and an action, respectively. After you have made your selections, and you save the starter or action, you are then presented with the Update Starter and Remove Starter buttons for the starter (and Update Action and Remove Action for the action). This gives you the opportunity to edit the starter or action, or remove it, before you save the automation itself.
When you are done adding starters and actions, you can return to the New Automation screen and tap Create Automation (Figure 8).
Troubleshooting
The app displays dialog messages for some common events that may occur.
Refer to the adb logs for information about how to resolve
these events.
If you encounter issues using the sample app, see Troubleshooting for Android.
