
The Google Home Developer Model Context Protocol (MCP) server gives AI-powered development tools the ability to search documentation and retrieve real-time, domain-specific information:
- Google Home Developer Center public documentation
- OpenThread
- Matter Specification: Available for version 1.5.1
- Thread Specification: Available for version 1.4.1
In addition, the Home Developer MCP server provides user feedback integration diagnostics for Cloud-to-cloud smart home integrations to improve user experience based on user feedback, whereas the Google Home Vitals dashboard is designed for generic quality monitoring. User feedback integration diagnostics correlate end-user feedback reports and categorize integration issues with diagnostic logs:
- Anomaly distribution: Summarize symptom distribution across user feedback
issues using
query_user_feedback_anomaly_distribution. - Historical trends: Query daily issue counts grouped by symptom over
specific time ranges using
query_user_feedback_symptom_trend. - Issue discovery: Retrieve sample issue summaries and affected devices
using
fetch_user_feedback_sample_issues. - Diagnostic analysis: Inspect detailed execution logs and Home Graph state
histories using
batch_fetch_user_feedback_sample_issue_logs.
An MCP server acts as a proxy between an external service that provides context or data and an AI application (the host). The Home Developer MCP server exposes executable tools that let Large Language Models (LLMs) find precise answers directly from indexed corpuses. To learn more about MCP servers, see What is the MCP and how does it work?.
Prerequisites
To use the Home Developer MCP server, you must have an MCP-compatible AI client or code editor installed. See Choose an authentication path to select the proper authentication method for the content and features you want to access.
Google Antigravity
If you are using Google's AI development environment, install one of the following:
- Antigravity CLI, following the Getting Started with Antigravity CLI guide
- Antigravity 2.0, following the Google Antigravity Documentation
- Antigravity IDE, following the Antigravity IDE Getting Started guide
Third-party AI assistants
You can also integrate the MCP with other AI applications, command line tools, and code editors, such as:
- Claude Code
- Cursor
- GitHub Copilot in VS Code
User feedback integration diagnostics requirements
Through the Home Developer MCP server, you can access user feedback integration diagnostics. To retrieve this data, you must meet the following requirements:
- You must have access to a
Google Cloud project
with the Home Developers API (
homedevelopers.googleapis.com) enabled. - You must authenticate your MCP client using OAuth 2.0 or Application Default Credentials (ADC) signed in with your authorized Google Account for viewing the diagnostics for your integration projects.
Choose an authentication path
The Home Developer MCP server supports three authentication modes depending on whether you need quick trial access, dedicated production quota for public documentation, or access to partner insights and gated Partner Program documentation.
| Authentication mode | Quota tier | Accessible resources | Recommended use case |
|---|---|---|---|
| Unauthenticated | Shared public quota | Public documentation | Quick connection testing without a Google Cloud project |
| API key | Dedicated project quota | Public documentation | Sustained development querying public documentation |
| OAuth 2.0 or ADC | Dedicated project quota | Public documentation and user feedback integration diagnostics | Required for user feedback integration diagnostics |
Unauthenticated connection testing
This method does not require an API key, OAuth client, or Google Cloud project. It uses a shared public quota and returns publicly available documentation only, making it the fastest way to trial the server and test basic tool calls.
API key authentication for public documentation
To prevent rate-limiting under shared public quotas when querying public documentation, you can authenticate with a Google Cloud API key.
- In the Google Cloud console, enable the API on your project:
- Open the Home Developers API page in the Google APIs library.
- Check that you have the correct project selected in which you intend to use the API.
- Click Enable.
Create an API Key:
- Go to the Credentials page.
- Click Create credentials, and then select API key from the menu.
- In the Name field, provide a name for the key.
Click the Select API restrictions drop-down, and then type Home Developers API. Click the result, and then click OK.
Click Create.
After the key is created, click Show key to view it, and copy it for the next step.
OAuth registration and setup
When you authenticate with OAuth 2.0 or Application Default Credentials (ADC), the Home Developer MCP server resolves your Google Account identity from the OAuth bearer token and verifies your partner integration permissions and Google Group memberships in real time. This authentication mode unlocks:
- User feedback integration diagnostics, enabling partners to analyze symptom anomalies, inspect historical trends, and retrieve diagnostic logs for their Cloud-to-cloud integrations.
All OAuth requests to the Home Developer MCP server require two configurations:
- The Home Developers API (
homedevelopers.googleapis.com) must be enabled on your Google Cloud project. - The OAuth credential must be authorized by your Google Account and include the
https://www.googleapis.com/auth/cloud-platformscope (which MCP OAuth clients andgcloud auth application-default loginrequest by default).
Complete the following steps to enable the API and set up either an OAuth 2.0 client or Application Default Credentials (ADC):
Enable the Home Developers API on your Google Cloud project:
- Open the Home Developers API page in the Google Cloud console, select your Google Cloud project, and click Enable.
Alternatively, enable the service using the Google Cloud CLI (
gcloud):gcloud services enable homedevelopers.googleapis.com \ --project=YOUR_PROJECT_ID
Choose and configure your OAuth credential method:
OAuth 2.0 client
Use an OAuth 2.0 client ID and client secret when connecting AI clients that manage the OAuth 2.0 flow directly (such as Google Antigravity, Claude, or Cursor).
- Configure the OAuth consent screen in Google Auth Platform:
- Open the Google Auth Platform Overview page (or APIs & Services > OAuth consent screen) in the Google Cloud console.
- If your project doesn't have an OAuth brand configured, click
Get started:
- Under App Information, enter an App name (for example,
Home Developer MCP) and select your User support email, then click Next. - Under Audience, select External (or select Internal if all users belong to your Google Workspace organization), then click Next.
- Under Contact Information, enter your contact email address, click Next, accept the terms, and click Create.
- Under App Information, enter an App name (for example,
- Authorize your Google Account on the consent screen:
- Open the Audience page under Google Auth Platform.
- If Publishing status is set to Testing, click Add users under Test users, enter the exact Google Account email address you use for your Google Home integration or Developer Center sign-in, and click Save. Alternatively, click Publish app under Publishing status.
- Register an OAuth 2.0 client ID:
- Open the Clients page under Google Auth Platform (or APIs & Services > Credentials).
- Click Create client (or + Create credentials > OAuth client ID).
- Select the Application type that matches your AI environment:
- Select Desktop app for local desktop IDEs and CLI agents (such
as Cursor, Claude Code, or VS Code) that listen on a local loopback
redirect URI (
http://localhostorhttp://127.0.0.1). - Select Web application for cloud or web-callback clients, and
under Authorized redirect URIs, click Add URI to register
your client's callback URL:
- Google Antigravity:
https://antigravity.google/oauth-callback - Claude:
https://claude.ai/api/mcp/auth_callbackandhttps://claude.com/api/mcp/auth_callback
- Google Antigravity:
- Select Desktop app for local desktop IDEs and CLI agents (such
as Cursor, Claude Code, or VS Code) that listen on a local loopback
redirect URI (
- Enter a Name (for example,
Home Developer MCP Client) and click Create. - Copy the Client ID and Client secret shown in the dialog (or click Download JSON) to use in the next section. You don't need to configure OAuth scopes in the Google Cloud console.
ADC
Use Application Default Credentials (ADC) if you are connecting from Google Antigravity using
google_credentials, or if your MCP client passes anAuthorization: Bearerheader generated by thegcloudCLI.- Install the
Google Cloud CLI (
gcloud). - Run the following command to authenticate with your authorized Google Account and configure your quota project:
gcloud auth application-default login \ --project=YOUR_PROJECT_ID- When your browser opens, sign in with your authorized Google Account and click Allow to grant the requested permissions.
- If your client requires a raw bearer token in the
AuthorizationHTTP header rather than reading local ADC credentials directly, print an access token with the following command and pass your project ID in theX-Goog-User-Projectheader:
gcloud auth application-default print-access-token
Configure your client
Enter your credentials in the following fields to populate the configuration templates for your preferred AI development environment:
You can locate these values in the Google Cloud console:
- Find your Google Cloud Project ID in the project selector drop-down at the top of the Google Cloud console (in the ID column), or on the Cloud Hub overview page under Project ID.
- Find your OAuth Client ID and OAuth Client Secret on the Clients page under Google Auth Platform.
- Find your API key on the Credentials page under APIs & Services.
Enter your Google Cloud Project ID: YOUR_PROJECT_ID
Enter your OAuth Client ID: YOUR_CLIENT_ID
Enter your OAuth Client Secret: YOUR_CLIENT_SECRET
Enter your API key: YOUR_API_KEY
Antigravity
Open your local ~/.gemini/config/mcp_config.json configuration file (or
.agents/mcp_config.json in your workspace) and add the HomeDevelopers
entry under the mcpServers object.
Regardless of whether you use the Antigravity CLI, Antigravity 2.0, or
Antigravity IDE, all three tools share ~/.gemini/config/mcp_config.json.
ADC
After running gcloud auth application-default login, configure Antigravity
to use google_credentials and pass your Google Cloud project in
X-Goog-User-Project:
{
  "mcpServers": {
    "HomeDevelopers": {
      "httpUrl": "https://homedevelopers.googleapis.com/mcp",
      "authProviderType": "google_credentials",
      "oauth": {
        "scopes": [
          "https://www.googleapis.com/auth/cloud-platform"
        ]
      },
      "headers": {
        "X-Goog-User-Project": "YOUR_PROJECT_ID"
      }
    }
  }
}
OAuth 2.0 client
If you registered a Web or Desktop OAuth 2.0 client ID in your Google Cloud
project, configure the oauth block:
{
  "mcpServers": {
    "HomeDevelopers": {
      "serverUrl": "https://homedevelopers.googleapis.com/mcp",
      "oauth": {
        "clientId": "YOUR_CLIENT_ID",
        "clientSecret": "YOUR_CLIENT_SECRET"
      }
    }
  }
}
API key
{
  "mcpServers": {
    "HomeDevelopers": {
      "serverUrl": "https://homedevelopers.googleapis.com/mcp",
      "headers": {
        "X-Goog-Api-Key": "YOUR_API_KEY"
      }
    }
  }
}
Unauthenticated
{
  "mcpServers": {
    "HomeDevelopers": {
      "serverUrl": "https://homedevelopers.googleapis.com/mcp"
    }
  }
}
Claude
You can connect both Claude (web and desktop connectors) and Claude Code to the Home Developer MCP server.
OAuth 2.0 client (Claude Connectors)
- Open Claude Connectors.
- Click + and select Add custom connector.
- Enter
https://homedevelopers.googleapis.com/mcpas the remote MCP server URL. - Open Advanced settings and enter your Web OAuth Client ID
(
YOUR_CLIENT_ID) and Client Secret (YOUR_CLIENT_SECRET). - Click Add and complete the Google OAuth consent flow in your browser using your authorized Google Account.
ADC bearer token (Claude Code)
After authenticating with gcloud auth application-default login, add the
server in your terminal with a bearer token and X-Goog-User-Project header:
claude mcp add HomeDevelopers \
  --transport http https://homedevelopers.googleapis.com/mcp \
  --header "Authorization: Bearer $(gcloud auth application-default print-access-token)" \
  --header "X-Goog-User-Project: YOUR_PROJECT_ID"
API key (Claude Code)
claude mcp add HomeDevelopers \
  --transport http https://homedevelopers.googleapis.com/mcp \
  --header "X-Goog-Api-Key: YOUR_API_KEY"
Unauthenticated (Claude Code)
claude mcp add HomeDevelopers \
  --transport http https://homedevelopers.googleapis.com/mcp
Cursor
To configure
Cursor,
edit either .cursor/mcp.json (for a specific project) or
~/.cursor/mcp.json (for all projects).
OAuth 2.0 client
{
  "mcpServers": {
    "HomeDevelopers": {
      "url": "https://homedevelopers.googleapis.com/mcp",
      "auth": {
        "clientId": "YOUR_CLIENT_ID",
        "clientSecret": "YOUR_CLIENT_SECRET"
      }
    }
  }
}
ADC bearer token
Replace YOUR_ACCESS_TOKEN with the output of
gcloud auth application-default print-access-token:
{
  "mcpServers": {
    "HomeDevelopers": {
      "url": "https://homedevelopers.googleapis.com/mcp",
      "headers": {
        "Authorization": "Bearer YOUR_ACCESS_TOKEN",
        "X-Goog-User-Project": "YOUR_PROJECT_ID"
      }
    }
  }
}
API key
{
  "mcpServers": {
    "HomeDevelopers": {
      "url": "https://homedevelopers.googleapis.com/mcp",
      "headers": {
        "X-Goog-Api-Key": "YOUR_API_KEY"
      }
    }
  }
}
Unauthenticated
{
  "mcpServers": {
    "HomeDevelopers": {
      "url": "https://homedevelopers.googleapis.com/mcp"
    }
  }
}
GitHub Copilot
To configure GitHub Copilot in VS Code for a single project, edit the
.vscode/mcp.json file in your workspace. Alternatively, to make the server
globally available, click Open Settings (JSON) in your
VS Code user settings
and add the JSON under an "mcp" root key.
ADC bearer token
Replace YOUR_ACCESS_TOKEN with the output of
gcloud auth application-default print-access-token:
{
  "servers": {
    "HomeDevelopers": {
      "url": "https://homedevelopers.googleapis.com/mcp",
      "headers": {
        "Authorization": "Bearer YOUR_ACCESS_TOKEN",
        "X-Goog-User-Project": "YOUR_PROJECT_ID"
      }
    }
  }
}
API key
{
  "servers": {
    "HomeDevelopers": {
      "url": "https://homedevelopers.googleapis.com/mcp",
      "headers": {
        "X-Goog-Api-Key": "YOUR_API_KEY"
      }
    }
  }
}
Unauthenticated
{
  "servers": {
    "HomeDevelopers": {
      "url": "https://homedevelopers.googleapis.com/mcp"
    }
  }
}
Verify installation and execution
Once your tool configuration is updated, verify the connection by prompting your agent workspace.
Verification example in Antigravity CLI
Launch your interactive workspace session:
agy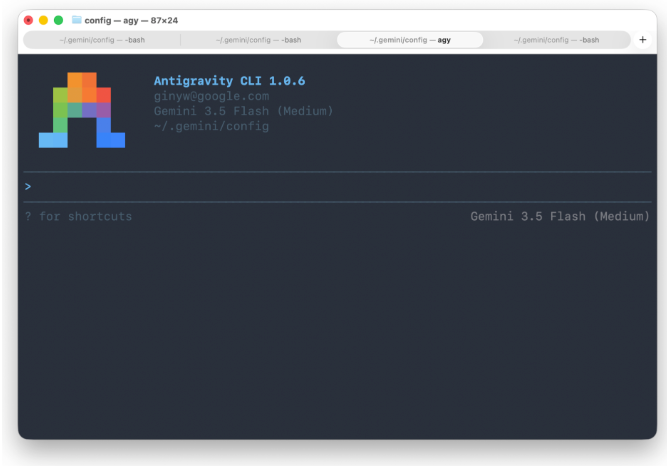
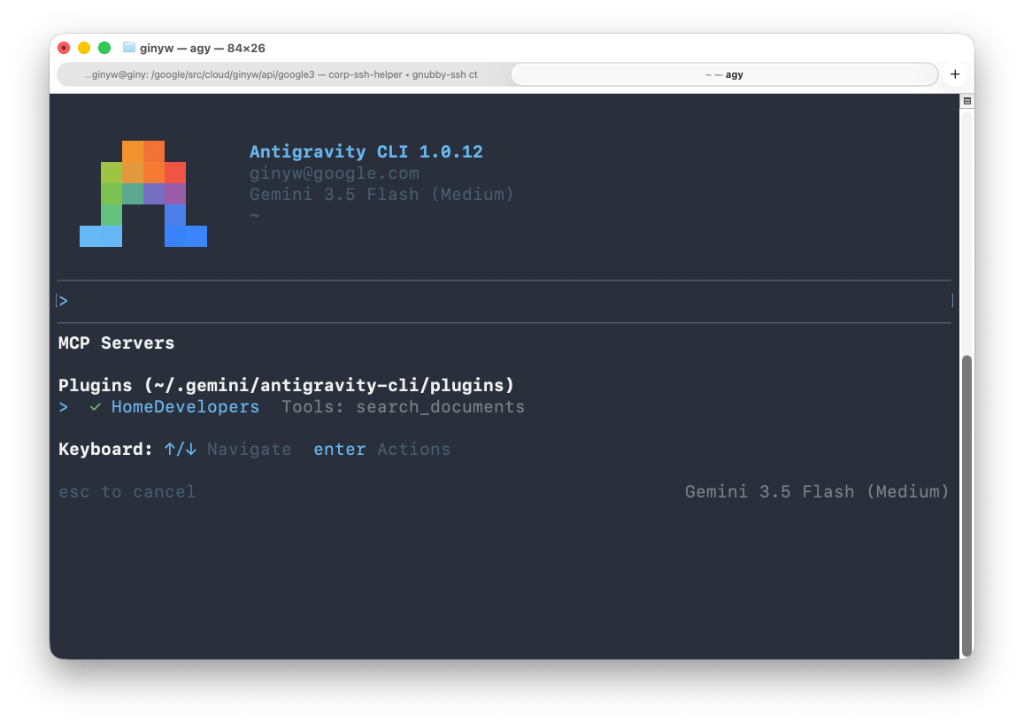
Execute the discovery checklist command to inspect active MCP servers:
/mcpConfirm that HomeDevelopers (or your chosen server name key) appears in the active connections list.
Ask a Google Home development question, for example:
How do I create an Automation using Home APIs?When Antigravity requests permission to call the Home Developer MCP server's
search_documentstool, select any of the Allow options to continue.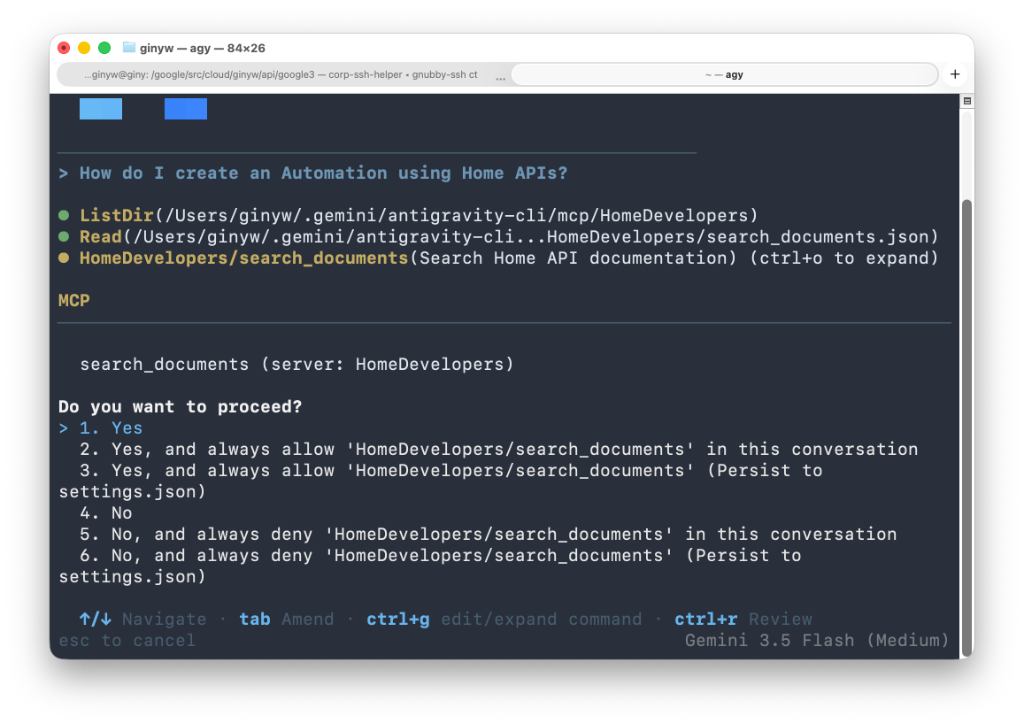
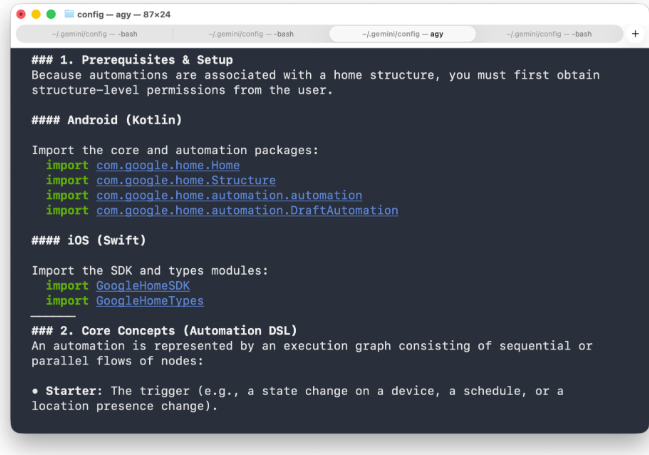
After calling the tool, Antigravity answers your query with a grounded response from the documentation.
Video tutorial
Watch the video for a step-by-step guide to installing the Home Developer MCP.
User feedback integration diagnostics
For Cloud-to-cloud smart home integrations, the Home Developer MCP server provides user feedback integration diagnostics. It correlates end-user feedback reports with Cloud-to-cloud logs.
The server provides four specialized diagnostic tools:
query_user_feedback_anomaly_distribution: Summarizes the distribution of symptom types across user feedback sample issues for an integration.query_user_feedback_symptom_trend: Retrieves daily trend counts grouped by symptom over a specified time window.fetch_user_feedback_sample_issues: Retrieves sample issue summaries and affected device records without verbose logs.batch_fetch_user_feedback_sample_issue_logs: Fetches detailed Cloud-to-cloud execution logs and Home Graph state histories for specific sample issue IDs.
These tools identify your integration using an agentId, which is your
Google Cloud project ID (the same definition in action.devices.SYNC).
Diagnostic investigation workflow example
AI assistants connected to the Home Developer MCP server can orchestrate an end-to-end troubleshooting workflow:
Identify top integration pain points: Ask your AI assistant to check the symptom anomaly distribution for your integration over a specific date range. For example:
Check the user feedback anomaly distribution for agent YOUR_AGENT_ID
between 2026-09-01 and 2026-09-20.
The assistant calls
query_user_feedback_anomaly_distributionto reveal which symptom type accounts for the highest share of user complaints.Evaluate historical trends: Inspect whether a symptom represents an acute regression or an ongoing pattern by querying daily counts:
Show the daily trend for agent YOUR_AGENT_ID
over the last 14 days.
The assistant calls
query_user_feedback_symptom_trendto plot or summarize daily counts and detect spikes following recent updates.Inspect affected sample issues: Fetch sample issue summaries to identify affected devices:
Fetch recent sample issues for agent YOUR_AGENT_ID
over the last 14 days.
The assistant calls
fetch_user_feedback_sample_issuesto retrieve sample records.Batch fetch diagnostic logs: Retrieve complete logs for the identified sample:
Retrieve the diagnostic logs for sample IDs SAMPLE_ID.The assistant calls
batch_fetch_user_feedback_sample_issue_logsto further inspect the logs for samples listed in the previous step.
Test with direct HTTP curl requests
For pipeline testing outside of an AI client environment, you can send standard
JSON-RPC 2.0 payloads directly to https://homedevelopers.googleapis.com/mcp
using curl.
Discover active system tools
Use the tools/list method to inspect the tools exposed by the server:
curl --location "https://homedevelopers.googleapis.com/mcp" \
  --header 'Content-Type: application/json' \
  --header 'Accept: application/json, text/event-stream' \
  --data '{
      "jsonrpc": "2.0",
      "method": "tools/list",
      "id": 1
  }'
Execute a functional search query
Select a tab to test search_documents using OAuth, an API key, or an
unauthenticated request:
OAuth 2.0
VALID_TOKEN=$(gcloud auth application-default print-access-token)
curl --location "https://homedevelopers.googleapis.com/mcp" \
  --header 'Content-Type: application/json' \
  --header 'Accept: application/json, text/event-stream' \
  --header "Authorization: Bearer ${VALID_TOKEN}" \
  --header "X-Goog-User-Project: YOUR_PROJECT_ID" \
  --data '{
      "jsonrpc": "2.0",
      "method": "tools/call",
      "id": 2,
      "params": {
          "name": "search_documents",
          "arguments": {
              "query": "How to create an automation?"
          }
      }
  }'
API key
curl --location "https://homedevelopers.googleapis.com/mcp" \
  --header 'Content-Type: application/json' \
  --header 'Accept: application/json, text/event-stream' \
  --header "X-Goog-Api-Key: YOUR_API_KEY" \
  --data '{
      "jsonrpc": "2.0",
      "method": "tools/call",
      "id": 2,
      "params": {
          "name": "search_documents",
          "arguments": {
              "query": "How to create an automation?"
          }
      }
  }'
Unauthenticated
curl --location "https://homedevelopers.googleapis.com/mcp" \
  --header 'Content-Type: application/json' \
  --header 'Accept: application/json, text/event-stream' \
  --data '{
      "jsonrpc": "2.0",
      "method": "tools/call",
      "id": 2,
      "params": {
          "name": "search_documents",
          "arguments": {
              "query": "How to create an automation?"
          }
      }
  }'
Query user feedback integration diagnostic tools
To test user feedback integration diagnostic tools directly with curl with an
OAuth request:
Anomaly distribution
VALID_TOKEN=$(gcloud auth application-default print-access-token)
curl --location "https://homedevelopers.googleapis.com/mcp" \
--header 'Content-Type: application/json' \
--header 'Accept: application/json, text/event-stream' \
--header "Authorization: Bearer ${VALID_TOKEN}" \
--header "X-Goog-User-Project: YOUR_PROJECT_ID" \
--data '{
    "jsonrpc": "2.0",
    "method": "tools/call",
    "id": 3,
    "params": {
        "name": "query_user_feedback_anomaly_distribution",
        "arguments": {
            "agentId": "YOUR_AGENT_ID",
            "firstDate": "2026-09-01",
            "lastDate": "2026-09-20"
        }
    }
}'
Symptom trend
VALID_TOKEN=$(gcloud auth application-default print-access-token)
curl --location "https://homedevelopers.googleapis.com/mcp" \
--header 'Content-Type: application/json' \
--header 'Accept: application/json, text/event-stream' \
--header "Authorization: Bearer ${VALID_TOKEN}" \
--header "X-Goog-User-Project: YOUR_PROJECT_ID" \
--data '{
    "jsonrpc": "2.0",
    "method": "tools/call",
    "id": 4,
    "params": {
        "name": "query_user_feedback_symptom_trend",
        "arguments": {
            "agentId": "YOUR_AGENT_ID",
            "firstDate": "2026-09-01",
            "lastDate": "2026-09-20"
        }
    }
}'
Fetch sample issues
VALID_TOKEN=$(gcloud auth application-default print-access-token)
curl --location "https://homedevelopers.googleapis.com/mcp" \
--header 'Content-Type: application/json' \
--header 'Accept: application/json, text/event-stream' \
--header "Authorization: Bearer ${VALID_TOKEN}" \
--header "X-Goog-User-Project: YOUR_PROJECT_ID" \
--data '{
    "jsonrpc": "2.0",
    "method": "tools/call",
    "id": 5,
    "params": {
        "name": "fetch_user_feedback_sample_issues",
        "arguments": {
            "agentId": "YOUR_AGENT_ID",
            "firstDate": "2026-09-01",
            "lastDate": "2026-09-20"
        }
    }
}'
Batch fetch issue logs
VALID_TOKEN=$(gcloud auth application-default print-access-token)
curl --location "https://homedevelopers.googleapis.com/mcp" \
--header 'Content-Type: application/json' \
--header 'Accept: application/json, text/event-stream' \
--header "Authorization: Bearer ${VALID_TOKEN}" \
--header "X-Goog-User-Project: YOUR_PROJECT_ID" \
--data '{
    "jsonrpc": "2.0",
    "method": "tools/call",
    "id": 6,
    "params": {
        "name": "batch_fetch_user_feedback_sample_issue_logs",
        "arguments": {
            "sampleIds": ["SAMPLE_ID"]
        }
    }
}'
Send feedback
Use our feedback form to submit your thoughts and suggestions about the Home Developer MCP or how we can improve your experience with the tool.